 |
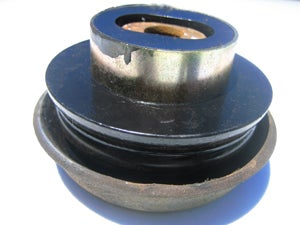
| The new Off-Road Designs body lift and Daystar body mount bushings gave our cab a much more solid feel over our the originals. |
One of the numerous upgrades on project ‘Big Bad Chevy’ is installing all new polyurethane body and transfer case bushings along with new bump-stops and a 1-inch body lift. Daystar, established in 1977, has been a long time manufacturer of polyurethane products. With ‘engineering excellence’ as the foundation of Daystar they make a wide range of products such as body bushing kits, shock dress up kits, spring shackles, shock boots, off road lights, bump stops, and many jeep products (such as tube doors, bumpers, and tire carriers) to name a few. All of Daystars products are available at various distributors throughout the country.
For our project we used Daystar’s body bushing kit. Each bushing is made of high strength polyurethane and is designed to be a direct replacement of the OEM rubber bushings, which had become brittle on the ‘Big Bad Chevy’ and were falling apart. The Daystar bushings provide a much more stable feeling truck cab and give a great ride on and off road. They are designed to maintain proper body and cab alignment for many years to come.
For the body lift we used a complete kit from Off-Road Designs (ORD) in Colorado. Headed by Stephen Watson, ORD was formed to meet the growing needs of the full size vehicle market. Stephen has been designing, testing, and manufacturing extremely heavy-duty products for older, full size trucks and SUV’s for over 10 years. The ORD body lift kit comes with 1-inch thick aluminum spacers and all new grade 8, proper length mounting bolts. In future ‘Big Bad Chevy’ articles, we will discuss in detail the products Stephen and ORD have designed to turn your early model full sized rig into and hardcore off road vehicle!
If you have never replaced body mounts or installed a body lift it may seem like a heavy-duty task but not to worry, it’s very easy and can be done in an hour or two. Daystars body mount kits come with some basic instructions, which provided a lot of helpful information. They discuss safety and the steps needed to easily install the new bushings.
 |
 |
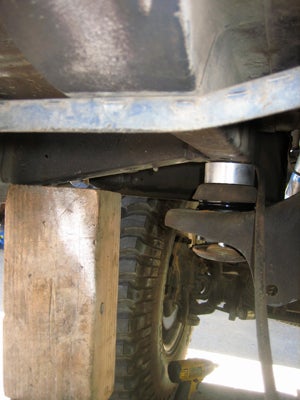
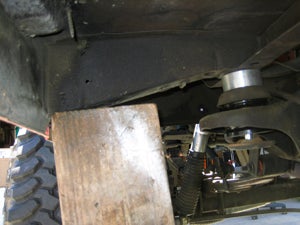
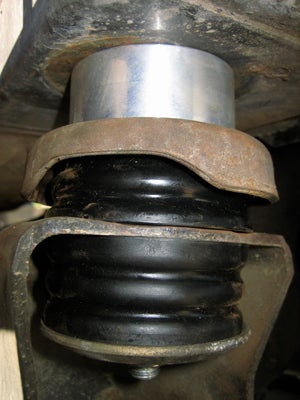
| To gently raise the cab off the frame we used a large wood block and a jack. The Off-Road Designs body lift uses aluminum spacers instead of plastic for strength. | The Daystar body mount bushings uses the original metal sleeves and outers. Ours were in good shape and the new bushings were a big improvement over our original ones. |
The first step, not discussed in the directions, should be to soak each of the side mounting bolts with WD-40. If your truck is old, chances are the body mounting bolts are rusted or frozen in place. The next step is to remove the front bumper and grill to allow access to the nut and bolt for the front two body mounts. The bolt head is housed in part of the radiator support structure and can be accessed with a socket. With the nut removed, our bolt needed some “assistance” to come out. Our trusty hammer was our best friend for these two heavily rusted bolts. Once they were out they went straight into the trash! With the bolts out, we left the OEM body mounts in place for now.
The next step is to loosen the remaining four body mount bolts. After removing some of the interior carpet in search of the nuts on the other end of the bolts, we realized the nut was not accessible and must be welded in place below the floor of the cab. We loosened the remaining four bolts using a socket and wrench rather than an impact gun to prevent possibly breaking the nuts loose. If this happened we would have to drill through the floor to access the nut and we didn’t want that!
 |
 |
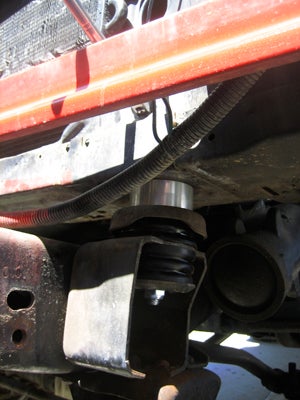
| Located just behind the front bumper, the front body mounts are easy to access with the bumper removed. | The new Daystar body mounts are sandwhiched into place. Included with the Off-Road Designs body lift is Grade 8 hardware for plenty of strength. |
Per the instructions, we did not fully remove all four bolts but rather just one side (two bolts) at a time. If you remove all four, then tilting the cab to one side may cause the cab to slide off the chassis. With one side of the cab raised a few inches, we removed the OEM bushings with the attached metal plates/sleeves from the chassis. You will be removing the plates/sleeves from the OEM rubber bushing and reusing them on the new Daystar polyurethane bushings. Now it’s time to install the new bushing assemblies, the 1-inch ORD spacer, and hand thread the bolts in place. When we had three new bushing and bolts installed on one side we repeated the procedure for the other side and tightened them all down. It is that simple and if working alone it can be done in about an hour!
Our new Daystar body bushings fit perfect and were easy to install. As our project moves along we will be using their transfer case mounts since ours feel like hard jello. We will also put into place their bump stops to keep our new suspension flexible. Stay tuned for more of our Big Bad Chevy project.
www.daystarweb.com
Daystar Products International, Inc.
841 S. 71st Ave.
Phoenix, AZ 85043 Daystar Products International, Inc.
Toll Free (800) 595-7659
Direct (623) 907-0081
www.offroaddesign.com
Offroad Design
484 County Road 113
Carbondale CO 81623
(970) 945-7777
 Your Privacy Choices