What better way to expand
your riding opportunities than to make your dirt bike street legal? Adding a
dual sport kit is the first step in getting your bike licensed for the street.
What's the reason for wanting to make a dirt bike street legal?
Well, here in Southern California many of the scenic trail loops are limited. There are miles of great trails to ride but all too often street legal only roads connect these trails together. In order to put a loop together you have to ride along these street legal roads to get to the next trail. If you don't have a street legal bike your either out of luck or risking a ticket. In addition to just connecting off-road trails a street legal bike can all you the freedom to explore many areas you otherwise wouldn't be able too.
|
Why
Cycle Zone?
|
There are quite a few
aftermarket dual sport kits available from companies like Baja Designs, Electrix
and Trick Dual Sport. In Europe and Australi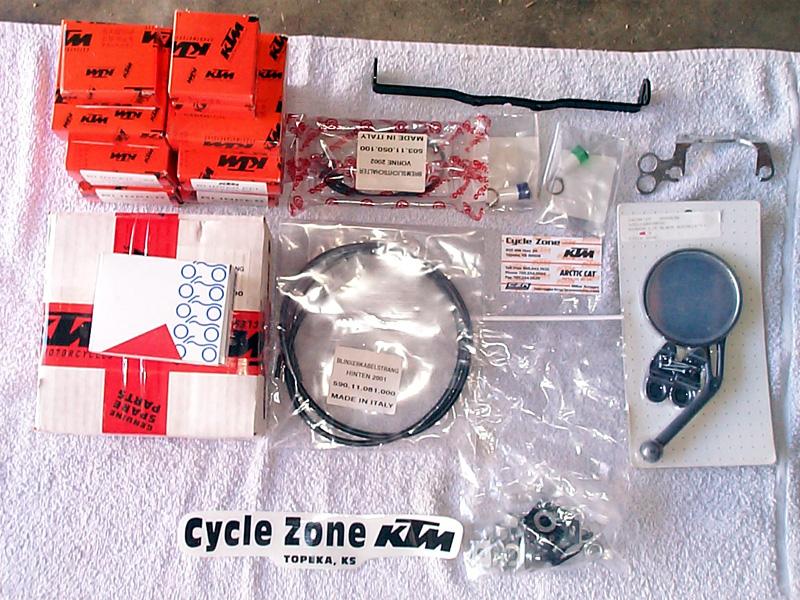 a
however the KTM 525 is already available in a street legal model. In researching
the different options for dual sporting our 525EXC we stumbled upon Mike Kruger
at Cycle Zone KTM in Topeka, Kansas.
a
however the KTM 525 is already available in a street legal model. In researching
the different options for dual sporting our 525EXC we stumbled upon Mike Kruger
at Cycle Zone KTM in Topeka, Kansas.
A call to Mike confirmed
that the factory KTM parts were a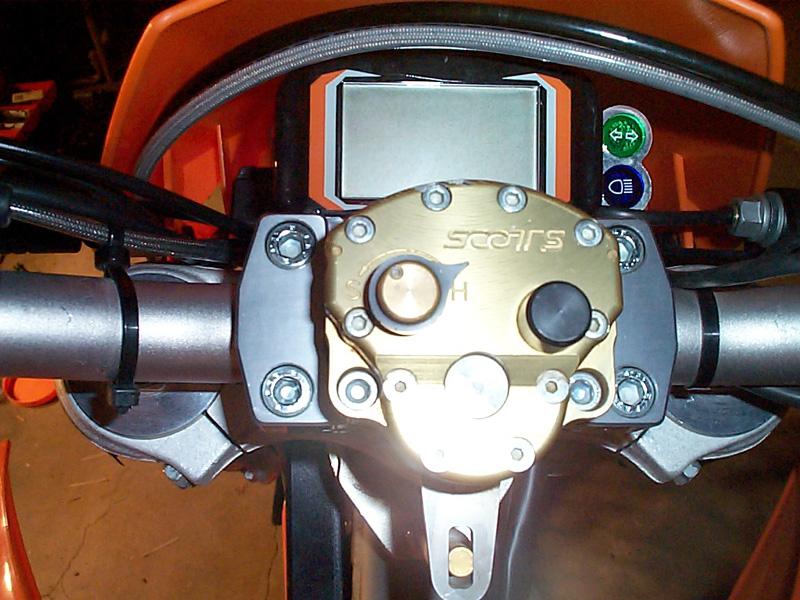 vailable
and at approximately $400 the price is right in line with the other kits. I
learned that Cycle Zone is one of the biggest KTM dealers in the Midwest and has
been importing the dual sport parts from Germany for a while. Apparently one of
their customers found out about the contact and relayed the information to Mike.
Although technically not a factory offered "kit", Mike packages all
the required factory dual sport parts together and offers them to his customers
as a service.
vailable
and at approximately $400 the price is right in line with the other kits. I
learned that Cycle Zone is one of the biggest KTM dealers in the Midwest and has
been importing the dual sport parts from Germany for a while. Apparently one of
their customers found out about the contact and relayed the information to Mike.
Although technically not a factory offered "kit", Mike packages all
the required factory dual sport parts together and offers them to his customers
as a service.
|
Made
in Austria
|
 While
any of the above-mentioned dual sport kits will do the job there is nothing
quite like knowing you have factory parts on your bike. Factory parts are
designed specifically for the bike and the fit and finish blends with the rest
of the parts on the bike. In the case of the 525EXC
While
any of the above-mentioned dual sport kits will do the job there is nothing
quite like knowing you have factory parts on your bike. Factory parts are
designed specifically for the bike and the fit and finish blends with the rest
of the parts on the bike. In the case of the 525EXC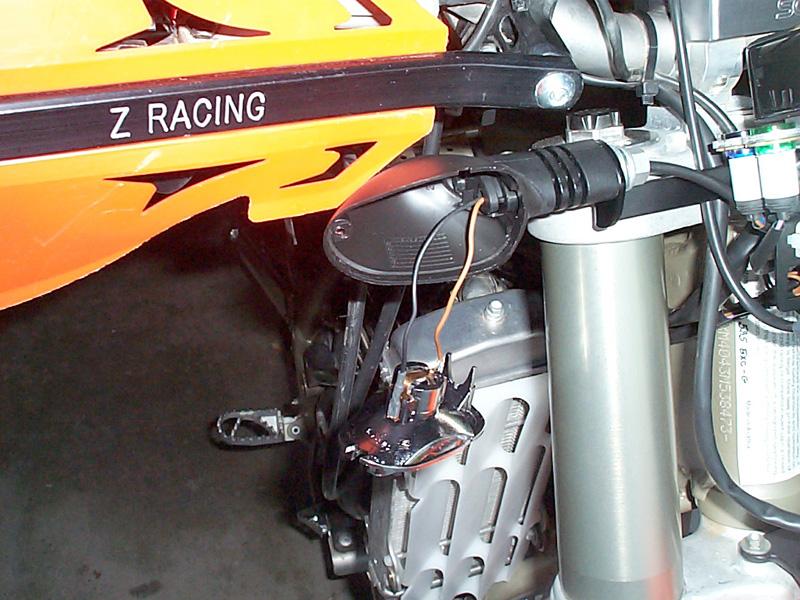 kit you receive a new main wiring harness, a control board that all the
electrical components plug into, front and rear brake switches, control
switches, horn, DOT approved blinkers and even high beam & blinker indicator
lights.
kit you receive a new main wiring harness, a control board that all the
electrical components plug into, front and rear brake switches, control
switches, horn, DOT approved blinkers and even high beam & blinker indicator
lights.
There are no detailed instructions but I did receive an electronic document that listed some of the main steps involved with installing the kit along with color photos. This document along with the parts manual that came with my bike allowed me to install the kit without any major difficulties. Having installed a Baja Designs kit in the past I would say this kit took a little less time but wasn't necessarily any easier.
|
Installation
- Front
|
Here is a run down of the
main steps of installing the kit. I first removed the headlight 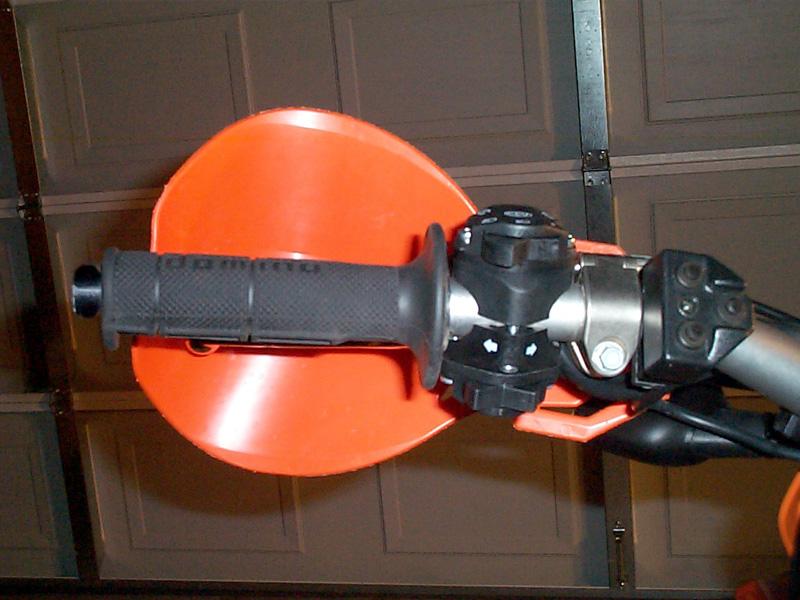 shell,
tank, seat, battery and battery box, filter cover, top subframe bolts, exhaust
bolts and rear fender from the subfender.
shell,
tank, seat, battery and battery box, filter cover, top subframe bolts, exhaust
bolts and rear fender from the subfender.
Starting at the front of
the 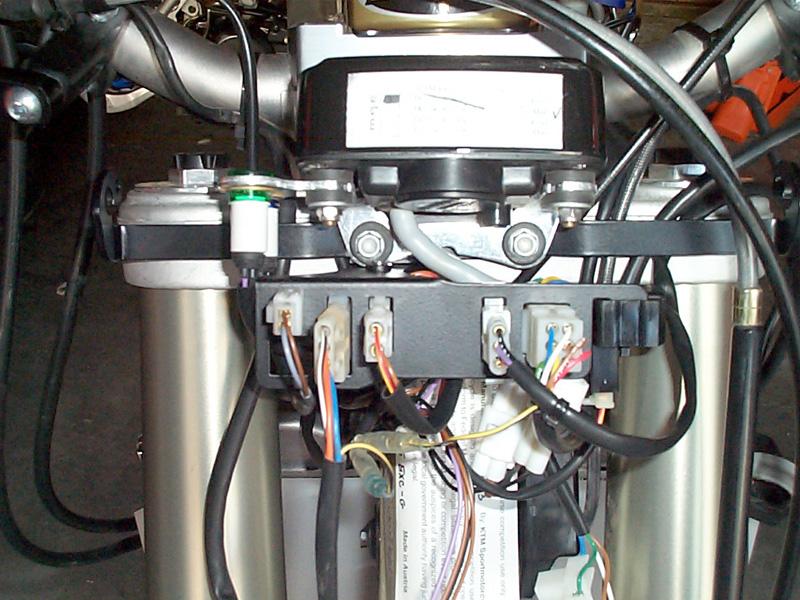 bike
the blinker mount, electrical controlboard and the stock odometer (on a new
mount) where bolted to the top triple clamp. The stock odometer handlebar
controls were moved to the right of the front brake so I could mount the new
control switch next to the left grip.
bike
the blinker mount, electrical controlboard and the stock odometer (on a new
mount) where bolted to the top triple clamp. The stock odometer handlebar
controls were moved to the right of the front brake so I could mount the new
control switch next to the left grip.
 Once
these were mounted I ran the new main wiring harness back along the frame,
removing the original harness as I went along. It took me a few minutes to
figure out that the starter switch connections were now located on the front
control board behind the headlight.
Once
these were mounted I ran the new main wiring harness back along the frame,
removing the original harness as I went along. It took me a few minutes to
figure out that the starter switch connections were now located on the front
control board behind the headlight.
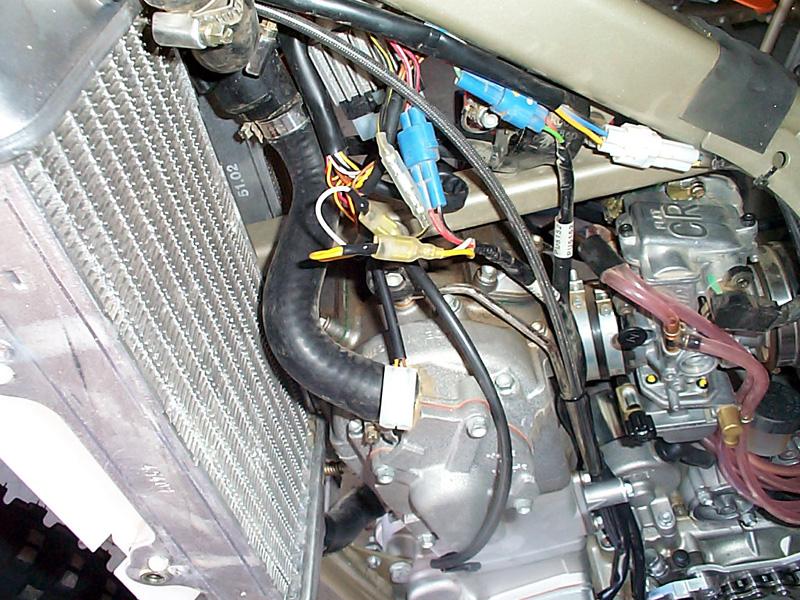
After plugging in most of
the co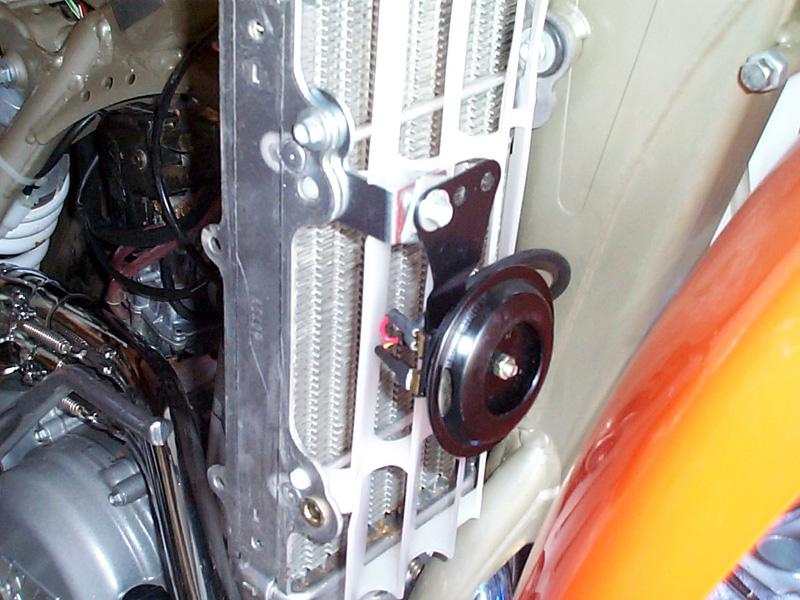 nnections
on the main harness I routed the first half of the blinker harness and ran it
back to behind the airbox.
nnections
on the main harness I routed the first half of the blinker harness and ran it
back to behind the airbox.
From here I mounted the horn onto the right radiator using the supplied bracket and plugged it in. To complete the front half of the bike I installed the front brake switch, blinkers and then the lights for the high beam and turn signal indicator.
|
Installation
- Rear
|
At the rear of the bike
the second half of the blin ker
harness was connected and run back to below the rear fender. I found it easier
to remove the brake light and subfender so that I could take my time in mounting
the blinkers and routing the wires properly.
ker
harness was connected and run back to below the rear fender. I found it easier
to remove the brake light and subfender so that I could take my time in mounting
the blinkers and routing the wires properly.
Using the front blinker
mount I had created a template of where the blin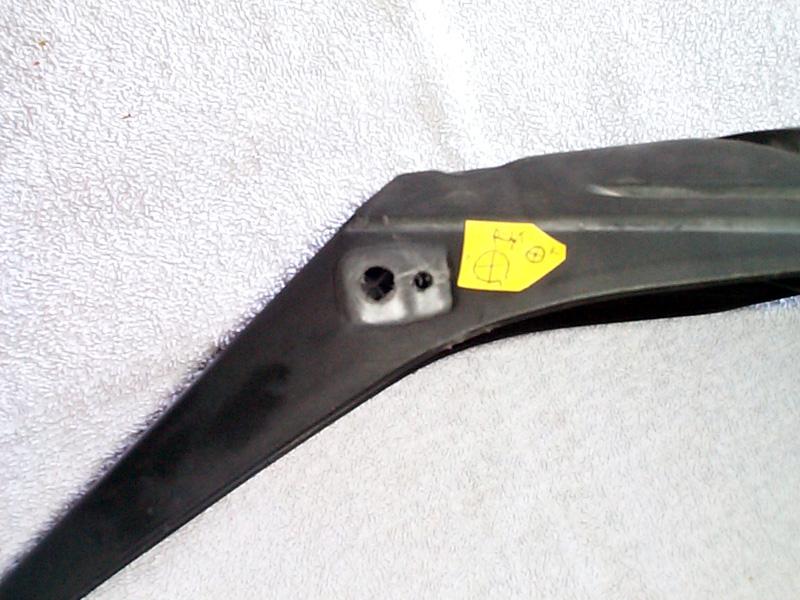 ker
holes needed to be. I used this template to mark the locations on the subfender
before drilling the holes. I also drilled a couple holes into the brake light
area to route the blinker wires through and protect them fro
ker
holes needed to be. I used this template to mark the locations on the subfender
before drilling the holes. I also drilled a couple holes into the brake light
area to route the blinker wires through and protect them fro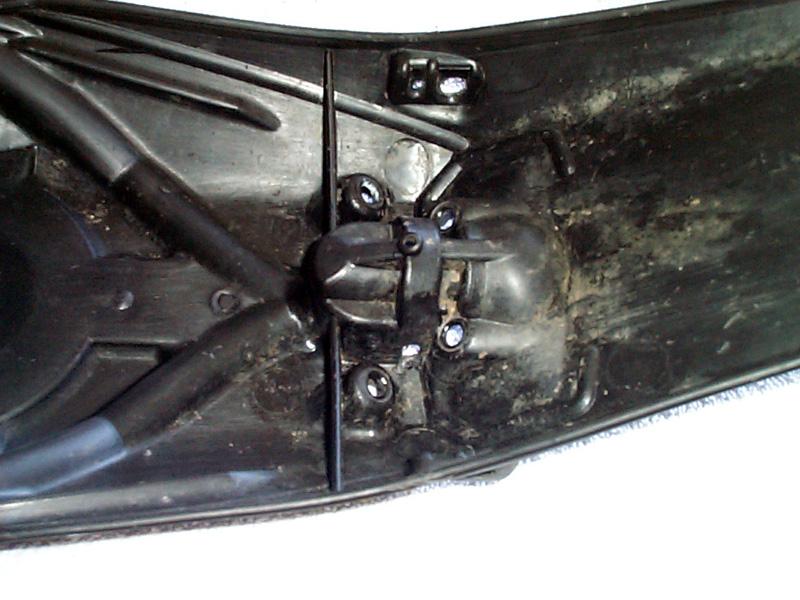 m
the rear wheel should I bottom out.
m
the rear wheel should I bottom out.
One tip when drilling, I
would suggest starting off with a smaller drill bit than you think necessary
because the plastic is very soft and easily distorts. After drilling all the
holes I mounted the blinkers and remounted the brake light and rear subfender to
the main fender. With all the major parts in place I zip-tied all the wires
together to keep them clean and out of harms way.
| Last Corner |
I am very satisfied on the installation and quality of the kit. All of the parts went on and connected together without a fuss. The blinkers, horn and headlight are all controlled by one easy to use switch. There is even a parking lamp that fits into the factory plugged up hole on the headlight. With everything installed the next step is to go through the California DMV process for registering the bike for street use. This process starts by getting a certification from an authorized dealer that the blinkers, horn and lights all work. Once the dealer signs the certification form a CHP form must be signed stating you know all the requirements for a street legal bike and that your bike conforms. Finally you take all of this paperwork to the DMV with a checkbook and pray it all goes smoothly. Stay tuned!
After installing the OEM
Dualsport kit on the 525 I realized the kit doesn't allow the taillight to be
switched on while the bike is off. In California the requirement is that the
battery must be able to power the taillight for 20 minutes with the bike off. To
meet 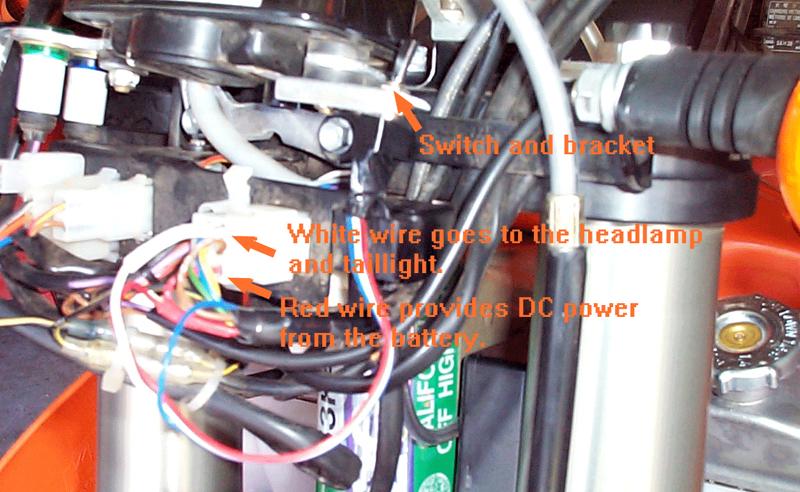 this
requirement I made a quick modification to the OEM Dualsport kit to allow the
parking lamp and taillight to be switched on while the bike is off.
this
requirement I made a quick modification to the OEM Dualsport kit to allow the
parking lamp and taillight to be switched on while the bike is off.
Since the OEM kit comes with the parking lamp I figured why not allow it to light up along with the taillight. This allows others to see you from the front as well as the rear and also gives you a little light to use in the dark. The taillight requirement is mainly to allow other driver/riders to see you if you are stopped or broken down along the road. To make this modification I used a switch (SPDT), some wire, shrink-wrap tubing and a soldering iron to secure the connections.
There are only two wires you need to tap into to make this modification and they are both conveniently located right behind the headlight on the connector coming from the main handlebar switch. The DC current coming from the stator normally powers the lights on the 525 but the parking lamp and taillight need DC current from the battery to run while the bike is off. The red power wire on this connector will give you the DC power from the battery you need when the bike is off. The white wire is the wire that delivers the power to the headlamp and the taillight.
To make the modification
you need to splice into the red wire and cut into the white wire. The switch has
three contacts on it to allow you to switch from Stator DC power to
Battery DC power. When the bike is running the switch prevents the bike from
shorting out by isolating the two DC paths. To install the switch first solder
three pieces of wire to each of the contacts on the switch. Make the length of
the wires long enough to allow you to mount the switch where you want it. Slide
some shrink tubing over each end of the white wire you cut earlier.
Next, solder either one of the wires coming off the ends of the switch to the power wire. The other wire coming off the opposite side of the switch should go to chassis side of the now cut white wire. The headlight side of the white wire should connect to the center of the switch so that it receives power from either source depending on the switch position. Once you get everything soldered up flip the switch and make sure it all works. I made a little mount out of aluminum that I bolted onto one of the odometer bolts so the switch is tucked out of the way but still within reach. You should now be legal and have a little light in case you need it in the dark.
| Cycle
Zone KTM www.cyclezonektm.com 600 NW Hwy 24 Topeka, KS 66608 866-843-7433 Mike Kruger mkruger@cyclezonektm.com |
|
Off-Road.com Newsletter Join our Weekly Newsletter to get the latest off-road news, reviews, events, and alerts! |
Follow @Off-Road
 Your Privacy Choices