Velocity-Stack Mod: Cheap and Easy Horsepower and Torque Gain on Toyota Trucks
Once upon a time, someone who owned a third-gen 4Runner (or 95.5 and up Tacoma) decided that the OEM airbox and ducting were restrictive and inefficient. They were right (well explain in another paragraph). So ask yourself, as this someone once did: Whats the easiest way to get more air into a box with one opening? Make another one. A big hole.
Is a big hole good enough? You can do better. Weve developed an interpretation of the hole-in-the-box modification the stack mod which is an improvement on the historic deck-plate mod. Our version made a documented 8 hp and 8 ft-lb of torque on the Mustang AWD500 Legacy dyno at Reese Tuning in San Diego County (619/749-0156, reesetuning.com). Imagine an inexpensive velocity stack that mounts exactly where the deck plate goes, providing a route for air directly to the filter. Best part? Its cheap the only part youll need costs $3. Everything else is junk youve got laying around the garage, plus some basic tools that if you dont own, you really need to.

Defining the Old Deck-Plate Mod
Next youll ask: Why is the original deck-plate mod for the Tacoma and 4Runner called that? From the looks of it, a deck plate is like a modular opening, or drain port, designed to function in a flat deck, apparently for nautical applications (so says the Web). In essence, the deck-plate mod describes the installation of this sort of port in the airbox to allow a significant increase in airflow (with it screened over if youre trying to keep vermin and debris out of the filter).
You could short bus this mod. Instead of the standard deck-plate maneuver, some folks have gone so simple as to plainly attack the airbox with a power drill, the oft-titled Swiss-cheese mod. We wouldnt stoop so low, but you can if that sort of thing satisfies you. Our velocity stack design is arguably less expensive than the original deck-plate modification, delivers air more effectively, and the project is no harder than before.

How and Why for a Velocity Stack?
Whats a velocity stack? Thinking historically: imagine F1, Can-Am or other race engines from the 50s, 60s and 70s, and youll remember shiny metal tubes sprouting from every carb on the engine, with one end shaped in a roughly parabolic funnel - velocity stack. Its basically a tube with one end formed to take advantage of an atmospheric equivalent of the Venturi Effect: air is collected from a larger area and fed into a narrower chute. This concentration increases flow.
The key ingredient we used for the stack mod was the plastic tube a bass port designed to tune and extend bass range for speaker boxes. Bass ports often have one end shaped like a velocity stack to eliminate inlet turbulence. Efficiency differences between perfect and crude stacks are minimal, so anything close will do. Having made a few bucks in college building custom speakers, using a bass port came to mind when looking at the construction of the original deck-plate mod. If you give air a channel or a tube to flow within, you direct the air and improve flow. For example, instead of a crowd trying to force itself into a room, consider people moving in an orderly line which process do you think works faster? The original deck-plate design uses the thin deck-plate ring to define the opening, but theres no channel, no tube, no route for the air to be directed into the filter. A velocity stack means focused air, plus increased flow.

Theres a speaker and electronics wholesaler in Ohio Parts Express, 800/338-0531 that keeps a massive catalog of this sort of part. They dont stock all the most exotic or miniscule tidbits, but the bulk of the killer components you need when wiring things or creating electronic devices can be found in their catalog. The four-inch diameter/four-inch long bass port (part no. 260-403) was ideal: theres only so much room in the face of the airbox, and the windshield-washer reservoir crowds it on one side. We wanted to use as much length of the stack as possible, so it was going to stick out of the front of the airbox a tad, and then extend into the airbox leaving room between its terminus and the filter.
.")
Eight Horsepower and Eight Foot-Pounds
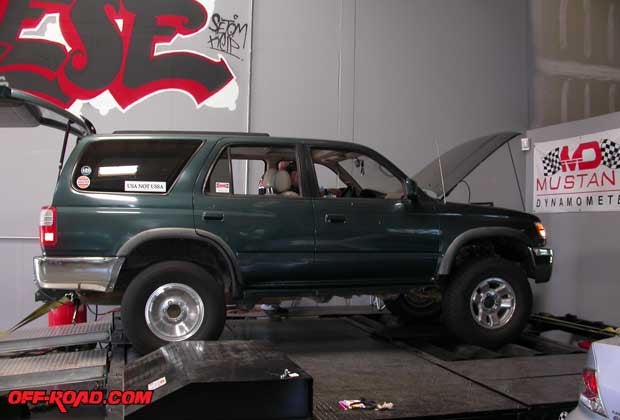
We parked our 180,000-mile 1997 4Runner (V6 and the slushbox) on the four-wheel Mustang dyno at Reese Tuning last week, and prepared to build the stack mod on the shop floor (instant results, no deviation in dyno settings). The Mustang dyno is a road-force dyno that applies gradient resistance to its rollers to mimic the delivery of power on an actual street, so the power figures are predictably less than non-interference dynamometers, but more honest. Mustang dynos are occasionally called bad names because they dont deliver the biggest absolute numbers that the dyno queens and poseurs crave, but most tuners respect road-force dynamometers for providing the most realistic power figures and the most accurate wheel horsepower.

The results are attached; the graphs are unaltered. Wed have preferred longer graphs with more from early in the powerband, but we had to roll into the throttle (with WOT by 3400) to avoid downshifting. The improvements netted with nothing more than the aforementioned velocity stack installed are obvious across the powerband (and remarkably even). Peak HP gain came at 4700 RPM with an increase of 8 hp, and torque peaked at 4800 RPM, providing an 8 ft-lb gain.
The air/fuel ratio was slightly leaner with the velocity stack in place, but still safe (even with a 180K fuel pump). We plan to install a bigger pump out of an STi (well test that too), but its our suspicion that lousy flow elsewhere and inefficient heads are causing plenty of ruckus at high RPM the horsepower curve falls off as the intake tract eats itself around 5000 RPM. Ironically, the most improvement was seen from the stack in that range, suggesting more ponies are to be had with further flow improvements. Well incrementally dyno a K&N plate filter and mods to the rest of the intake tract too.

Crash-Course In Airbox Surgery
Remove the airbox. Spin out the three bolts holding it down (theyre captured with the bushing, so mind the bits), loosen the hose clamp downstream of the mass-air, undo the two bolts holding the mass-air sensor, unplug it and gently twist it out of the airbox. Give the airbox a tug and its out.
Use the bass tube to trace a circle on the upper-left corner of the airboxs flat face (as if youre looking at the airbox from the front of the truck), space the opening about two centimeters from the edges. Youre not cutting at the line youve drawn use it as a guide, but cut about five millimeters within it, then slowly trim out until the stack fits snugly. Its woodwork basics with plastic use the drill to make a small hole completely inside the cutting radius, then cut a 360-degree loop with the jigsaw. Dont get grabby with the size of it you can slowly massage things with the saw and file to get a perfect interference fit. You should be able to slide the stack into the opening with a slight amount of friction, and the stack should stick in place without fasteners. We shouldnt have to tell you this, but just in case youre having a moron moment, be sure remove the filter from the airbox so as to keep errant plastic fragments from getting into it, and so you dont hack a hole in it during a moment of errant jigsawery.

You dont want big junk and livestock getting in the airbox, so some sort of screen would be wise. We chose to use an old speaker grille as a screen for the bass port velocity stack. Admit it: youve got 10 unused old speakers in your garage. Peel one apart, trim the screen to fit, secure it with a few screws (we also formed it around the lip of the stack, mostly because it looked cool). Pre-drill the holes, because you dont want to split the stacks lip or the grille. The grille we used, a little denser than basic screen material, appears to have cooperated with the stack to deaden the V6s drone, which can become obnoxious uncorked. According to stack physics, the stack probably defeats the drone by itself, though we didnt test it that way.
![] OEM airbox with stack in place note gap between stack and filter.](/images/content/08-Deckplate7-7.jpg "] OEM airbox with stack in place note gap between stack and filter.")
Two smaller ports easier to locate in the airbox to avoid interference with other things in the boxs neighborhood could work so long as you do the math and have enough flow area to guarantee effective air movement. Several smaller runners (instead of one big one) might also improve low-end torque more (as is the logic behind longer intake runners), but the fact that theyre upstream of the filter means the filter might mitigate substantial further gains. Its a small bother the improvements netted with the arrangement weve specd here are legitimate and dyno-proven, so you dont need to mess around unless you have an itch to scratch.
Tools needed? We used: 10mm and 12mm sockets, a few extensions, needle-nose pliers, a round or half-moon file, hacksaw, jigsaw with a fine blade, drill with a bit about 1.5-times-larger-than-the-blade width, a crayon, some caulk (if you want to seal around the stack-airbox interface). Dont make excuses if theres time this is cheap horsepower. Have some.

|
Off-Road.com Newsletter Join our Weekly Newsletter to get the latest off-road news, reviews, events, and alerts! |
Follow @Off-Road
 Your Privacy Choices