Broken parts happen. You can fix them. Broken parts happen more often when youre four-wheeling. On-trail fixes are harder: got tools, got parts, got lighting? No garage, no creeper, no parts store. Can you be prepared?
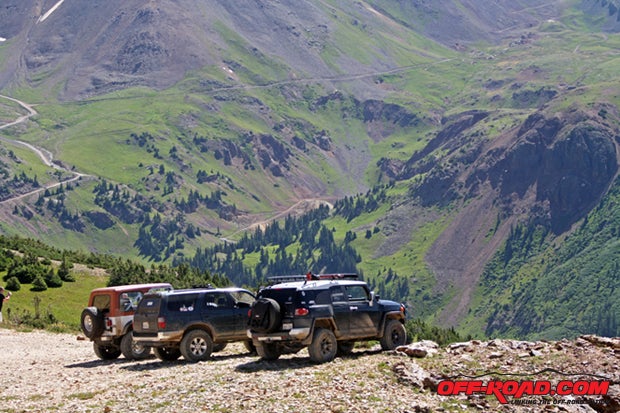
During a weeklong run through the awesomer parts of southwestern Colorados off-roading territories, we broke some parts or tried to. Then we fixed them. While we were prepared to deal with some breakage, other bits, not so much. However, you can avoid some trailside freakouts with a little preparation and vision.
When youre off-roading, whats onboard?
- Tools? You might not be ready to rebuild a diff (or are you?), but an assortment of the usual suspects can fix a lot: popular sockets and combo wrenches, a few pointy pry/screwdriverlike objects, some snips, some pliers, a crowbar, a hammer or two, a knife, a hacksaw, a few pieces of wood to hammer on, safety glasses, a funnel, a pair of gloves.
- Work lights? A few AAA-powered LED bars or a 12-volt droplight go a long way.
- Achy breaky parts? Does your truck murder bushings? Is there a power-steering line that blows? Do you have bolts that rattle out? What about grease? Fuses? Fluids?
- Temporary fixes? Zip-ties, duct or gaffers tape. 10/12-gauge copper wire or some wire hangars. Stranded automotive wire. Spare nuts, bolts and screws, with lots of washers. Hose clamps. Loctite.

Corporate Five-Bolt Locking Hub Bolts on a Dana 30
Sooooo, whats stronger than Loctite Red? While the five jailbird bolts holding the manual hubs together on this Dana 30 have been a flight risk for months, they were reinstalled with copious No. 263, and by all appearances wed solved the half-day loosening issue. Or not.

, and in case youre interested, there is a wicking Loctite. Awesome.")
After a day on-trail, rolling both the lumpy Kendall Mountain climb and historically rock-infested Engineer Pass, four of five bolts had departed for greener pastures (or some pastoral trailside nook). Hmmm, probably shoulda checked them. If youve got a problem bolt, keep a few in the truck. Or a few dozen. In this case, we got lucky and Silvertons hardware store (its for sale!) had a strong selection of bolts, including the type we needed. Should another dose of thread-locker not do the job (perhaps the new Loctite Black Hold will be enough), theres always the old truckers trick of drilling and wiring each bolt head in series, or the installation of some Jeep-sized nut indicators.

4Runner Anti-Roll Bar Bushings (Front & Rear)
Having shredded these bushings in both the front of the truck and in back, one would be inclined to brand the axle-mounted (rear) and frame-mounted (front) sway bar bushings on a third-gen 4Runner a wear item. One would be right to do so. The anti-roll bars act in a partially limiting capacity at full droop for this platform, and those bushings take a beating.
While we were prepared with a backup front bushing, the departure of the rear bushing was a surprise three front bushings had failed but never one in the back. Fortunately, the high-steel clanking of the bar-on-axle tube was readily discerned. A homefab stand-in bushing of plastic gaffers tape (think of the tape used to bond a carpets edge to cement floors in a convention center) was made by wrapping the tape around the anti-roll bar to the bushings thickness. Ironically (or coincidentally), we hadnt packed any tape originally (duct tape would have worked too) until being chided into doing so at the last minute. Thanks, dude.
MORE TRAIL STORIES
Road to the Summit: Toyota, Expedition Overland and an Epic Off-Road Journey
10 Epic Photos from FJ Summit X
 stopped to help diagnose the blown power-steering line on the Renegade. We pulled the belt and limped it back to the cabin.")
GM Power-Steering Pressure Line
The CJ-7 Renegade in our group was a small-blocked restomod that was still shaking out some cobwebs and flaws. One of the things that had been... underdesigned... was a problematic power-steering hose: a return-pressure hose (the suck hose) had been used on the pressure side of the power steering pump (the push side). Apparently, there is a difference.
 in-house.")
During high-twist froading moments, the steering pump overloaded the lower-strength line and popped it at the fitting. These parts had divorced before, but another low-pressure hose was put back in place of the previously blown line (not realizing that it was the wrong line altogether). On-trail a half-hour out of Silverton, the low-pressure line blew again, so limping back wasnt much trouble. This was good, because there was no spare. Instead, we slipped off the power-steering pump belt and arm-wrestled the truck home. A proper replacement was found in nearby Durango a hard-working farm and trucking town with a truck mechanic named Bob at Bobs Truck Parts & Hoses. Bob made a new line out of 4000psi Gates SAE 100R2 (mmmmight be enough). Next time, a $40 spare will be in the bits box.

Dearly Departed Lower Shock Bolt on Live-Axle FJ Cruiser
This one was worth a laugh and about three beers. After days of froading, the lower bolt holding the port shock absorber to the axle of a late-model FJ Cruiser shook itself out, and its replacement a relatively undersized black zip-tie of unknown manufacture kept the shock in place for the rest of the week on-trail and, like the little piggies do, all the way home.

While the wisdom of having zip-ties along for any trucklike adventures is indefatigable, the logic of one enduring this sort of load may surprise you. A well-balanced suspension component (such as one that would be designed by a Toyota engineer) puts relatively little stress on a shock, especially in low-speed settings like on-trail (it doesnt hurt if your shocks are blown...). In fact, your author has four-wheeled with just one shock damping the whole rear axle after grenading the drivers side rear shock (seriously, it exploded). The less there is to dampen, the less stress there is on that shock-to-axle connection, and as in this case, one lone zip-tie was sufficient.
Flapping and Flopping Plastic Panels #1 and #2
With mods come changes to parts, and changed parts occasionally interfere with original equipment. With the removal of OEM 4Runner bumpers and their replacement with high-clearance tube/plate bumpers, more air than originally intended flows into the engine bay, and in turn, causes several plastic wheel-well panels to puff into the wells. This wouldnt be a big deal, but the upsized Nitto knobbies used on the truck for off-roading take up more wheel-well space and rub against those pillowing panels. Whoops.

Around town, the rubber-on-plastic interference was a case of misdemeanor battery, but at freeway speeds through the southwestern desert, these plastics deformed enough that the tires began commiting felony cannibalism. A zip-tie from the cluster of that we keep strapped to the rollbar (credit where credits due: we saw that trick on Dave Colliers Gnarly Racing pleasure juggy) pulled the well liner back, and a leftover reciprocating saw blade pinned the master cylinder shroud in place where no plastic pop fitting could cope. Never be afraid to repurpose good chunks of metal like a Sawzall-style blade name brand ones are sturdy and have a lot of uses even after the teeth are dulled (though the bimetal blades are tricky to weld).
MORE TRAIL STORIES
Road to the Summit: Toyota, Expedition Overland and an Epic Off-Road Journey
|
Off-Road.com Newsletter Join our Weekly Newsletter to get the latest off-road news, reviews, events, and alerts! |
Follow @Off-Road
 Your Privacy Choices