After lifting a truck, theres a good chance suspension gremlins will materialize. Sometimes the show up right away, but others take time to grow. With a lift, the suspension geometry has been altered so new angles on drivelines add wear and axle angles are out of spec.
For some 4x4s, the solution may be as simple as getting an alignment. In our case, we needed to dig a little deeper.
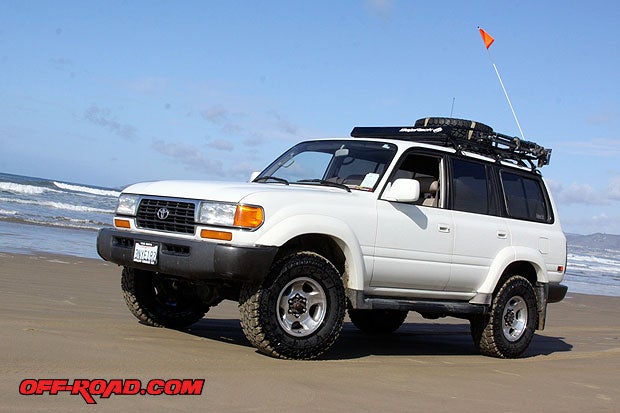
We had lifted our Toyota Land Cruiser 80 Series 2.5 inches using an Old Man Emu (OME) suspension kit consisting of front/rear coils and OME Nitrocharger shocks.
See related article:
Old Man Emu FZJ80 Land Cruiser Suspension Review
By lifting our 80 Series Land Cruiser 2.5 inches, we altered the front axle caster angle, making the steering much more sensitive. Our vehicle didnt wander all over the road, but it did feel a little light at higher speeds and when fully loaded.
WHAT IS CASTER? Caster is one of the three major areas of wheel alignment, along with camber and toe.
Caster is the angle between the pivot line, an imaginary line that runs through the center of the upper kingpin to the center of the lower kingpin on an axle, and vertical line. Caster influences directional control of the steering.
A backward tilt is referred to as positive (+) camber, and forward tilt is negative (-) camber (see illustration). For example, a bicycle typically has forks with a positive (+) camber or rake. This allows the front wheel to return to center much easier and makes it more predictable when riding.
In the negative (-) camber setting, you will have a wheel that doesnt return to center very easily, and sometimes is unpredictable. Negative camber, along with other adjustments of toe and camber, can be used for racing applications where turning in one single direction is key to winning the race, like NASCAR.
THE FIX
We wanted to take a proactive approach to addressing a known caster problem on the 80 Series Land Cruiser following a suspension lift, so we contacted Slee Off-Road for advice.
Slee Off-Road, a Toyota Land Cruiser specialist out of Colorado, recommended that caster correction bushings should be installed with any OME suspension lift over two inches. In their experience they all need them, considering 80 Series Land Cruisers come with so little positive camber from the factory.
 camber. The diagram above illustrates the different negative caster measures as more lift is added.")
Stock caster for an 80 Series Land Cruiser is 2-4 degrees positive (+) for it to be within spec. We were somewhere between zero and negative (-) 1 degrees after the lift.
")
Old Man Emu happens to make caster correction bushings, also known as 2-degree bushings. These Australian-made polyurethane bushings are designed to correct the negative (-) caster problem by replacing the factory bushings on front control arms. The OME caster correction bushings have off-center eyes that put the caster angle back within spec on an 80 Series Land Cruiser.

We spoke with an OME / ARB 4x4 representative about the caster angle issue and they told us that some vehicles need it, some dont. You really dont know until after the OME springs have been installed and the vehicle has been driven. In the end, we decided to take Slee Off-Roads advice and add the OME Caster Correction bushings to make sure our 80 Series Land Cruiser was well within spec.
INSTALL
Doing the job requires a hydraulic shop press, large metric sockets and wrenches along with air tools. It can be done at home if you have a full arsenal of shop tools and the room to do it, but sometimes it makes more sense to consult with the pros. Even the service manual suggests taking the vehicle to a certified mechanic if the control arm bushings need to be serviced since it requires special tools--so we did.

We took our Land Cruiser to Off Road Warehouse in Escondido, Calif., to get a hand with the OME Caster Correction bushings. Doug Ebba, who has done several of these jobs, was able to jump right in. He had the truck off the ground and air tools buzzing before we could get our camera shooting. Hes fast!


 should have indicator mark facing up, so that the offset eye is on the bottom. This will ensure a 2-degree positive camber correction is gained.")


FINAL THOUGHTS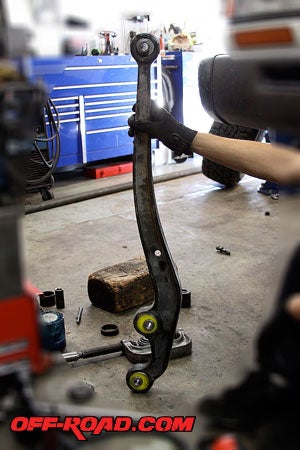 When we initially lifted our Land Cruiser, we ran it without the OME caster correction bushings for about 5,000 miles. We never experienced any erratic steering or excessive wandering. However, the steering wheel did feel a little light at higher speeds and when fully loaded.
The vehicle now feels true at higher speeds and doesnt dart when changing lanes or making quick maneuvers on road or off-road. This extra safety makes driving the Land Cruiser that much more enjoyable.
Along with gaining positive (+) caster angle, Doug at ORW pointed out that our front driveline angle was also corrected with the adjustment. When we first drove into the shop it wasnt straight, but now it is.
Swapping out the factory control arm bushings with OME caster correction bushings is money and time well spent. It not only puts the geometry of your front axle in spec, it also adds safety to quick maneuvering and steering on the Land Tank.
SOURCES:
Old Man Emu (OME) / ARB 4x4 Accessories
http://www.arbusa.com/
1-866-93-9078
Off-Road Warehouse
http://offroadwarehouse.com/
1-800-341-7757
Slee Off-Road
http://sleeoffroad.com/
1-888-4X4SLEE
|
Off-Road.com Newsletter Join our Weekly Newsletter to get the latest off-road news, reviews, events, and alerts! |
Follow @Off-Road
 Your Privacy Choices