While working on this old truck (a 97 4Runner), weve given you the good OE-parts speech more than once. For instance, we fitted a gen-two 4Runner electric fan for auxiliary pusher duty. It doesnt end at one part: 4Runners are chock-full of great swappable bits. Do you remember the first-generation 4Runners original-equipment four-point rollbar? Weve seen them in second- and third-gen 4Runners; heres a recipe for installing one in a third-gen.
Roots of Rollbar First-Gen Necessity
Because the 1984-89 4Runner wasnt much more than a Toyota Hilux dressed up with a capper and a second row of seats, there was triple-need for a proper tube-based rollbar in back. Though it bolted to the bed instead of being bolted or welded to the frame (not ideal), it provided a modicum of rollover protection, acted as a stiffening agent for what was otherwise a pickup bed missing a wall, and offered a place to secure seat belts for those almost-afterthought rear seats.
So. The 4Runner, for all its awesome, hasnt changed a whole lot over the years. Subsequently, that first-gen rollbar is almost a bolt-in for third-gen 4Runners.
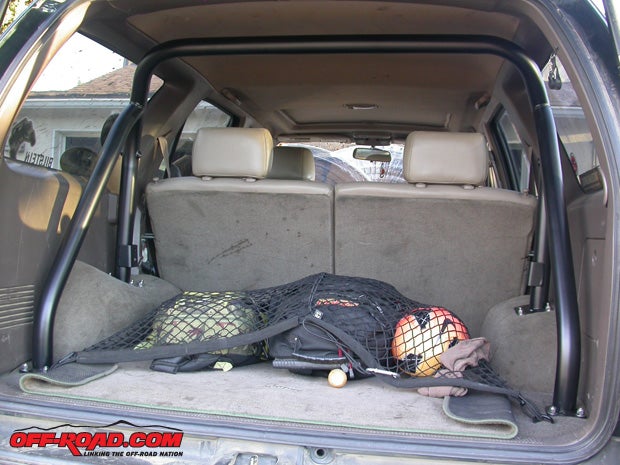
1. If youre a trail guy who needs to secure gear in the back-back...
2. If you like your ground clearance and want to get your spare tire out from under the truck behind the rear bumper...
3. If youre planning to put a tube bumper in the back...
4. If you like doing the cool-parts-from-other-trucks swap thing...
5. If you want your friends to stop asking you to haul 4x8 sheetrock in your 4Runner...
... this is a straightforward mod that allows you to safely stash your spare (up to 35) in the cabin, hang some mounting points for air, tools or a jack, and provides a convenient tie down for your cooler so you dont yard-sale your fine beverages the next time everyones watching you.

Not Hens Teeth Find First-Gen Rollbars in the Couch
Youll find first-gen 4Runner rollbars on Craigs, at the swaps or in the junkyard. They arent rare, but theyre occasionally priced that way. Ours was $100 in good condition; weve seen less goodly conditioned ones for as little as $30. Its rare to find one in actual great shape most are covered in stickers or rotten foam padding, and every one has faded paint.

Also, keep in mind when digging for these pieces, NONE of them are straight. From the pictures of various installations to the ones weve handled (and the one we bought), theyre all a little crooked slightly closer to one side of the interior or the other, slightly higher on one side than the other, legs that arent quite square. The one we picked up was an inch off from corner to corner. We suspect this matches variations in the first-gen 4Runners they were originally installed in were they built in-truck? This affects how the rollbars feet line up with the floor of your 4Runner, but as long as the rear feet can be placed flat and the top of the rollbar sits close to level, youll be fine. Remember, its not just the rollbars that arent perfect. Lots of 4Runners have been hammered off-road, or been crashed and put back together a little notso, so there are a few rooflines and interiors that arent true either. Six of one, half a dozen of the other: you can tweak the way the part sits in your truck when you weld the feet on the front legs.

 versus how tall it appears with carpeting and padding (more than eight). This was our first hint that cutting short was a good idea, Justin case.")
Fitment Is Straightforward
The only real measuring youll need for this swap is figuring the alignment of the front legs of the rollbar in relation to the inner wheel wells. The rollbar has four feet the forward two perch on the wheel wells, the rear two on the floor. We stood up and leveled the OE rollbar to gauge how high the original front feet stood over the rears, and then measured the height of our third-gen 4Runners wheel wells. With two ammo cans that closely approximated the third-gen wheel wells standing alongside the leveled OE rollbar, we were able to visualize and measure how much of the front legs to trim (the later-model 4Runners wheel wells being taller than the gen-one wells). From that measurement, we gauged slope and angle of those wheel well humps on the inside of the project truck, accounted for carpet depth, and grease-penciled out the cut line.


As this is just steel tubing, we went at it with a cutoff wheel. To be on the safe side, we chopped off a half-inch LESS tubing than we measured (assuming we could trim more in case we missed our measurement). Thaaaaaaankfully, that extra half inch saved our bacon. The padding of the carpeting on the wheel-well humps proved to be thicker than we had figured once the rollbar feet were cinched down, and it compressed a lot.


With the rollbar trimmed but the new feet not yet attached, we angled the rollbar into the cabin to test its fit. With the extra half-inch proving essential on the drivers side, we slid the new foot-plates under the cut tube ends, and then cinched the rollbar down using the corner cleats in the 4Runners back-back and a few cargo straps. This simulated the rollbar in place cranked down, as if bolted in place and we sliced off a bit at a time until the rollbar leveled. Then we left the straps on until we were able to spot-weld the feet in place (careful not to melt the carpet). Before the spot welds, we measured again and again, checking evenness from the tailgate to the rollbars rear feet as well, and from each side of the truck. Because the rollbar isnt perfectly true, we couldnt get every measurement to kosher up, but we got close.

Getting the Rollbar Into the Cabin
You cannot get this rollbar into the back of a third-gen 4Runner through the back too much interior plastic must be removed, parts that cannot be replaced once the rollbar is back in. You CAN get it in through the rear doors. Fold down the rear seats and remove the seat-mount dress trim on the C-pillar. Holding the rollbar in the direction itll mount in the cabin, rotate the it forward so the top tube points forward and down (towards the rear footwells), and then angle it in sideways. Once its in, rotate it back so the top tube comes up, looping the rear feet of the rollbar slowly over the rear seat-latch posts and into place. You may need to squeeze it to get the front legs past those posts, or you can remove them. Be careful not to poke out a window.

Nuts and Bolts and Easy Fabrication
Your trucklike buddies are going to see your rollbar once its installed, and you dont want them making fun of your boogery welds. Plus, if you dont do a good job, that four-point gear rack could turn into a four-point projectile in an accident. Your author isnt a good welder, and he summoned the service of neighbor, friend and metal-fabbing genius Mark Fageol (maker of the Fageol Supercharger for Harley-Davidsons, GM V-6s and other applications) to do the welds right.

The feet that we welded onto the front legs were a case of Its more work to make them than pick up a set, so we picked up four at local metal supplier Competitive Metals [http://www.competitivemetals.com/]. In SoCal, theres a lot of truck and racecar building going on, so outfits like Competitive keep many pieces in stock that form the basis of roll cages and rollbars mounts, tubing, ties, foot plates, gussets and tabs. Dont be ashamed that you increased your efficiency by buying a few $10 pieces of pre-cut metal.

Because we didnt want the relatively thick though not actually thick metal that comprises the wheel wells failing under stress, we back-plated the rollbars new feet with matching plates on the other side of the well hump (outside of the vehicle, on the tire side). With a heavy coating of rust-preventative primer covered with an impact-absorbing coat of rubberized plastic that sorta matched the wheel wells, they would resist rust. In an additional attempt to keep moisture away from the wheel-well humps, a shot of silicone would go around each bolt as well.

Mark also recommended that, because we were going to put the bolts that secure the rollbar through the wells into the wheel well itself, we should use stainless bolts. Wed already determined that a smooth-headed bolt would work better (less for a fully-stuffed tire to grab), and Mark suggested an Allen-keyed button-cap bolt.
We tried to get these fittings locally, but the guys behind the counter at El Cajons go-to bolt and nut supplier were positively unlikable. Negative Yelps ensued quality service matters. We took a look online and found an outfit in Chicagoland Phoenix Alloys (dot-net) [http://phoenixalloys.net/] that sells about every common nut and bolt and washer, as well as welding, grinding and drilling hardware, both through their website and on Amazon. Their service positively crackled, and their pricing was also quite good. We will be using them again.

Drilling Holes in Perfectly Good Sheet Metal
With the rollbar reshaped and the new foot-plates in place, we returned it to the cabin to test the fit. The rest of that process is the trigonometry of getting the rollbar into and out of the back-back for test-fitting, then drilling through perfectly good sheet metal.

Ahhhh yes, that wonderful gearhead moment making holes in hole-free metal with a shiny new drill bit. With the refooted but as-yet unpowdercoated rollbar (no use in scratching a new coating while drilling), we realigned it in the back-back and strapped it down as it would be installed, checking our measurements repeatedly. At that point, we did the drill-where-you-stand routine and popped 12 holes through the rollbar foot-plates (two per each rear foot, four per each front). YES, you need to ensure theres nothing on the other side of where youre drilling; triangulate from the rear bumper and the fender (and no, theres nothing there). We used 3/8-inch bolts 1 ½-inch long (though 1 ¼-inch would have worked) and popped holes of the same size. With the holes drilled, we were off to the powdercoater.
.")

Powdercoating is a Stronger Coating
Once the rollbar had its snazzy new feet in place and the truck was ready for bolts, we went after the rollbar with a sanding disc and cleaned up spatter, funk and crust. Then we took a defuncticant to the tubing so it was cleaned up for a proper powdercoat. Powdercoating is more durable than paint, bonds more completely with metal parts, cleans up more easily, and has enough thickness that exposure to sand and dirt wont chip it. We always use Powder1 in El Cajon [http://powder1.com/]. Weve used them for years, both for this 4Runner and for more industrial applications. The biggest hurdle with a powdercoater is finding a shop thats reliable and consistent, and when you find that guy, you keep em. Powder 1 has been that guy.

Final Rollbar Installation, Planned Uses
With the to-be-adapted gen-one 4Runner rollbar measured, adapted, cut, fabbed, tested, fitted, cleaned and coated, it looked too good to put in our 240,000-mile Foreigner project truck. Unfortunately, we couldnt figure out how to make a table out of it, so we put in the truck. The bolts lined up easily pointing up to keep the low-profile button-cap head nearest the tires though without a helper we had to pin each nut with a combination wrench while ratcheting it in from beneath the truck. We wound up messing up one of the lock-nuts. Go figure find a second set of hands when you need them. Were going to re-cinch each of these bolts in about a week; not so tight that the wheel well deforms, but enough so that theyre honestly tight.
While we planned for backing plates for the front rollbar feet, which made installation easier and stiffened the bars placement, we didnt for the rears. It turned out that those rear feet were in a flexier section of the 4Runners floor than the curved wheel wells, and probably needed the backing plate as much as the ones in the wheel wells. Well grab a few pieces of scrap plate from Marks and coat em like we did for the front legs.

Whats the point of this exercise? Theres going to be an Addicted Off-Road rear tube bumper on this 4Runner soon, so that spare tire needs to be out from under the truck. While it was relatively safe with the OE trailer hitch back there (which is far stronger than the 4Runners tinfoil rear bumper), both of those will be gone when the new bumper goes on. We also have some in-the-truck gear and a cooler that need to be attached to something in back a cargo net can only get you so far. That, and we love adapting parts from other vehicles to this truck, including the Dodge 2500 shocks controlling the rear axle, Tundra front suspension and brakes, a high-power/low-profile Volvo 240 antenna, some wiring and connectors from a 5.0, and the aforementioned gen-two 4Runner electric fan. Because truck.
Resources:
Competitive Metals
619.442.4130
competitivemetals.com
Fageol Superchargers
619.447.1092
facebook.com/FageolSuperchargers
Phoenix Alloys
561.441.5401
phoenixalloys.net
Powder 1
619.588.9200
powder1.com
|
Off-Road.com Newsletter Join our Weekly Newsletter to get the latest off-road news, reviews, events, and alerts! |
Follow @Off-Road
 Your Privacy Choices