Want to give your old Chevy/GMC a face lift? One
of the latest trends is to update the older ‘73-’80
front clip to the clean lines of the ‘89-’91 style
front clip. This page will, in a lengthy process, explain this type
of swap. If you are interested in only upgrading your
‘81-’88 grille to the ‘89-’91 grille, see
the Parts List then skip to the ‘89-’91 Grille
Installation section.
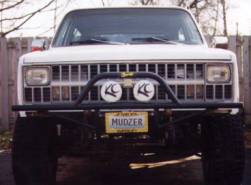
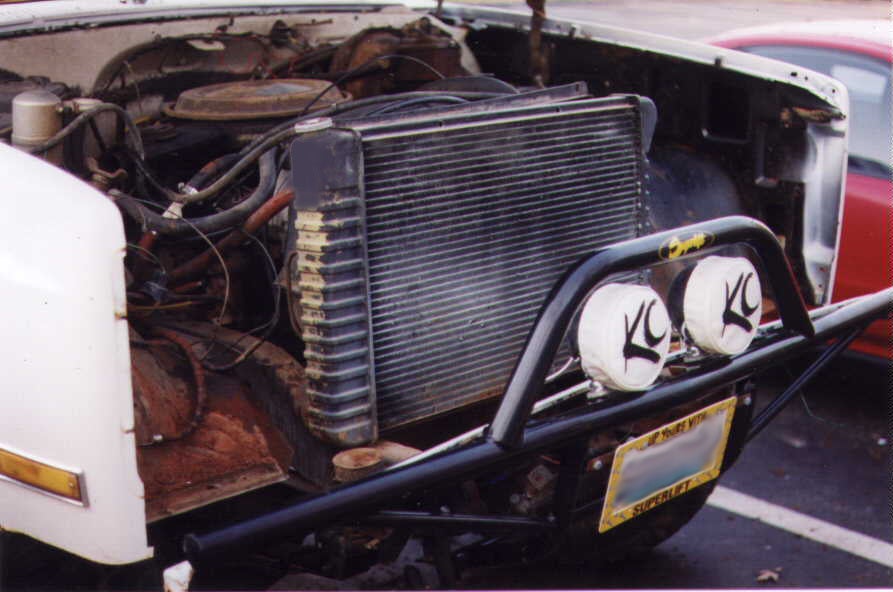
Before

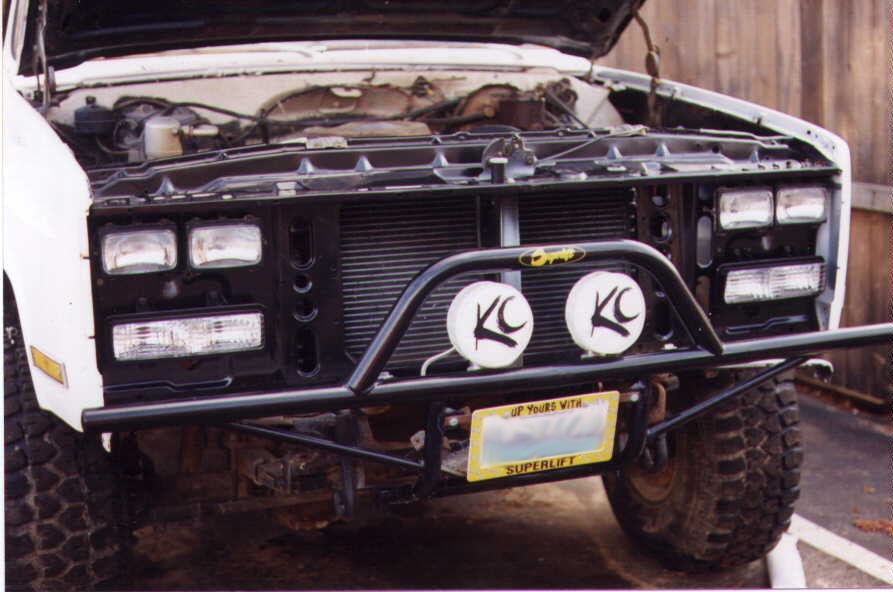
After
Like most of you, I have a Blazer “Project” that will
never end. I bought my 1978 K5 complete with parts truck at a good
price. The problem is, I was wanting the ‘89-’91 years.
Not long after buying my ’78, I wanted the newer
‘81-’91 style front clip so I decided to upgrade. I
started the upgrade by searching the newspaper and salvage yards
for any ‘81-’91 Blazer or Suburban I could find. My
search ended after looking in the local newspaper and reading about
an ’82 Suburban front clip. I made the purchase and arranged
shipment. I bought the complete front clip including: Radiator
Support; Fenders with side marker lights and inner fenders; Hood,
hinges, and springs; Headlights, Buckets, and trim rings; Bumper
with turn signals; Grille, Headlight doors, and Chrome trim
surrounding the grille. There were some parts not included which I
will detail later. I was in a hurry to get rid of about 20% of the
rust from my vehicle so I started the project right away. I removed
the existing front clip all in one piece with the help of some
friends. I did not; however discard my radiator or headlight wiring
harness. Disconnect your factory hood latch cable if equipped, this
will be reused for the new latch. At this point, you may want to
replace the radiator support mounting bushings and bolts. I
completed my ’82 front clip upgrade previously. After seeing
the Off-road.com Project Blazer “Potent Rodent”, I
decided to upgrade mine again. Shawn Spickler, owner of the
Potent Rodent
completed a similar swap on his ’87 Blazer. In the parts
list, I have noted some GM part numbers for your use. Most body
shop supplies can use these numbers to find the correct part the
first time (it took me several trips to the store). Lets talk
parts.
Click on each thumbnail for larger image
Radiator Support, Fenders,
Hood and Hinges
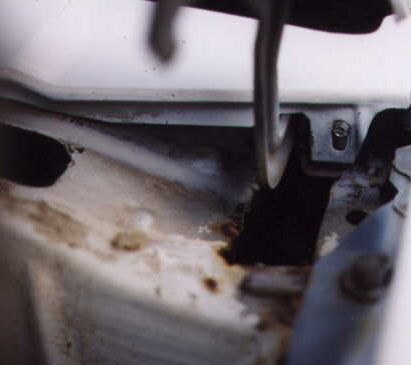
When I upgraded to the ’82 front clip, I followed these steps. Install the radiator support, radiator and shroud. I used my existing ’78 radiator and shroud. The next few steps are a bit complicated and require installation and removal of the fenders and hood. View the images, then mark and cut two rectangle holes in the firewall for hinge recess. Bolt the fenders and inner fenders onto the truck only using a few bolts to line up the parts. Be sure to tighten these bolts after aligning the panels because you will be making some measurements for the hood mounting hinges. After installing the fenders, install the hood hinge spring to the fender and let it hang down out of the way for now. Next install the hood hinges on the hood. Make sure the hood latch is installed in the radiator support. Have a friend help you install the hood and hinges in the correct location. After installing the hood, line it up with the front and top of the fenders. Next mark the holes where the hinge mounts on top of the firewall (2 holes on each side). After making sure the hood is perfectly lined up and you are sure of the holes you have marked, remove the hood. There are several options you may have here. I did not have enough metal on the outside of the firewall to drill holes and mount the hinges. My Blazer required me to either weld an extra piece of metal to the firewall for the new hinges, or simply weld the hinge mounting brackets to the firewall and be done with it. I opted for the latter. If you plan to weld the hinge directly to the firewall, be sure to elongate the hood mounting holes for adjustment. The bad thing about this option is, you must get the hood perfectly lined up so you have plenty of adjustment when you elongate the holes. When I did final welding I kept the fenders in place and spot welded the hinges in place. I then checked how the hood opened and shut and made sure I could adjust it properly before welding firmly. After welding the hinges or bolting if you have the holes drilled, install the rest of the bolts for the fenders. If you opted to weld your hinges on, you will have to attach your Hinge foam with weather strip adhesive. I do recommend using the foam, at least on the passenger side hinge, as you will be drawing cold air into your fan in the winter months. This will help keep most of the cold air out. Install battery tray in the factory location, side marker lights and horns

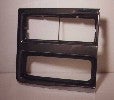
Hinge Detail
Hinge recess hole
Click on thumbnails for larger image
Windshield Wipers and Cowl
Panel
The next item to install is the Windshield wiper linkage and posts. The new posts are longer than the ‘73-’80 style. The posts fit in the same hole as the existing posts, but you will have to drill out one new hole per side. The posts have 3 bolts per side but they have one hole off a little. Next install the cowl panel. The new cowl panel is anchored by 1 screw onto each hinge and plastic anchors that mount in holes in the fire wall. The ‘73-’80 firewall will not have the holes, so you can either mark and drill holes or not use any of the plastic anchors. The two screws keep mine secure without flopping. Install wiper reservoir on the fender in the factory location. Hook up the hoses to the washer pump and to the washer spray tubes in the cowl panel. Install the washer fluid reservoir and connect hoses to the pump. ‘89-’91 Grille Installation
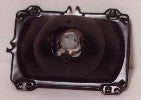
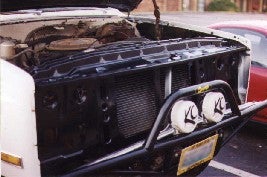
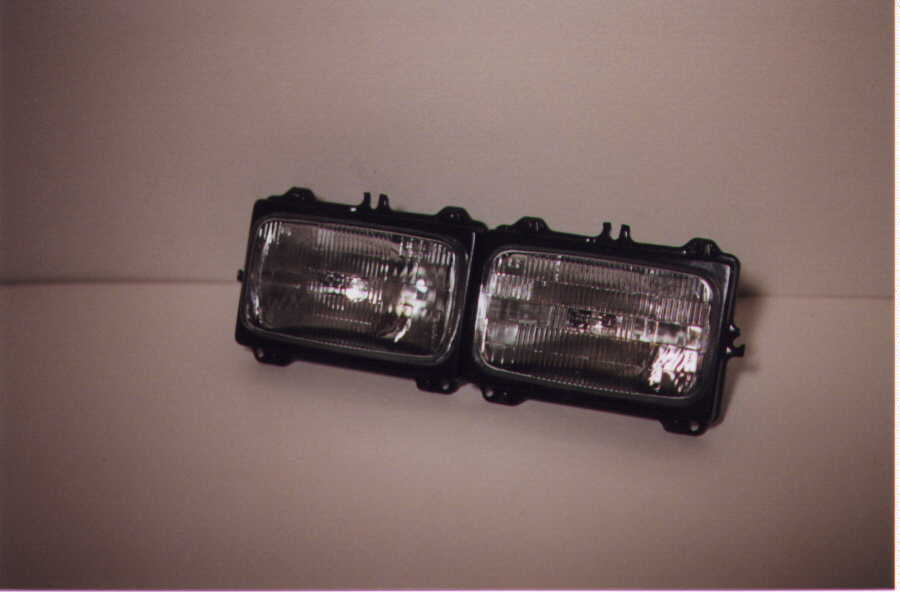
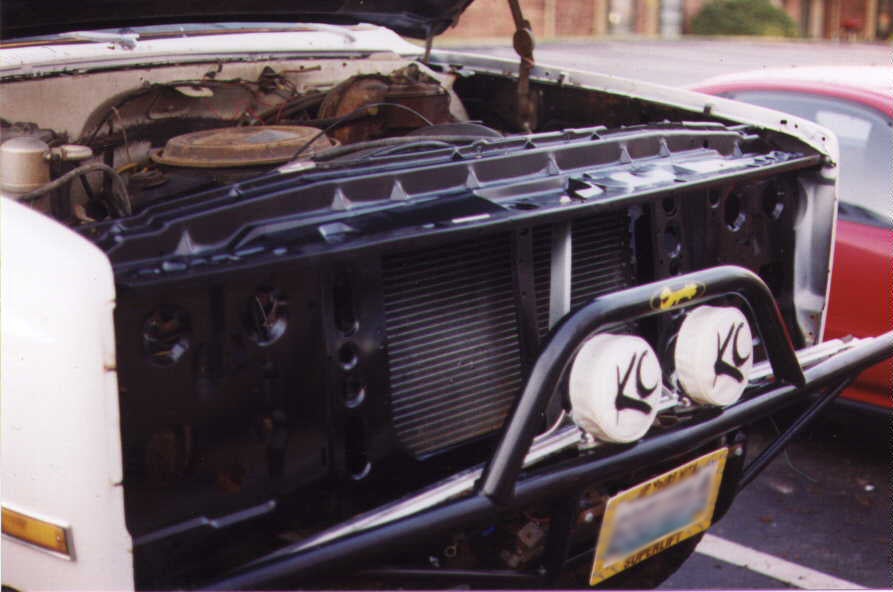
 After installing the radiator support in the factory location, bolt
it to the frame with 2 bolts, then attach to the fenders and inner
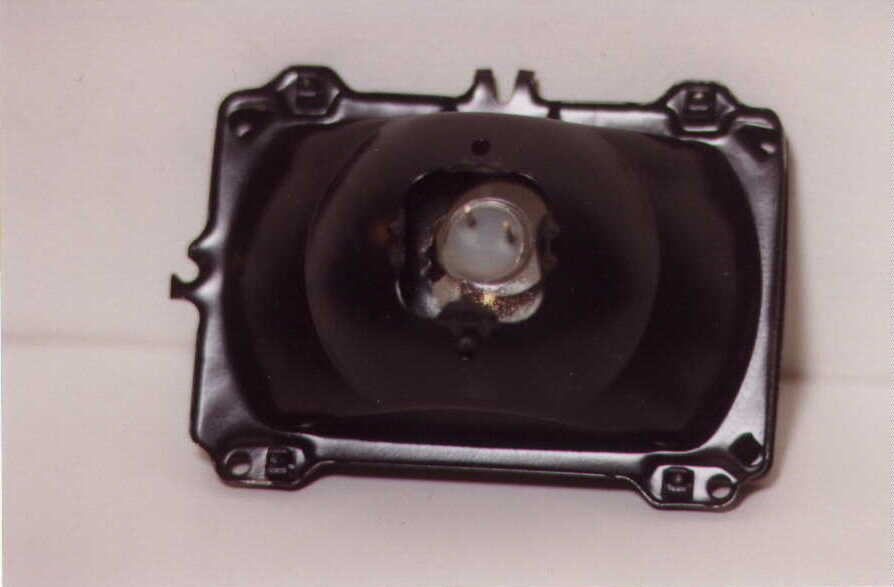
fenders. Place headlight into each cup and install trim ring.
Install adjusters into radiator support (8 total), then install
each headlight assembly and spring. Adjust the headlights until
they appear flat at this time. You can adjust the headlights after
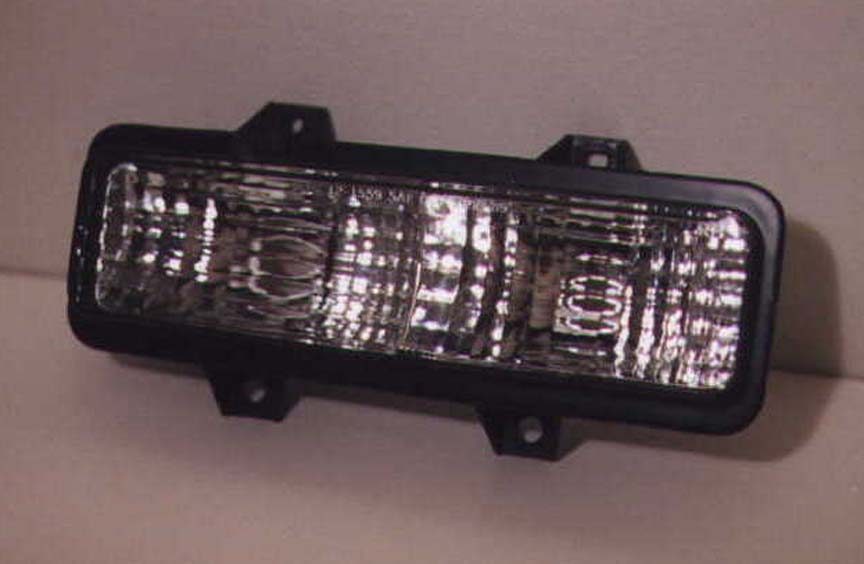
completing the installation. Install turn signals on each side with
four attaching bolts.
After installing the radiator support in the factory location, bolt
it to the frame with 2 bolts, then attach to the fenders and inner
fenders. Place headlight into each cup and install trim ring.
Install adjusters into radiator support (8 total), then install
each headlight assembly and spring. Adjust the headlights until
they appear flat at this time. You can adjust the headlights after
completing the installation. Install turn signals on each side with
four attaching bolts.
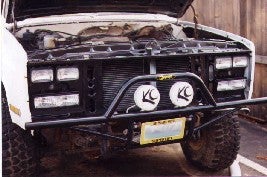
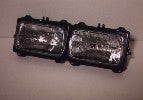
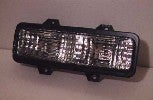
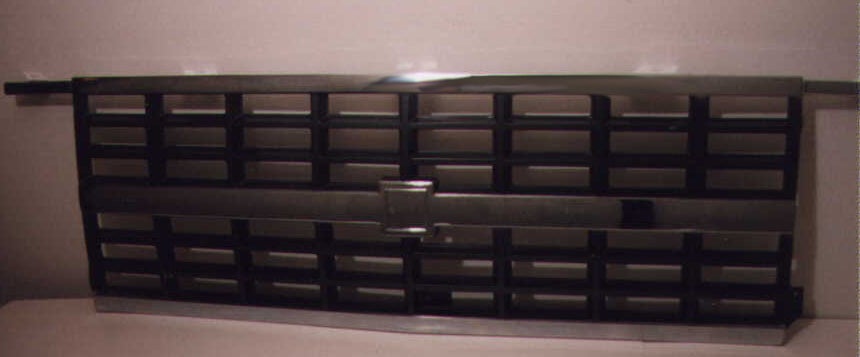
When installing the grille, you will notice some attaching points
are missing on your front valance. Fabricate some “L”
shaped brackets and rivet to your valance. Drill 3/8” holes
in the brackets after aligning the grille and marking the center
point of each hole. Install factory style nutsert into the hole.
Install grille. You will need to drill and elongate a hole for the
lower mounting point for the bezels. After making the hole, install
factory nutsert in the elongated hole. Install right and left
headlight bezel. Your grille at least “looks” like a
’91, now lets talk about wiring to make the change over more
functional.
Wiring Installation
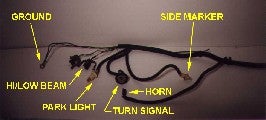
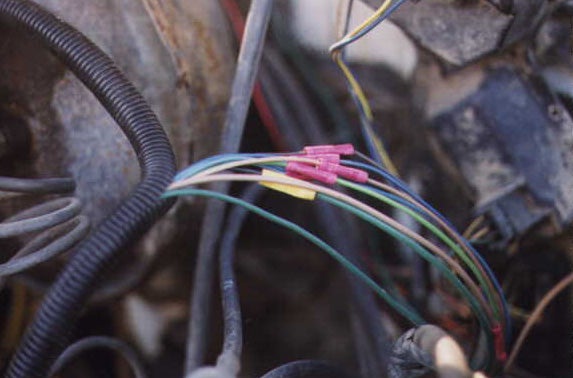
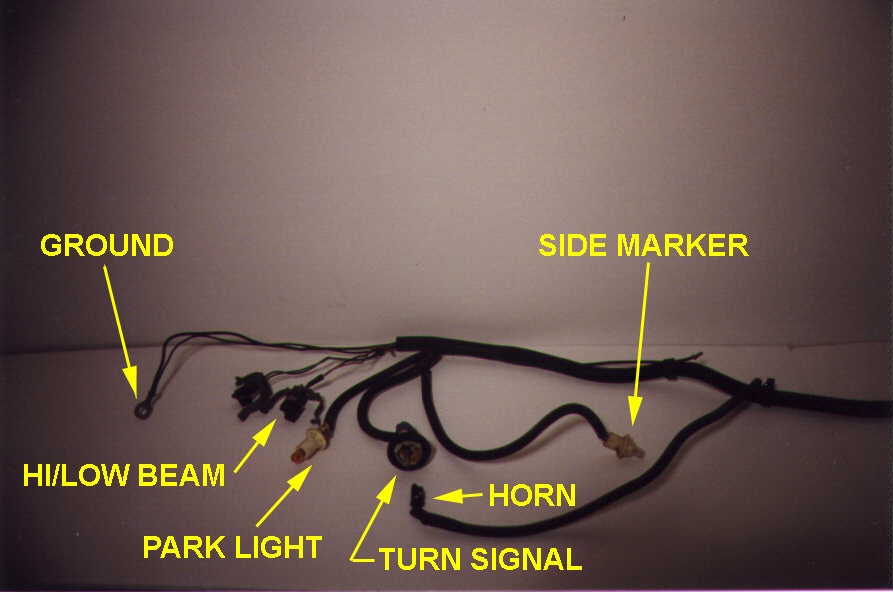
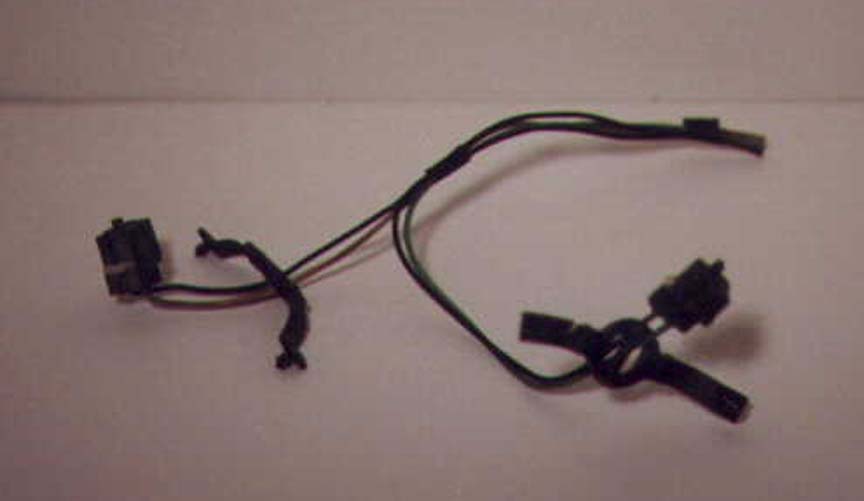
The new headlight system is a single filament style where most earlier versions are double. The upgrade will require some minor wiring to enable the lights to work properly. The turnsignals have a small plug for the parking lights and a big plug for turnsignals. The side marker light uses the same small plug as any ‘73-’91 Blazer/Suburban/Jimmy. I researched this topic and found several sources. The “pigtails” I referred
to in the parts list are actually short pieces of the factory
wiring harness wires and the plugs that attach to the headlights.
Call local junkyards looking for the specific years
(‘89-’91) of Blazer/Suburban/Jimmy. If this
doesn’t pan out, call the local Auto Parts stores and ask for
the headlight wiring plugs. Still no luck, as a last resort call GM
Dealer. The Dealer pricing is extremely high compared to what you
get. I lucked out and found a wrecked ’90 Suburban with the
dual headlights. I purchased the complete headlight wiring harness
for a mere $75. That price seems like alot when you see the small
pile of wires, but ease of installation will far outweigh the
price. My splice was made about 12 inches from where the wires
leave the firewall. I think I could have just used the factory
’90 Suburban plug and installed the Brake fluid warning light
wire into the new harness. The splice was easy because the wires
were all the same color as my ’78 wiring harness. The only
difference in the splice connection of the new to the old is the
new harness has two extra wires. The two wires are Dark Blue and
Light Blue. After viewing the Wiring Diagram, I noticed the two
extra wires are to be connected to each other. After making a quick
splice, I re-connected the Battery and tested the lights. They work
great. Test all the lights by toggling your turnsignals; high and
low beams, park lights, etc. When faced with doing the wiring
challenge, you have some options. These models use the same style
of headlight and turnsignal plugs:
The “pigtails” I referred
to in the parts list are actually short pieces of the factory
wiring harness wires and the plugs that attach to the headlights.
Call local junkyards looking for the specific years
(‘89-’91) of Blazer/Suburban/Jimmy. If this
doesn’t pan out, call the local Auto Parts stores and ask for
the headlight wiring plugs. Still no luck, as a last resort call GM
Dealer. The Dealer pricing is extremely high compared to what you
get. I lucked out and found a wrecked ’90 Suburban with the
dual headlights. I purchased the complete headlight wiring harness
for a mere $75. That price seems like alot when you see the small
pile of wires, but ease of installation will far outweigh the
price. My splice was made about 12 inches from where the wires
leave the firewall. I think I could have just used the factory
’90 Suburban plug and installed the Brake fluid warning light
wire into the new harness. The splice was easy because the wires
were all the same color as my ’78 wiring harness. The only
difference in the splice connection of the new to the old is the
new harness has two extra wires. The two wires are Dark Blue and
Light Blue. After viewing the Wiring Diagram, I noticed the two
extra wires are to be connected to each other. After making a quick
splice, I re-connected the Battery and tested the lights. They work
great. Test all the lights by toggling your turnsignals; high and
low beams, park lights, etc. When faced with doing the wiring
challenge, you have some options. These models use the same style
of headlight and turnsignal plugs:

Click on above pictures for larger image
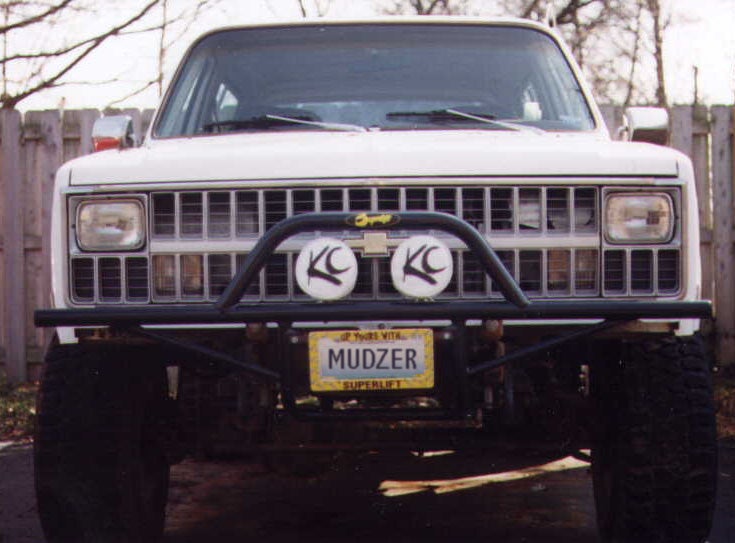
Before
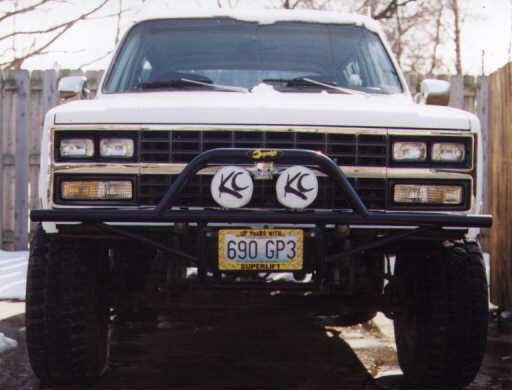
After
- Parts List:
- ‘89-’91 Radiator support GM part #15641713 *
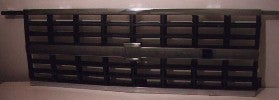
- ‘89-’91 Grille (center portion) GM part #15628796 *
- ‘89-’91 Right headlight/turn signal bezel GM part #15628670 *
- ‘89-’91 Left headlight/turn signal bezel GM part #15628669 *
- 4 - ‘89-’91 Headlights, headlight buckets and trim rings GM part #16503172 (RH low beam), 16503171 (RH high beam), 16503162 (LH low beam), 16503161 (LH high beam)
- ‘89-’91 Right Turn signal lens GM part #5975228 *
- ‘89-’91 Left Turn signal lens GM part #5975227 *
- 4 - ‘89-’91 Headlight “pigtails” *
- 8 - ‘89-’91 Headlight adjusters *
- 4 - ‘89-’91 Headlight springs *
- ‘81-’91 Right fender GM part #15634642
- ‘81-’91 Left fender GM part #15614467
- ‘81-’91 Right inner fender GM part #15594890
- ‘81-’91 Left inner fender GM part #15594889
- ‘81-’91 Hood GM part #15629509
- ‘81-’91 Cowl panel, plastic leaf cover, washer spray tubes and hoses
- ‘81-’91 Wiper arms, linkage, and posts
- ‘81-’91 Battery tray
- ‘81-’91 Washer fluid reservoir and hoses
- ‘81-’91 Hood weather strip, hood bumpers (on fenders), hood stop adjusters (radiator support)
- ‘81-91 Hood latch, hinges, hinge springs, hood hinge foam seal (one per side) *only used in the ‘89-’91 grille swap for ‘81-’88 Chevy/GMC Trucks.

Click on each thumbnail for larger image
When I upgraded to the ’82 front clip, I followed these steps. Install the radiator support, radiator and shroud. I used my existing ’78 radiator and shroud. The next few steps are a bit complicated and require installation and removal of the fenders and hood. View the images, then mark and cut two rectangle holes in the firewall for hinge recess. Bolt the fenders and inner fenders onto the truck only using a few bolts to line up the parts. Be sure to tighten these bolts after aligning the panels because you will be making some measurements for the hood mounting hinges. After installing the fenders, install the hood hinge spring to the fender and let it hang down out of the way for now. Next install the hood hinges on the hood. Make sure the hood latch is installed in the radiator support. Have a friend help you install the hood and hinges in the correct location. After installing the hood, line it up with the front and top of the fenders. Next mark the holes where the hinge mounts on top of the firewall (2 holes on each side). After making sure the hood is perfectly lined up and you are sure of the holes you have marked, remove the hood. There are several options you may have here. I did not have enough metal on the outside of the firewall to drill holes and mount the hinges. My Blazer required me to either weld an extra piece of metal to the firewall for the new hinges, or simply weld the hinge mounting brackets to the firewall and be done with it. I opted for the latter. If you plan to weld the hinge directly to the firewall, be sure to elongate the hood mounting holes for adjustment. The bad thing about this option is, you must get the hood perfectly lined up so you have plenty of adjustment when you elongate the holes. When I did final welding I kept the fenders in place and spot welded the hinges in place. I then checked how the hood opened and shut and made sure I could adjust it properly before welding firmly. After welding the hinges or bolting if you have the holes drilled, install the rest of the bolts for the fenders. If you opted to weld your hinges on, you will have to attach your Hinge foam with weather strip adhesive. I do recommend using the foam, at least on the passenger side hinge, as you will be drawing cold air into your fan in the winter months. This will help keep most of the cold air out. Install battery tray in the factory location, side marker lights and horns
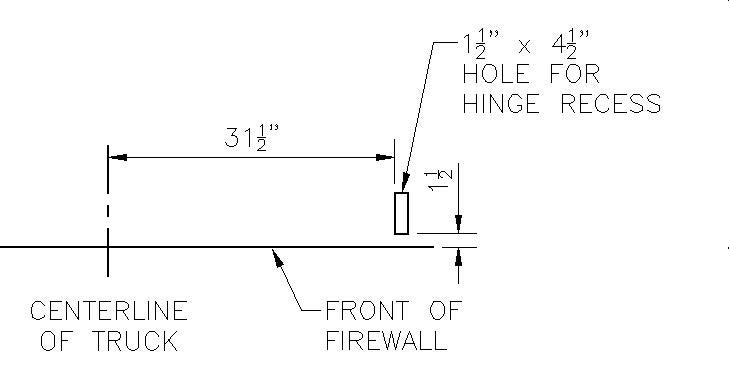
Hinge Detail
Hinge recess hole
Click on thumbnails for larger image
The next item to install is the Windshield wiper linkage and posts. The new posts are longer than the ‘73-’80 style. The posts fit in the same hole as the existing posts, but you will have to drill out one new hole per side. The posts have 3 bolts per side but they have one hole off a little. Next install the cowl panel. The new cowl panel is anchored by 1 screw onto each hinge and plastic anchors that mount in holes in the fire wall. The ‘73-’80 firewall will not have the holes, so you can either mark and drill holes or not use any of the plastic anchors. The two screws keep mine secure without flopping. Install wiper reservoir on the fender in the factory location. Hook up the hoses to the washer pump and to the washer spray tubes in the cowl panel. Install the washer fluid reservoir and connect hoses to the pump. ‘89-’91 Grille Installation
Wiring Installation
The new headlight system is a single filament style where most earlier versions are double. The upgrade will require some minor wiring to enable the lights to work properly. The turnsignals have a small plug for the parking lights and a big plug for turnsignals. The side marker light uses the same small plug as any ‘73-’91 Blazer/Suburban/Jimmy. I researched this topic and found several sources.
 The “pigtails” I referred
to in the parts list are actually short pieces of the factory
wiring harness wires and the plugs that attach to the headlights.
Call local junkyards looking for the specific years
(‘89-’91) of Blazer/Suburban/Jimmy. If this
doesn’t pan out, call the local Auto Parts stores and ask for
the headlight wiring plugs. Still no luck, as a last resort call GM
Dealer. The Dealer pricing is extremely high compared to what you
get. I lucked out and found a wrecked ’90 Suburban with the
dual headlights. I purchased the complete headlight wiring harness
for a mere $75. That price seems like alot when you see the small
pile of wires, but ease of installation will far outweigh the
price. My splice was made about 12 inches from where the wires
leave the firewall. I think I could have just used the factory
’90 Suburban plug and installed the Brake fluid warning light
wire into the new harness. The splice was easy because the wires
were all the same color as my ’78 wiring harness. The only
difference in the splice connection of the new to the old is the
new harness has two extra wires. The two wires are Dark Blue and
Light Blue. After viewing the Wiring Diagram, I noticed the two
extra wires are to be connected to each other. After making a quick
splice, I re-connected the Battery and tested the lights. They work
great. Test all the lights by toggling your turnsignals; high and
low beams, park lights, etc. When faced with doing the wiring
challenge, you have some options. These models use the same style
of headlight and turnsignal plugs:
The “pigtails” I referred
to in the parts list are actually short pieces of the factory
wiring harness wires and the plugs that attach to the headlights.
Call local junkyards looking for the specific years
(‘89-’91) of Blazer/Suburban/Jimmy. If this
doesn’t pan out, call the local Auto Parts stores and ask for
the headlight wiring plugs. Still no luck, as a last resort call GM
Dealer. The Dealer pricing is extremely high compared to what you
get. I lucked out and found a wrecked ’90 Suburban with the
dual headlights. I purchased the complete headlight wiring harness
for a mere $75. That price seems like alot when you see the small
pile of wires, but ease of installation will far outweigh the
price. My splice was made about 12 inches from where the wires
leave the firewall. I think I could have just used the factory
’90 Suburban plug and installed the Brake fluid warning light
wire into the new harness. The splice was easy because the wires
were all the same color as my ’78 wiring harness. The only
difference in the splice connection of the new to the old is the
new harness has two extra wires. The two wires are Dark Blue and
Light Blue. After viewing the Wiring Diagram, I noticed the two
extra wires are to be connected to each other. After making a quick
splice, I re-connected the Battery and tested the lights. They work
great. Test all the lights by toggling your turnsignals; high and
low beams, park lights, etc. When faced with doing the wiring
challenge, you have some options. These models use the same style
of headlight and turnsignal plugs:
Click on above pictures for larger image
- ‘89-’91 Chevy Blazer/Suburban and GMC Jimmy w/dual headlights - see Option A
- ‘89-’91 Chevy/GMC Truck w/dual headlights (headlight plugs only) - see Option B
- ‘92-’96 Chevy/GMC Van w/dual headlights - see Option C
Wiring Diagram
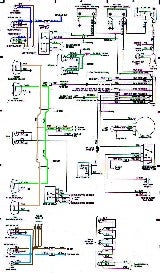
Click thumbnail for larger image

Click thumbnail for larger image
Questions or Comments about this
page should be directed to: chevy@off-road.com.
We cannot
guarantee a response to every letter we
receive.
|
Off-Road.com Newsletter Join our Weekly Newsletter to get the latest off-road news, reviews, events, and alerts! |
Follow @Off-Road
 Your Privacy Choices