Project Chevy Tahoe: AEM Brute Force Intake System for your Sport Utility Vehicle
|
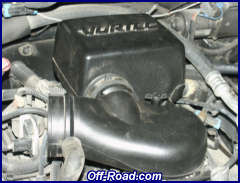
More than 2 years ago Project Tahoe recieved an intake system. We have been happy with the improved performance but discovered some design flaws. To fix that we have decided replace the current intake and upgrade to the AEM Brute Force Intake. AEM has extensive experience designing intake systems and builds systems for many vehicles with each system being designed specifically for that application. The intake system is made with lightweight aluminum, madrel-bent tubing that is tuned in length and diameter. The tube is matched to the engine to give the best power over a broad RPM range. The intake is coated with a high-gloss, heat reducing Zirconia based powder coating. The special blend of powder coating helps reduce heat penetration which helps bring cooler and denser air to the engine for more power. The aluminum is very light and will not rust unlike chrome plated steel systems. AEM provides a stainless-steel heat shield to help minimize heat soak into the inlet area and provide protection from dust, dirt and mud. The air filter is manufactured by AEM in-house and is a lightweight urethane, four-layer cotton-gauze filter designed to last for years. Installation
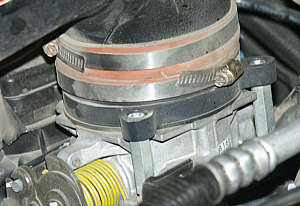
Our installation is slightly different since we had the other unit previously installed. The first thing we had to do was round up some of the stock parts that were originally on the Tahoe. The Brute Force unit installs with the stock plenum and resonance chamber. This was a bonus because we knew this would fix the problem we had with the current unit. The stock plenum mounts much more securely than the attachment provided by the other unit. We talked with AEM engineer Greg Nakano to see if there was other reasons for AEM using the stock plenum. Greg said they test multiple configurations when designing their unit and they found the best performance gains on this application when used with the stock plenum and resonance chamber. The third benefit the stock plenum provides is a quieter product. It seems AEM really did thier homework rather than just quickly throwing a product together. Greg said AEM won't market a product that does not provide good honest gains for the customer.
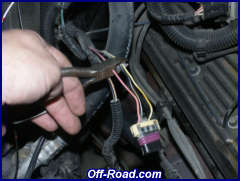
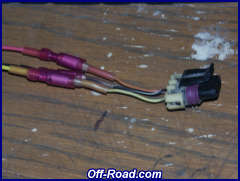
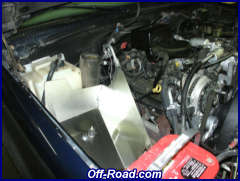
With the stock plenum and resonance chamber reinstalled we were ready to continue with the installaiton of the Brute Force Intake. If you are starting with a stock installation you will need to remove the factory airbox from the engine compartment. Next you need to modify the wires going to the MAF sensor. The wires will be extended with the parts supplied with the AEM kit. The installation manual shows the whole process in detail including pictures of every step. A heat gun is nessessary to apply the heat shrink tube and shrink the bullett connectors. While NOT a difficult process it does take a while to splice in the longer wire.
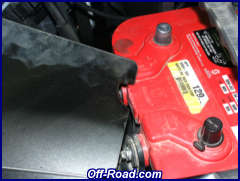
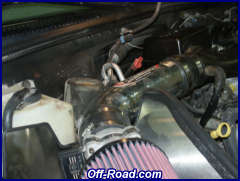
? Next you need to install the heat shield and intake pipe. The open side goes toward the fender and it bolts down to the fender. You need to be careful not to touch the positive battery terminal with the heat shield. In our installation we found that the heat shield made contact with the battery. While our Optima battery is not original, we don't believe it is larger than the factory battery and in fact it may be slightly smaller. In any case, it only took a few minutes with our small 4" grinder to notch out the heat shield so it did not touch the battery.
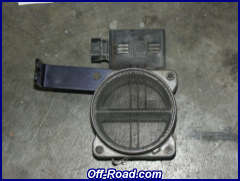
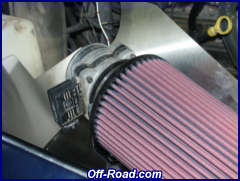
Now remove the MAF sensor from the factory intake and attach the bracket supplied with the kit. Then attach the air filter to the MAF sensor and tighten the hose clamp. This assembly attaches to the rubber mount in the heat shield. Leave the nut on the rubber mount loose until you get everything in place.
You need to prepare the pipe by installing the silicone couplers and hose clamps on the pipe. Now carefully manipulate the pipe into place between the MAF sensor and the intake plenum. No part of the intake system should be touching the vehicle or heat shield. When the proper position is achieved you can tighten down all the hose clamps and the rubber mount.
Plug in the MAF sensor and the IAT sensor and install the molding on the heat shield. You are done. The complete installation took us about 3 hours. I am sure most of you could do it faster but we are a little slow around here. Summary This is an easy do-it-yourself install. The instructions provided by AEM are some of the best we have seen with photos of every step. If you can't follow these instructions then you shouldn't be driving. The use of the stock plenum and resonance chamber makes for a system that is much quieter than the previous system we had installed. Performance is good, although from the seat of the pants, it is difficult to tell a big difference between the old system and the new system. If you are going from a stock system then should definetly notice an improvement in performance. What we like the most if the fit of the AEM system. We have had the unit installed for several months and we no longer have a problem with the unit coming loose. We are happy campers.
Advanced Engine Management
|
|||||||||||||||||||||||

|
Off-Road.com Newsletter Join our Weekly Newsletter to get the latest off-road news, reviews, events, and alerts! |
Follow @Off-Road
 Your Privacy Choices