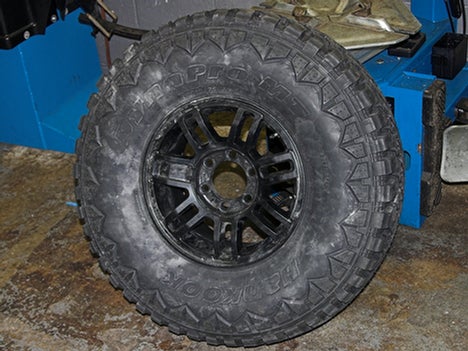
With a new set of Hankook DynaPro MT RT03’s, project Polar H3 had some new shoes, but something was missing. I’m going to go with feet analogies here for a moment, so run with it, ok? (Yes, pun intended.)
 |
If you equate a truck’s rim to a foot, and its tire to a shoe, then mounting a tire on a rim is like slipping your foot into a pair of sandals or loafers. They’re on your foot, but just barely. You wouldn’t go run the 100 meter dash in sandals. Instead, you’d lace on a set of track shoes, knowing that they’re not going anywhere. They’d be the perfect extension of your foot, making you one with the track.
Well, rims and tires are basically the same idea. A road tire does great held on by its bead and air pressure, but an off-road tire is different. We rely on the maximum tire footprint we can get, and to get that we run large tires and extremely low tire pressures.
This setup is great for maximizing that footprint, but horrible for holding your tire on a rim. You can compensate by running a higher tire pressure than would be optimal for the terrain, but then you lose your maximum footprint.
Unfortunately, if you run very low air pressure for maximum performance, eventually gravity, weight, terrain, and any number of factors are going to conspire against you, and a bead will be lost. This could end up being a big pain in the butt, requiring you to somehow attempt to reseat the bead on a trail, or becoming truly disastrous and potentially causing a roll or crash. Not good, right?
Okay, back to the foot and shoe analogy. Project Polar H3 has a spare set of OEM “feet” in the garage, and with a fancy set of new Hankook shoes, all that’s missing are some strong laces. Enter the Staun Internal Bead Lock. With Staun bead locks, I can use my spare OEM rims and be sure that I can safely run the low tire pressures I want to maximize performance in the H3. I won’t have to worry about losing a bead because even though I’m running single digit pressures in the tire, at the bead I’m seated with 50psi of pressure. Those tires won’t be going anywhere.
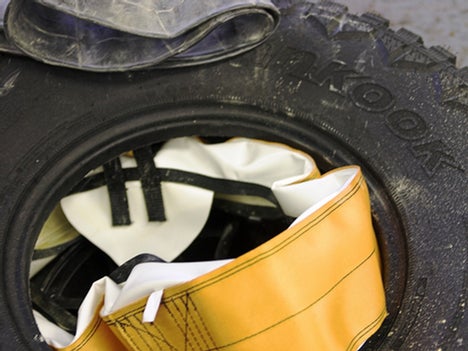
For those of you not familiar with the Staun Internal Bead Lock and how it works here is a quick description. The Staun Internal Bead Lock (IBL) is essentially an inner tube encased within a Kevlar shield. The shield divides the tire into two chambers. The primary chamber carries typical tire pressure, anywhere from street pressure to essentially nothing; whatever you see fit. The second chamber is the tube encased within the Kevlar shield. It is filled to 50psi and applies pressure to the tire only at the bead. No pressure is applied at the tire sidewall or tread. This ensures that the tire is held securely to the rim no matter what pressure you choose to run in the tire itself.
I considered going with a traditional double bead lock wheel, but couldn’t justify the expense. Seeing as I already owned a spare set of five OEM H3 wheels, choosing the Staun IBL was a no-brainer.
When I was planning my tire and bead lock purchases, I thought about tire wear and the effects the different weights of a wheel and tire combo could have on the truck. I had been doing a four tire rotation on my old tires and was unhappy that the unused spare could no longer be switched into the rotation without getting another new tire because of tread depth differences. It also meant that I would be getting 20% fewer miles out of a set of tires. I was also concerned about attempting to use my current spare with the new wheels and tires. Not only would there be big weight differences, there could also be diameter differences and on a full time 4WD truck like the H3, this could lead to problems.
By choosing to run the same wheel/tire/bead lock combination on all five wheels I got rid of all these issues. In fact, I’ve already done my first five tire rotations. Sure, there is a bit of added expense in getting a fifth Staun IBL, but I think that the long term benefits of having all five wheels set up the same will quickly outweigh that expense. It’s a practice I recommend to anyone.
Now that I had made my decision on what products to get, I started researching what I was going to need to get the job done. One of the key things about the Staun IBL is that you need to make a commitment to them. When you install the Staun IBL you need to drill a second hole in the wheel to accept the bead lock’s second valve stem. On Staun’s website, there is an installation video that I watched thoroughly as I was waiting for the IBL’s to arrive.
One of the key considerations in selecting a location for the second valve stem is that the valve stem must not interfere with anything in the wheels rotational path. The second consideration is that the second valve stem must be within eight inches of the primary valve stem.
 |
 |
To make sure that I could use the Staun IBL on my OEM H3 wheels, I contacted Harry Lewellyn of Staun Products USA for advice on where to locate the second stem. Harry had me send him some pictures of the rims and their relation to the brake caliper. Harry came back to me with an enthusiastic “yes”, confirming that I could use my wheels. He recommended that I use the Staun IBL model number: SBLN1679.
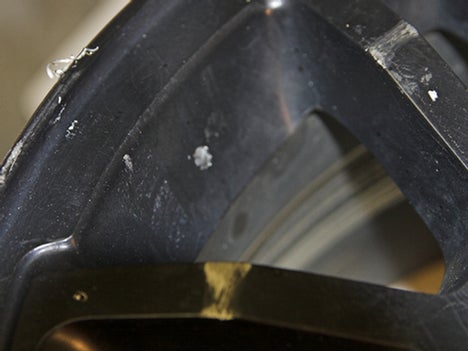
Due to the location of the brake caliper and the shape of the rim, I wasn’t left with a lot of locations to choose from. Actually, I was left with two: to the right or to the left of the primary stem, and the new hole would need to be drilled identically to the original.
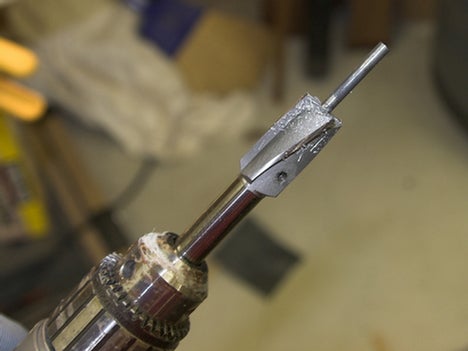
I thought, “How in the world am I going to do that?” The outside cross section of the rim is curved heavily and drilling such a substantial hole would be near impossible - or so I assumed. Harry had the answer to this as well. McMaster-Carr (www.mcmastercarr.com) sells bits called counterbores. They drill a flat bottomed hole at whatever diameter you specify. Harry suggested using either a 5/8” or ¾” bit with a pilot. The current valve stem hole is 5/8” in diameter so I chose to go with that size.
The pilot bit for the counterbore is 3/16” in diameter. Because of this, I used a 3/16” bit and drilled a pilot hole from the inside of the rim, perpendicular to that section of rim, to the outside. I used the existing hole to gauge where to drill and the angle at which to drill. Once I had drilled this pilot hole, I inserted the counterbore and pilot bit into the pilot hole and made a flat surface on the inside of the rim.
 |
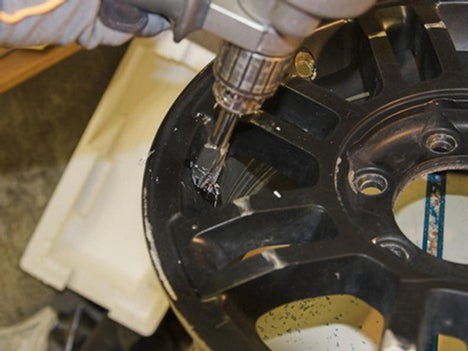
Once I was done on the inside, I turned the rim over to do the outside. This is where I had figured the pilot hole would be critical. I had prepped the counterbore and pilot bit as you typically would, with the pilot bit’s fluted, drilling end out. I had no issues drilling and boring the inside face, but within moments of starting the bore on the outside face, the pilot bit broke. The lateral forces were too much and the bit broke in the fluted section. I thought about it for a moment, got another 3/16" bit, and inserted it backwards into the counterbore. This allowed only the shank to be exposed and that acted perfectly as a guide and had full strength as none of the flutes were exposed or allowed the bit to flex.
 |
Once I got past that, everything else was easy. With a little Tap Magic as a lubricant, the counterbores cut the rim like a hot knife in butter and I had all five wheels drilled in no time. The first wheel took about 45 minutes to setup and drill, the second took about 15, and by the time I had done the last wheel, that time was down to about 8 minutes. I finished up by smoothing any sharp edges with wet/dry sandpaper.
 |
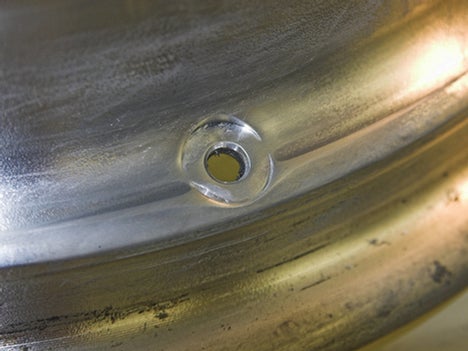 |
After I was done drilling, I cleaned up the wheels and gave them a fresh coat of black wheel paint and I was off to mount up my new Hankook DynaPro RT03 tires and Staun IBL.
At this point I advise you to make close friends with the guys at your local gas station or tire retailer. Being able to install the tire with the aid of tire machines can be great help. I was lucky enough to have a friend at a local motorcycle dealership who offered to let me use one of their tire machines. (Thanks go out to Greater Boston Motorsports)
Staun provided a fairly thorough DVD with instructions for mounting the tire and IBL. The same video is available on the web, so if you didn’t get the DVD you still can see the installation video.
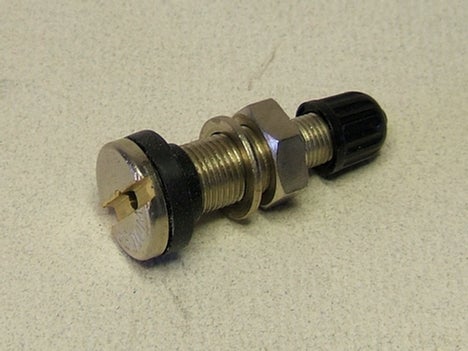
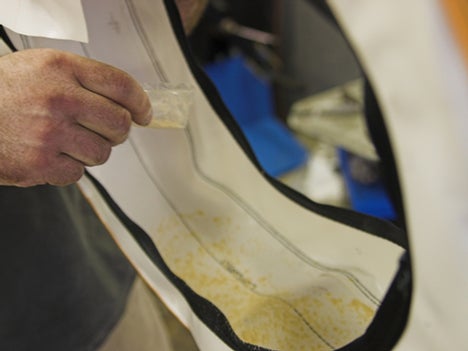
When you open up the package that the IBL comes in you’ll find the Kevlar bead lock case, an inner tube, a special, high quality metal valve stem, and chalk powder.
The instruction video has you to start by liberally coating the inner tube and the inside of the bead lock casing with the chalk powder. It also has you coat the inside of what is called the “air channel flap” with the powder.
 |
 |
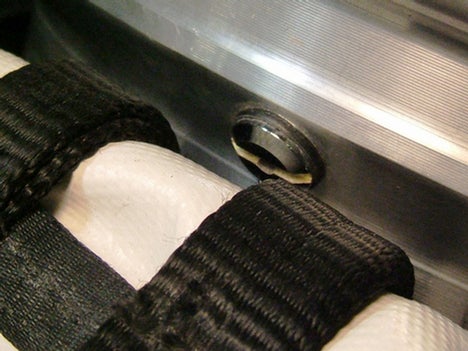
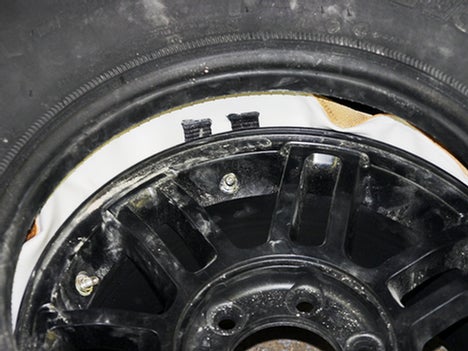
Mount the special valve stem to the rim in the standard, original valve stem location. There is a grove on the inside of the valve. Make sure that this slot is perpendicular to the edge of the rim. This will help prevent the valve from being blocked.
Now, either manually or with a tire machine, put the inner bead of the tire onto the rim. I chose to remove the wheel and tire assembly from the tire machine and to put it on the floor. I used large blocks to lift the tire up off the floor so that access to the tire chamber was allowed.
At this point place the bead lock casing inside the tire and work the inner bead of the casing over the rim. Using the well of the rim will help out as it gives you a bit more room to work. When you do install the casing make sure that the air channel flap is to the outside and be sure to position it so that the air channel flap is inline with the new special valve stem.
 |
Insert the powdered inner tube into the bead lock casing. Start by putting the tube valve stem into its hole and then loosely threading the locking nut onto the stem. This will prevent the tube from pulling back into the tire. I found that adding a small amount of air to the inner tube gave it some body and helped in the installation by preventing the tube from twisting.
Once the tube is in place, tuck the air channel flap under the tube, above the special valve stem and start working the outer bead of the bead lock casing onto the rim. Doing this was easily the most challenging part of the project. Due to where the valves are in relation to the rim on the OEM H3 wheel, you are unable to utilize the well of the rim to ease getting the outer bead in place. This makes it “less than easy” getting the bead in place. It will go, but it’s not a cake walk.
 |
Before proceeding to mount the outer tire bead, you need to check that the tube is not under the outer bead of the bead lock casing and that the bead lock casing beads are not turned under or over. Any of these could cause the tube to get pinched and potentially fail.
Once you have checked the tube and bead lock casing, you can move on to mounting the outer bead of the tire. Be sure that the Air Channel Flap is neatly positioned above the valve stem and that the channel extensions are between the bead lock casing and the inside of the tire, not between the tire and the rim. When you start installing the tires outer bead, be sure to END at the valve stems, not begin. Staun warns that starting at the valve stems can cause excess stress on the valve stems and can cause failure of the valve stems.
Once you have installed the outer tire bead, you can seat the tire beads. You do this by adding pressure to the bead lock. Make sure not to exceed 50psi when seating the bead. If you need to exceed 50psi to seat the tire beads, add pressure to the tire until the beads are seated. I found that I was able to seat the beads using pressure in the Staun IBL alone.
Once the tire beads are seated, remove the valve core from the IBL and allow the tire to fully deflate. Reinsert the core and then fill the Staun IBL to 50psi and tighten the locking nut on the tube valve stem. At this point, fill the tire to 30psi. Once this is done, remove the valve core from the tire valve. The tire should loose pressure freely and rapidly. If it doesn’t, then a mistake was made when positioning the air channel flap.
On my third wheel I got cocky and rushed through things. That was a mistake. I failed to correctly position the air channel flap. I had removed the tire valve core, expecting lots of air to escape out. Instead, I got nothing. The Staun IBL was pressurized and it sealed the tire valve stem, preventing air from escaping. Trust me; you don’t want to make this mistake. It’s not terribly hard to correct, but it is a pain.
I was forced to unseat the both the inner and outer tire beads, remove the outer bead, remove the outer bead lock casing bead, reposition the bead lock casing and the air channel flap, and then go through the install process again. It’s better to take a few extra minutes and get it right the first time, especially as it’s not hard to get it right.
If the tire pressure flows freely when the valve core is removed then you have positioned everything correctly. At this point remove the Staun IBL valve core as well and allow both chambers to empty. Reseat the valve cores and inflate the Staun IBL to 50psi. Then inflate the tire to its normal street pressure, or to a maximum of 44psi. You are now ready to go enjoy your new bead locked wheels!
 |
Living with the Staun IBL’s has been easy. The supplied valve stem covers are different for the tire valve and for the Staun IBL valve. The tire valve cover is chrome and the Staun IBL cover is black. This helps to show which is which. I can tell which valve stem belongs to what chamber easily, but explaining it to others can be a chore.
I took my truck in to have an alignment done prior to driving west for X Rocks 2007, and despite my explaining which stem to check for tire pressure, the technicians still needed me to walk out to show which stem did what. To help prevent this in the future, I’m considering having stickers made up to show which is which.
In the time I have had my new ‘Kook’s and Staun IBL’s on project Polar H3, I have driven approximately 7000 miles. The vast majority of that mileage was on the highway between Massachusetts, Colorado, Utah, and back again.
I can confidently say that in all those miles, I haven’t noticed any negative side effects from driving with the Staun IBL’s installed. Highway comfort remains unchanged. I have seen no noticeable increase in stopping distances. Gas mileage remains unaffected. Even when I had them balanced I noticed no ill effects. Of the five wheel combinations, the worst required only 6.25 ounces to balance. The best needed only 1.25 ounces and all were perfectly balanced in two spins or less. On wheels with over 100lbs of rim, tire, and bead lock I’d say this is pretty impressive and goes to show the attention to quality and craftsmanship that went into making the Staun IBL’s and the Hankook DynaPro MT RT03.
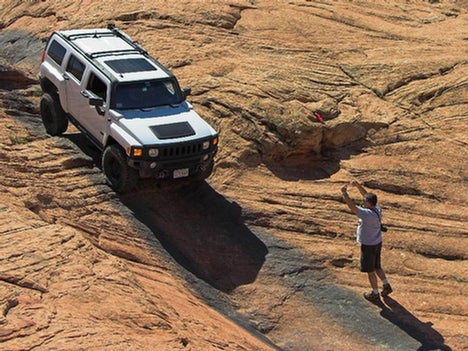
Just the other day, I was wheeling and I had the misfortune of breaking both tie-rods. I was prepared with one spare, but that only solved half my problem. Unfortunately, since I only had one spare, I needed to be dragged off the trail. That drag turned out to be roughly three miles long. I was able to steer with the driver’s side front wheel, but the passenger front wheel just flopped about, despite our efforts to keep it straight. For roughly three miles that tire was subjected to radical side loads. Those loads could have easily unseated one of the beads. Surprisingly, the tire stayed put and rolled along.
The Staun IBL does exactly what it is supposed to do; it has kept my tires right where they belong, solidly on their rims. Are they easy to install? Not exactly, but they’re not all that difficult to install either. If you enjoy working on your truck and can be careful and methodical, then installing the Staun IBL should be right up your alley. Would I recommend them to a friend? In a heartbeat!
No one likes Hummers more than the editors of Off-Road.com. So keep an eye out for more Hummer tech, only at Off-Road.com!.
|


 Your Privacy Choices