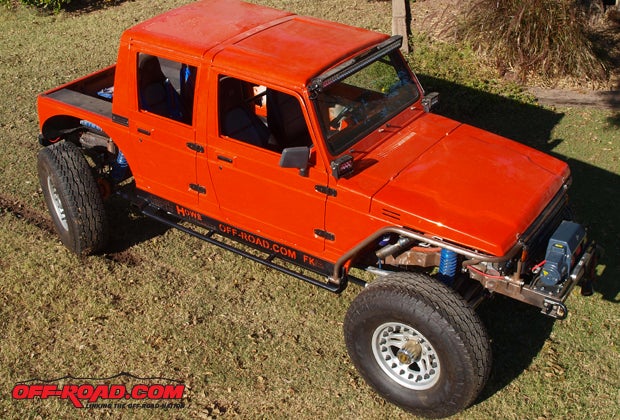
After receiving the door panels from Mendoza's Off-Road Center, we were really seeing the detail work start to come to an end. This meant the task of tying up all of the loose ends. One of those tasks was installing the door glass and regulators. After cutting the rear doors down to half of their original size, we thought this was going to be quite a challenge. As we told you earlier, we stole the rear glass from my wife's 2009 four-door JK.
The curve of the glass, size of the glass, and even the notched corners on the bottom of the glass fit perfectly. It was as if they were straight from the factory for a four-door Samurai. It turned out to be a fairly simple job to fabricate the parts needed to make the rear windows work. We had a set of old Bronco doors laying around, so we took the window guide that separates the wind wing from the window and took the wind wing off of it along with all of the rubber.
We then cut it to length and welded tabs onto it so that we could bolt it into the Samurai door. We also made fillers out of some sheet metal. Now came the regulators. Because our rear doors were so much smaller than the original, using a scissor regulator was not going to work. We decided to get some universal power window regulators, which are most commonly used in street rods and muscle cars.
Previous Project Samurai Stories
Part 8 Completing Interior & Controls
Part 6 Exhaust, Driveshafts, Lighting
Part 5 Instruments and Hoses
These regulators use a cable to raise the window up and down. Power windows using cables usually have a limited life span, especially in an off-road vehicle and we definitely did not want to be doing this again. So we got on the Internet and found Nu-Relics Power Windows. We spoke with Dusty, a former off-roader, about our project. Nu-Relics has all kinds of patterns for street rods and muscle cars but, you guessed it, nothing for a Suzuki Samurai, let alone a four-door.
But he was up for the challenge. He located an old Suzuki door through a friend, and with just a few pictures and some measurements he was able to build gear-driven regulators for our four-door Suzuki. This made the installation a breeze and it came with a lifetime warranty, making the money spent on this well worth it. On every build, you'll always have that one part of the project that's intimidating, even to a seasoned pro. And figuring out these power windows would work was that for me, but Dusty made this issue almost embarrassingly simple.
Halfway through this part of the project, we went to the SEMA show in Las Vegas to see all of the new toys and products. As all of us off-roaders know, bead locks can be very expensive. And because of that, not everyone on the trail has them.
The first thing we do on the trail is to air down to 5-10 psi, and those without bead locks will try to stay safe by only going to 15 psi. The inevitable will always happen and someone will break a bead. Out comes the ratchet straps and the cheesy little 12V compressors, while we try to kick and pull on the tire, even pour a little beer on the rim trying to lubricate and reset the bead.
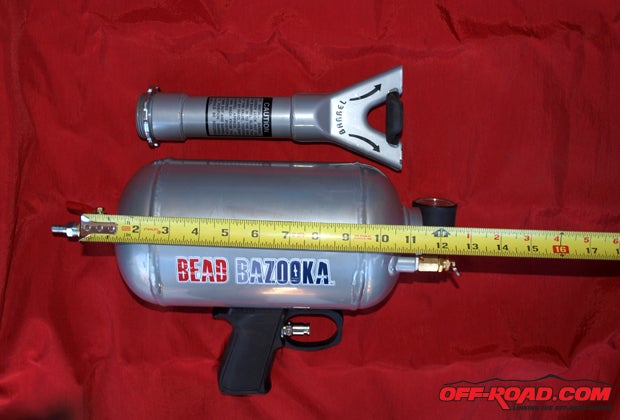
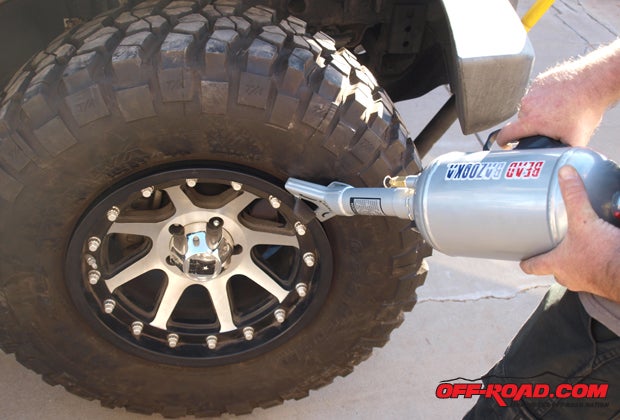
I found a very compact cure for this situation. It's called a Bead Bazooka. This needs to become part of your survival gear, just as you carry a high lift jack or a snatch strap. It can reduce down to as small as 12 inches in length. You will tempted to use it as potato gun or a golf ball launcher, and some "Tim Taylors" may be tempted to clear a drain with it. But let's keep it real. It's made for making the job of resetting the bead easy on the trail. And you don't have to remove the tire from the vehicle for it to work. No more gasoline, carb spray, or ratchet straps that could possibly take your head off.
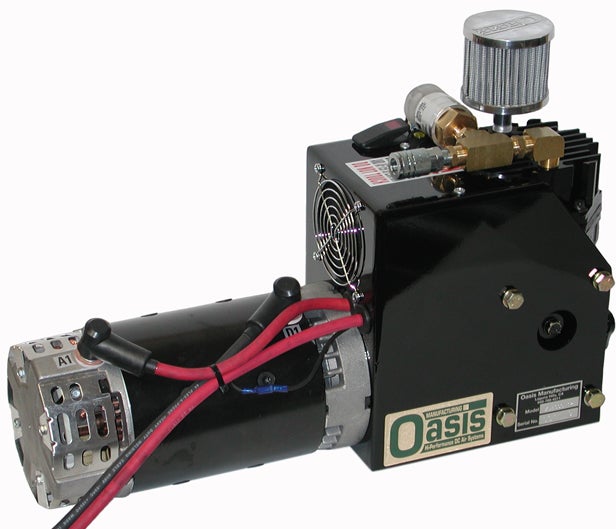
On our project Samurai, we don't have the room for on-board air, so while we were at SEMA, we looked for a high-volume 12V compressor. We came back empty handed. So I dug into my memory bank and remembered seeing an impressive portable 12V Oasis compressor one time on the trail. This compressor is primarily used in the industrial/commercial industry. Although a little spendy, as all good tools are, this is ideal for on the trail. This is the only 12V compressor on the market able to run a 1/2" impact without a tank. This compressor is able to fill a completely flat 37-inch tire to 35 psi in about 3 minutes.
While at the SEMA show, I ran across the Gear Wrench booth and shook a few hands and thanked them for the new pry bar I recently picked up on a tool truck. The toe of the bar is fully adjustable so that you able to get that perfect prying position, allowing the bar to do all of the work. The length of the bar is adjustable as well, from 30 inches to 4 feet. This bar can be used to dig like a hoe, pry rocks out from under your vehicle, straighten tie-rods, and pry damage away from the wheels or steering after having that unfortunate incident on the trail or race course. It has enough leverage and strength to handle the situation you may be tempted to use your winch on.
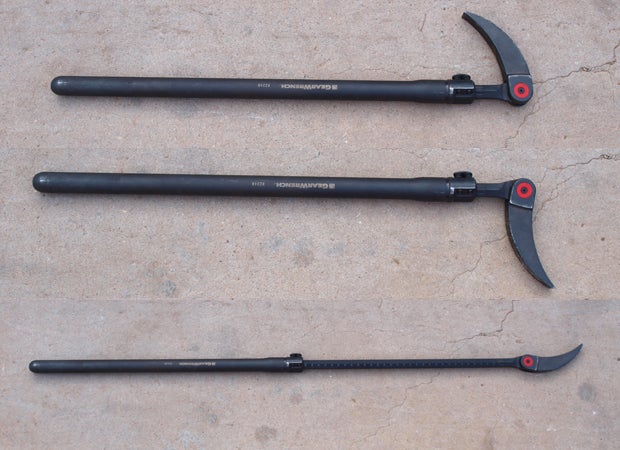
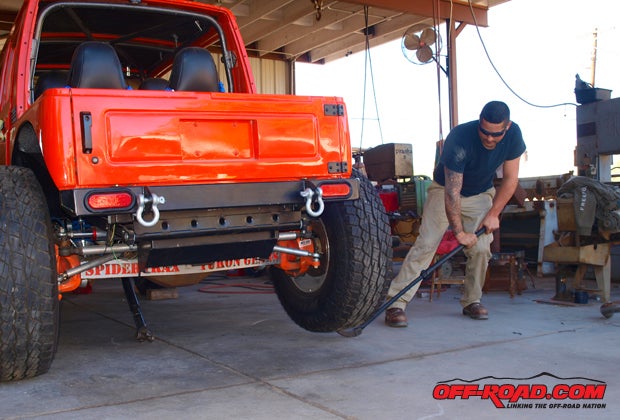
We used it to pick up one corner of the Samurai. We did it with very little effort and it didn't bend or bow. Its an absolutely great tool for Baja Trophy Truck teams and for any rock crawler or trail rig to have on board. It can easily be strapped to the roll cage without using much real estate. This is a serious tool. It will get you out and get you home. This also needs to become part of your trail survival kit.
Another neat little thing we ran across was the Factor 55 Prolink. This is a replacement end for your winch cable. It not only dresses up the look of your winch, but with the shackle it's quite adaptable to use other types of riggings, such as a strap, instead of using your rope line. That helps eliminates frays and snags on your synthetic winch line. It fits winches up to 20,000 pounds and stops hook rattle as well.
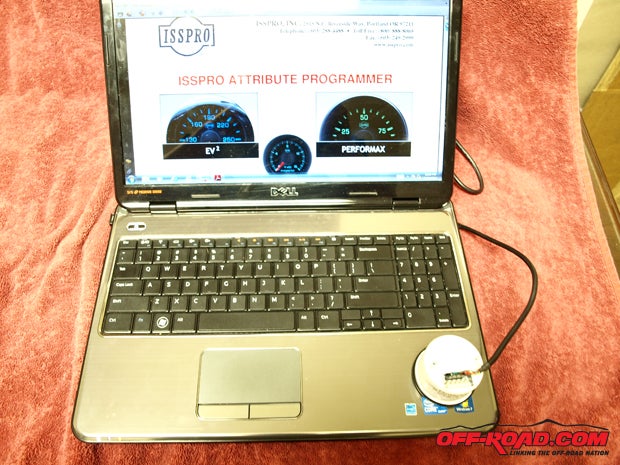
Before we headed to the dyno, we set up the warning lights on our ISSPRO gauges. A computer and the USB cable from ISSPRO is all thats needed to set it up. We will very soon find out if this Suzuki is truly a Jeep Killer.
Previous Project Samurai Stories
Part 8 Completing Interior & Controls
|
Off-Road.com Newsletter Join our Weekly Newsletter to get the latest off-road news, reviews, events, and alerts! |
Follow @Off-Road
 Your Privacy Choices