Built and designed by a close friend, Kevin Lake of Pahrump, Nevada, we worked together to come up with the features my wife and I wanted in our camping trailer. Kevin had already built two three custom trailers for himself, and I liked his latest trailer so much — I was suffering from severe trailer envy — I asked him to design one for me.
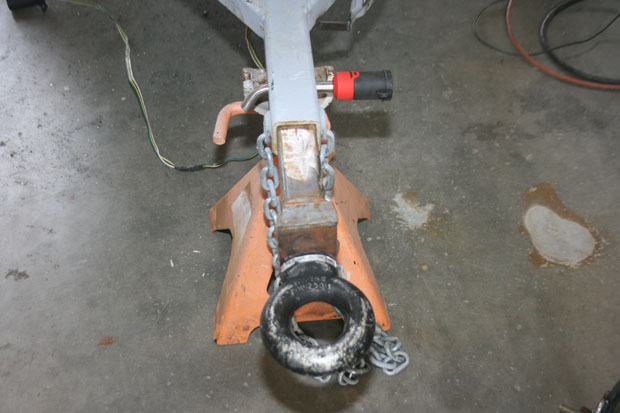
For the camping trailer’s coupling, we decided a 2-inch ball/coupler assembly with a receiver-type connection in the trailer tongue (a military-style lunar ring can also be used). We use a Bolt Receiver Lock to secure whichever coupler we’re using at the time (we also use a Bolt Spare Tire Lock to secure the trailer’s spare tire). For the tongue length, we measured the width of the Smittybilt Adventure Box, which we planned to mount on the tongue, and added it to the tongue’s length. In addition, to clear the toolbox’s lid, we added about 7 inches of clearance with the box. Next, we determined what distance would be needed to clear the Jeep’s swing-open spare tire and tailgate and totaled the entire amount.
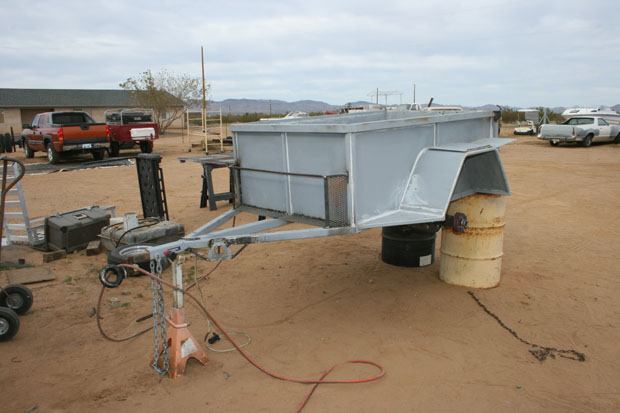
For the basic camping trailer design, we matched the trailer’s track width—the distance between its two tires’ midpoints — with the Jeep’s tires’ midpoints. On a soft surface — mud, sand, snow — this allows the Jeep’s tires, which have traction, to pack down the loose material, giving the trailer’s tires a more solid surface to roll over (the track width produced a 4-foot-wide bed). For the length, we decided on a 6-foot-long bed, which gave us a couple feet in addition to the width of the Smittybilt Overlander rooftop tent.
Construction
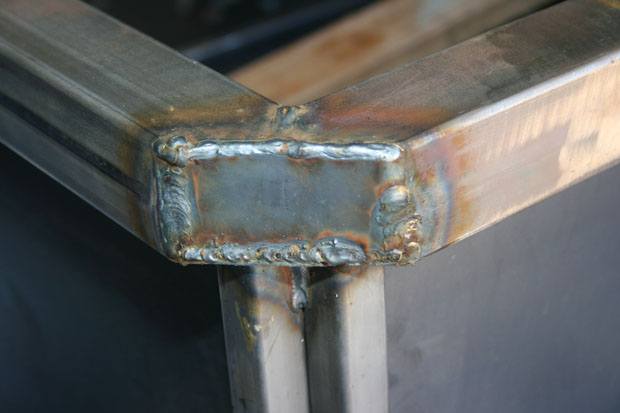
We used 2x2x0.120-inch steel square tubing for the basic frame, with a 7-foot length of 2-1/4×2-1/4×0.250-inch steel square tubing for the trailer’s tongue. By laying out the pieces of square tubing, we can mark the ends of each piece to cut them at the proper angles. With the angle cutting, we have longer weld joints, which are stronger than square-cut welds.
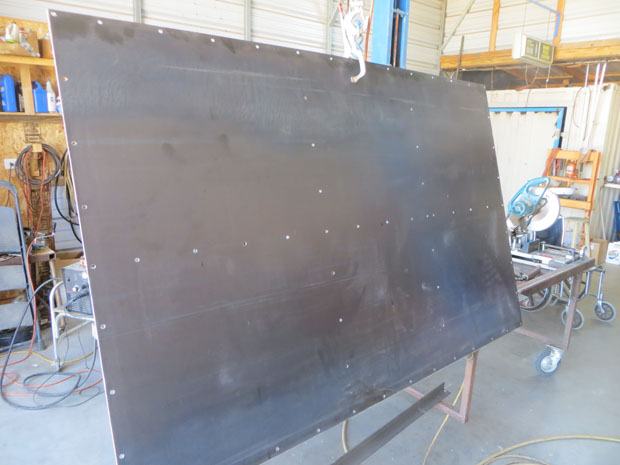
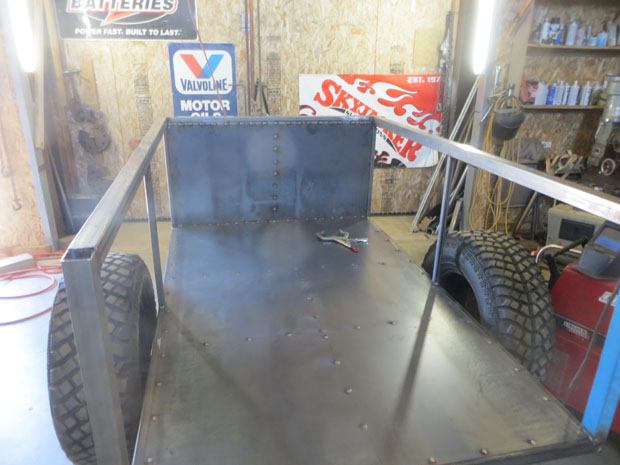
For the cargo box itself—flooring, walls, and the tailgate—we used 14-gauge sheet metal, with framing by 1x1x0.120-inch steel square tubing. Three sections of piano hinge were used to mount the tailgate. We used more of the one-inch square tubing, some heavy-duty rollers, and expanded metal for the cargo box’s roll-out tray, which makes loading and unloading the trailer much easier (as long as the rear of the trailer is supported).
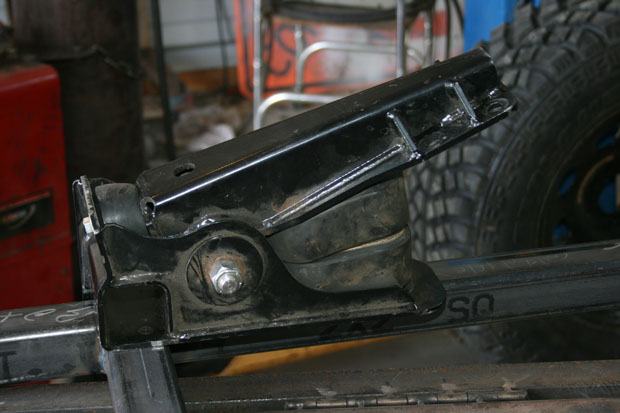
Instead of a typical trailer suspension with an axle that could hang up on rocks, up-thrusted roots, or the center ridge on a highly eroded trail; I opted for a Timbren Axle-Less Trailer Suspension (ASR2000HD). Timbren’s axle-less HD suspensions are designed to take the abuse seen on any off-road expedition. Timbren uses a softer Aeon spring for more suspension travel. A Timbren axle-less trailer suspension system compresses and becomes stiffer as the load increases, boosting spring strength; and the rebound springs act as a return device to minimize bottoming out and eliminate the need for shock absorbers.
Author’s Note: After we thought we were finished with the suspension, we decided to raise the camping trailer six inches for better ground clearance, additional tire articulation, and to better match the raised Jeep’s height. We simply used 6×2-inch steel tubing between the frame and the Timbren suspension units.
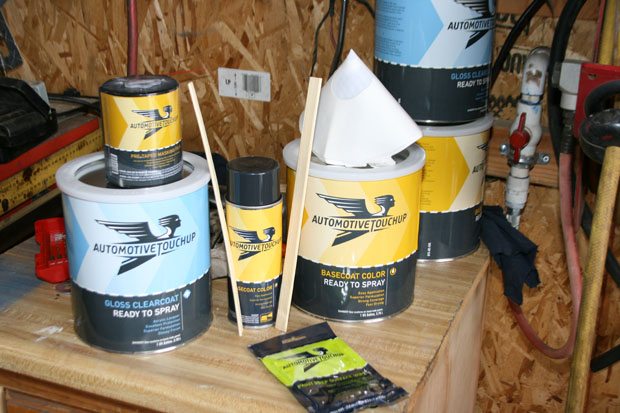
After several coats of primer, we sanded the entire cargo box—inside and outside—to prep it for painting. This step, although necessary, is exhausting! In order to match the great Maaco Ford Competition Orange paint on the Jeep, I contacted Automotive Touchup for the same color. Well-known for creating touch-up paint in spray cans, gallon cans or handy pens, Automotive Touchup sent me two gallons of color and two gallons of clear coat. Since this was my first time with a spray gun, I discovered two things: it’s a very difficult job to paint anything well, and the clear coat is needed to put a shine and a finish on the paint surface.
Livability
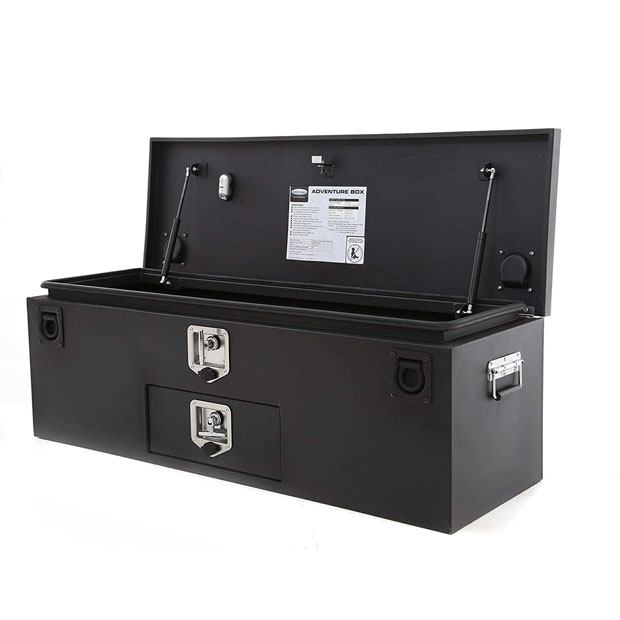
Mounting a Smittybilt Adventure Toolbox on the trailer’s extended tongue provides us with security, if needed, while away from the trailer. If you travel trails that are similar to the trails we travel, you’ll love having the lockable Smittybilt Adventure Box. Whether you are carrying camping supplies, recovery gear, or tools, it keeps your items safe and easily accessible. The 16-gauge steel box has gas-charged struts to hold the lid up.
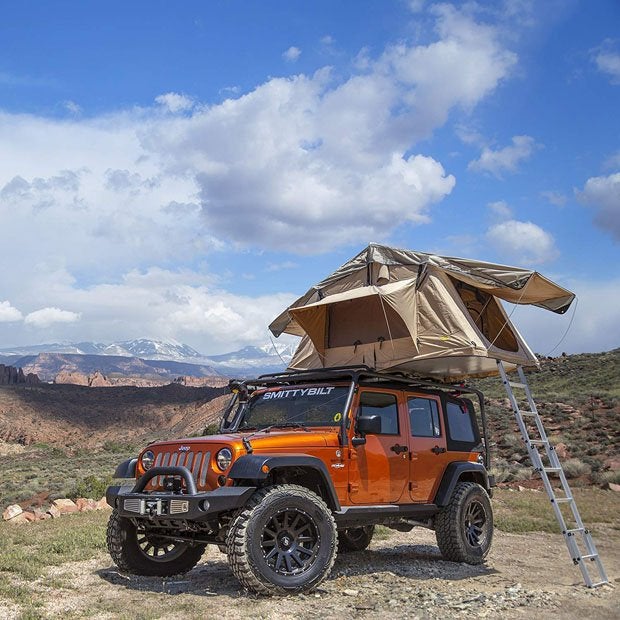
The Smittybilt Overlander rooftop tent, which is mounted on special bars bent to fit by Kevin, provides us with a comfortable 95×56-inch, high-density foam mattress that’s 2 inches thick, and the mattress even has a removable cover. Mosquito screens cover all windows and “doors” (there’s door at each end of the tent). A telescoping aluminum ladder provides access to the tent. An LED light strip is hung above the entrance adjacent to the ladder.
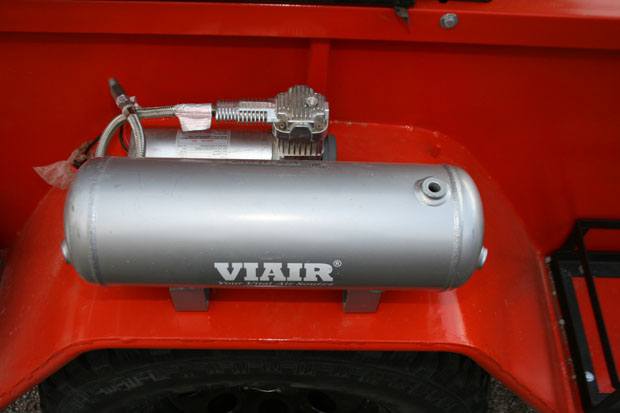
A Hi-Lift jack is also mounted to the curved bars that support the Smittybilt tent, and a Viair air pump and air tank are mounted to the passenger’s side fender. We mounted the Viair air tank outside of the air pump to provide protection to the air pump on heavily overgrown trails.
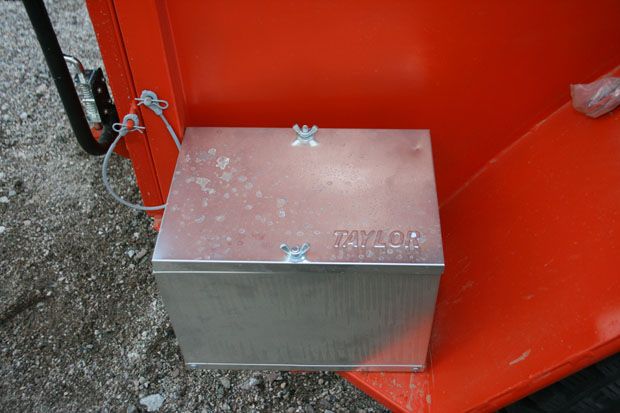
A secure battery box from Summit Racing—mounted on a fender brace on the trailer’s passenger’s side—protects and secures the deep cycle RV battery that provides power for a multitude of lights and the Engel fridge/freezer whenever the trailer is disconnected from the Jeep. We also have a 50-watt solar panel to sustain the battery for extended stays in camp. While traveling, the Jeep’s electrical system supplies power to the battery.
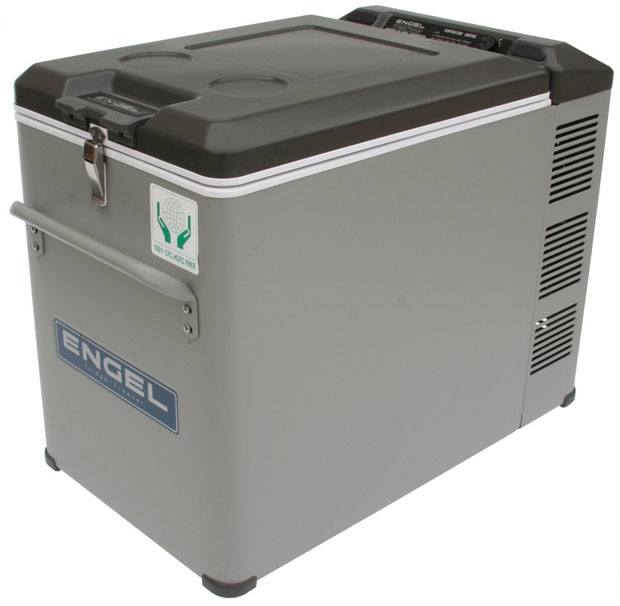
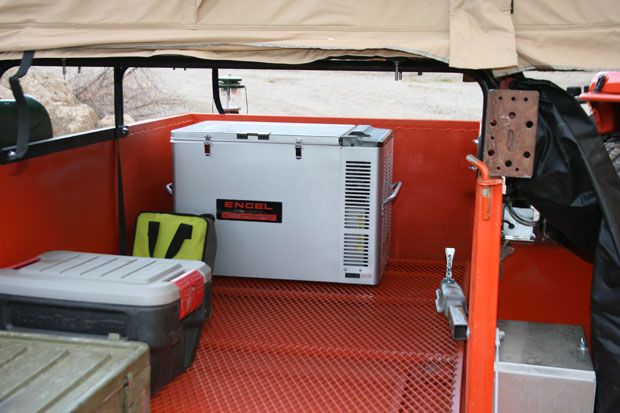
If you have the room and weight capacity, an Engel fridge/freezer is a great accessory for the camping trailer. It features a built-in digital thermometer and can be either a fridge or a freezer that’s capable of freezing almost anything. Since it is dual voltage (120VAC/12VDC), it’s ideal for long-term storage. I chose the Engel MT80, which is the company’s largest dual-voltage fridge/freezer and weighs 86 pounds.
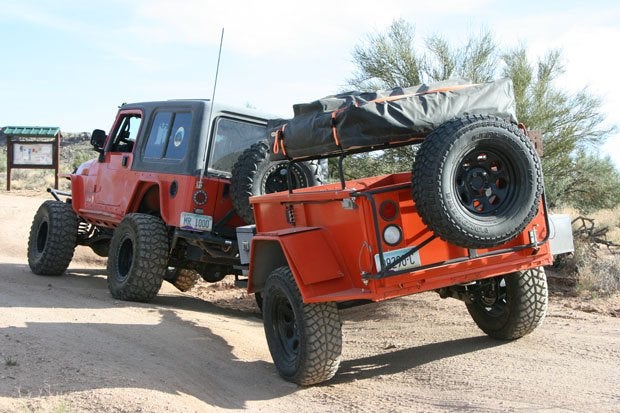
Add a trailer to your Jeep and extend and enhance your getaways tremendously.
How to Build Your Own Camping Trailer: Step-by-Step Guide
01: Adding a trailer to your Jeep increases your capacity for tools, supplies and equipment (including an Engel fridge and a Smittybilt rooftop tent), which can greatly extend and enhance your expeditions and enjoyment.
02: First step in construction is assembling the frame. After making sure the frame was square (matching measurements diagonally from corner to corner), all junctions were welded and then each weld was smoothed and inspected carefully.
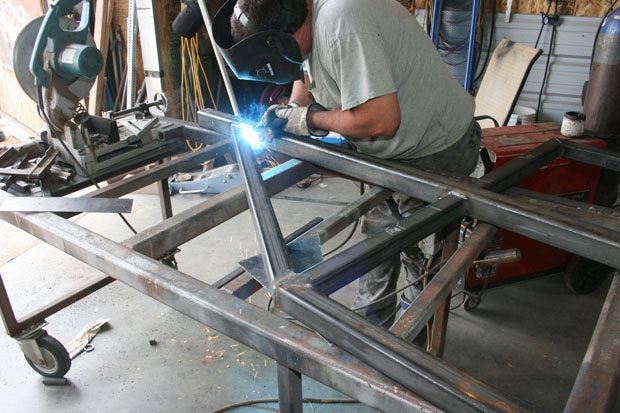
03: We bolted the Timbren axle-less suspension units to the frame, and then made sure they were square with the frame and with each other.

04: Once the Timbren units were square, we also welded them into place.
05: With the basic frame completely assembled—including the suspension—we flipped the frame upright and then moved on to assembling the cargo box framework components.
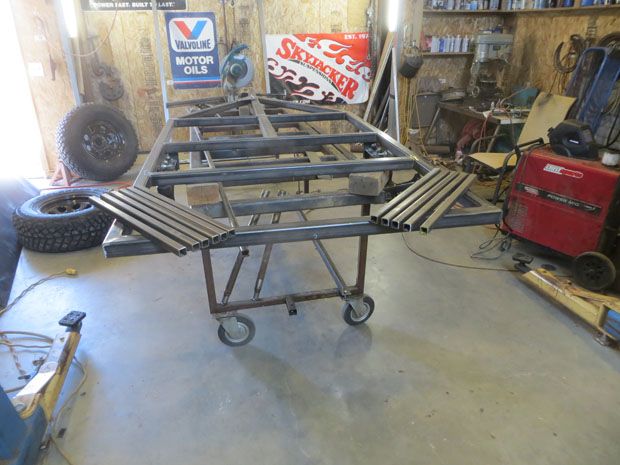
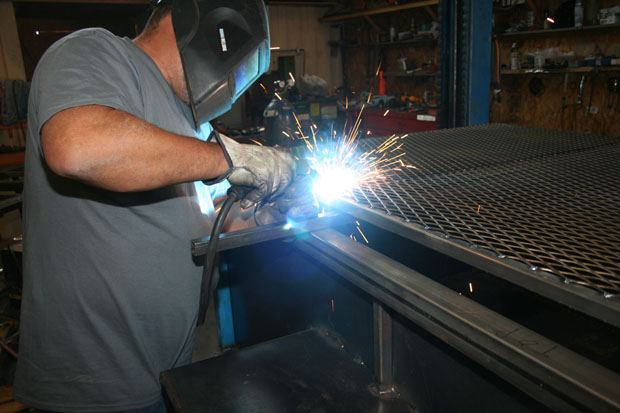
06: Each cargo box frame member was tacked into place and then the top frame pieces were added. Once we made sure every piece was square with the frame and parallel with each other, we finished welding them.
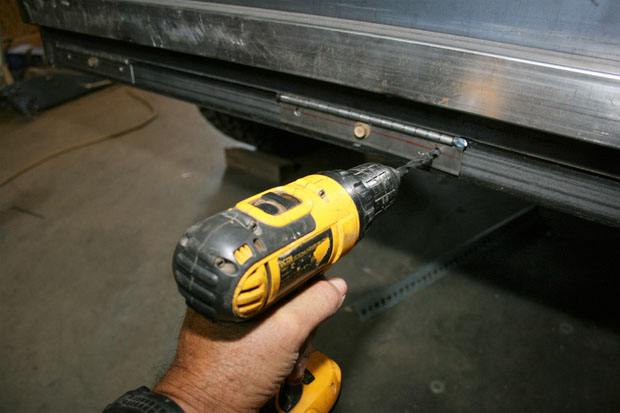
07: Kevin pre-drilled the cargo box’s floor for plug welding it to the camping trailer frame.
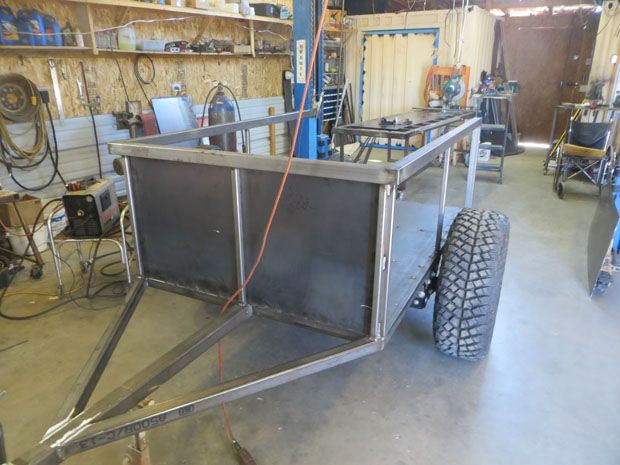
08: We completed the Timbren suspension with hubs (we recently added the brake assemblies) and wheels, and then with the cargo box framework in place, we began attaching the box’s sheet metal.
09: As you can see, the floor and front wall are plug-welded to the frame. All welds will be smoothed down.
10: Both front corners of the cargo box were cut and angled to add strength and avoid scratches and scrapes on future travels.
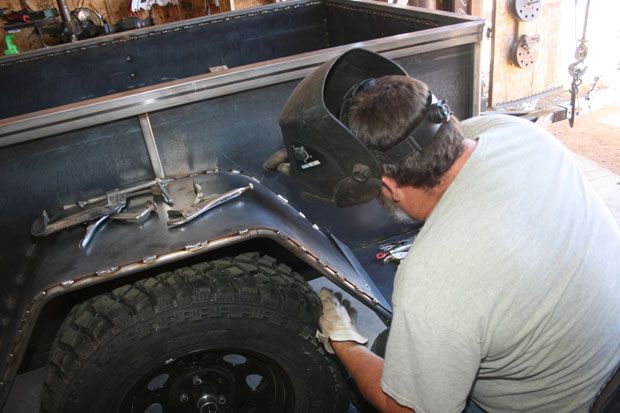
11: Once the cargo box was completed, Kevin formed the fenders and reinforced them with steel tubes. Again, all welds were smoothed and surfaced for future painting.
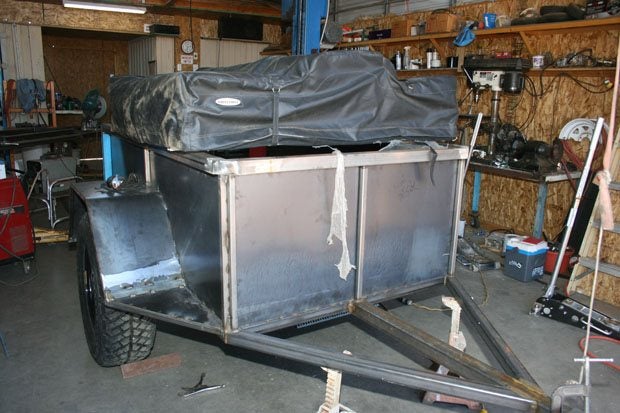
12: This was the very first time we placed the Smittybilt rooftop tent on the trailer to ascertain how we were going to mount it. Initially, we simply bolted it to the cargo box’s top railing.
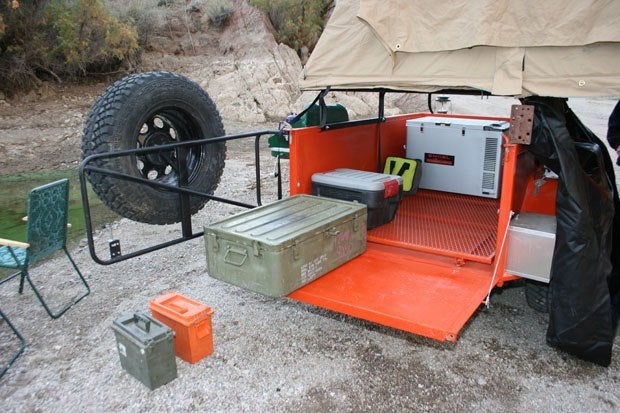
13: To simplify loading and unloading, we built an expanded metal tray on heavy-duty rollers. It covers the entire cargo box floor and provides a non-skid surface and tie-downs for cargo containers.
14: We used heavy-duty piano hinges for the tailgate.
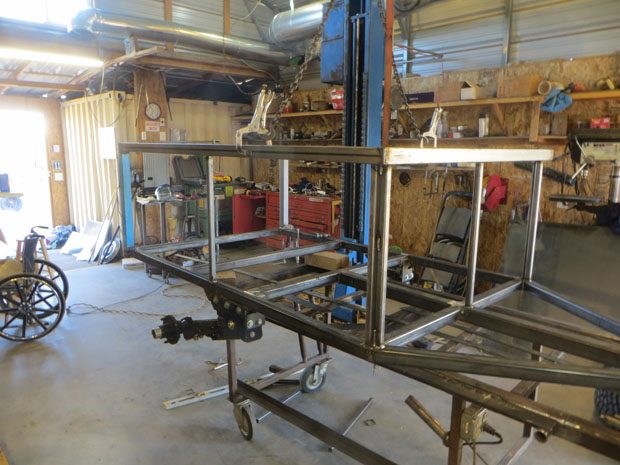
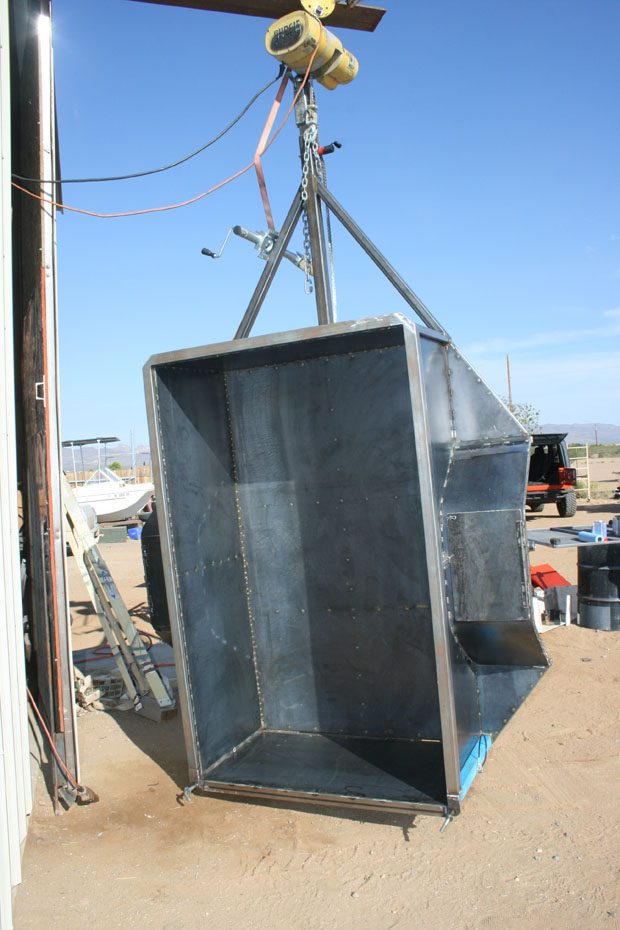
15: To ease applying the primer, we hung the trailer from Kevin’s hoist. We could actually paint the entire camping trailer while standing.
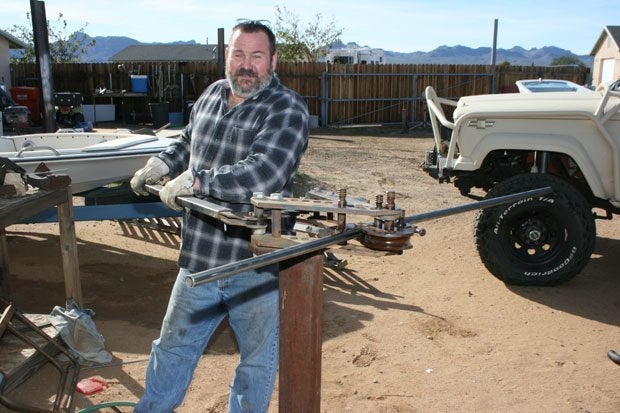
16: Kevin Lake is bending the tubing for the trailer’s spare tire carrier. He designed and built the carrier, which is mounted to the cargo box.
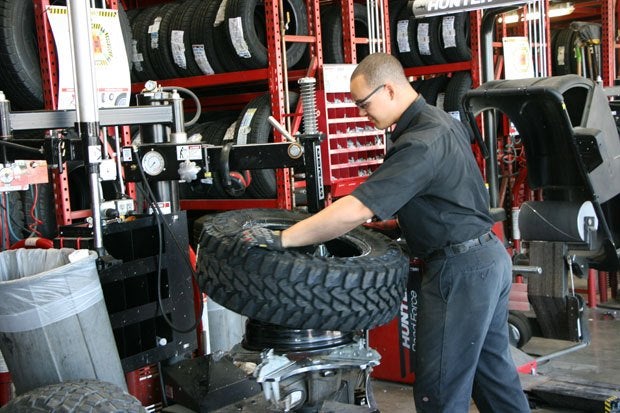
17: Discount Tire in Kingman mounted and balanced our Yokohama Geolander M/T G003 265R70x17 tires on Cragar rims. The rims’ lug pattern matches the Jeep’s, which gives me two spare tires (albeit different sizes) for either vehicle in case of an emergency.
18: Automotive Touchup sent me the paint, the clear coat, breathing masks, wipes, and filters. Plus a spray can of touchup paint for future scrapes and scratches.
19: We placed the trailer on supports and pulled the tires in preparation for its paint job. Eventually, we’ll completely undercoat the cargo box and fenders.
20: After sanding every surface on the trailer, Mike Barnes and I took turns spraying several coats of competition orange on the cargo box—inside and out. We then followed it up with several layers of clear coat. We also painted the interior rolling tray orange.

21: For both security and convenience, the camping trailer can be equipped with a 2-inch ball coupler or a military-style pintle hook/lunar ring set-up. Either way, the towing system is secured by a Bolt single-key receiver lock (the Jeep’s ignition key operates the lock).
22: Kevin built a raised frame to support the tent. We had to assemble the tent—it’s shipped from 4Wheel Parts with all parts inside the tent—and then bolted it to the framework before placing the assembly on the trailer’s cargo box top rails.

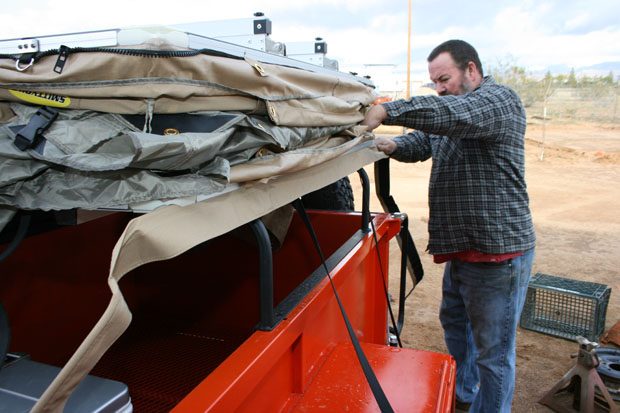
23: After placing the tent and carrier on the box rails, we inserted the Velcro strip around the tent’s base. The weatherproof tent cover is secured to the Velcro strip during travels.
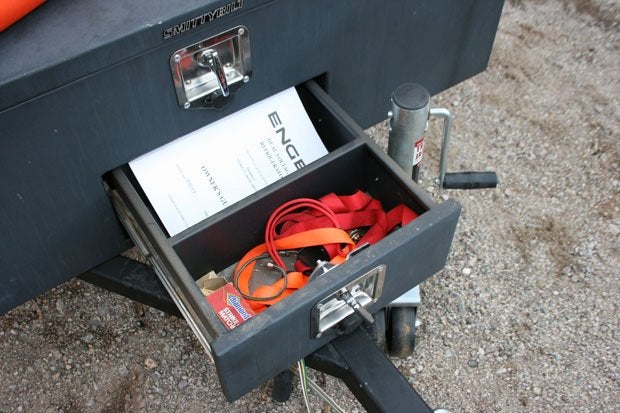
24: In addition to the large cargo area in the Smittybilt Adventure Box, a lockable drawer can keep small items separate and easy to access.
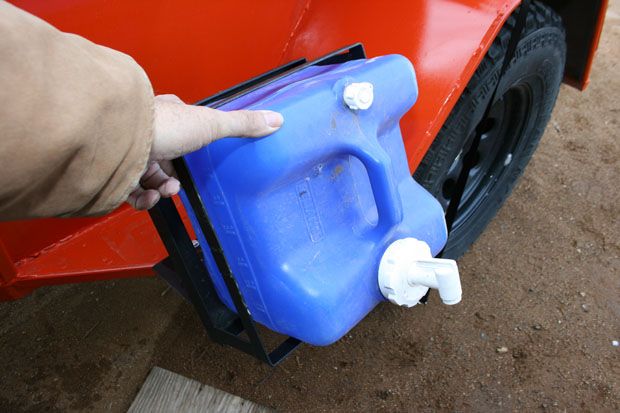
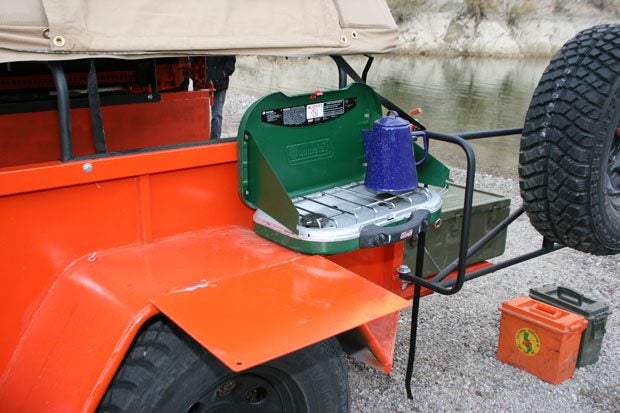
25: Water containers are carried on both sides of the camping trailer. The framework built by Kevin will hold either the seven- or three-gallon container. The cooking side container is hinged and tilts for easy use.
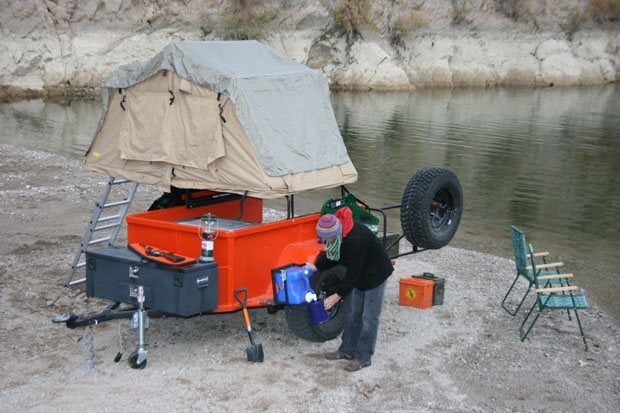
26: The tilting water container makes camping life much easier.
27: A Taylor battery box—large enough for an RV deep-cycle battery—was purchased from Summit Racing. The kit came complete with everything but cables to secure the box and battery.
28: A Viair 12VDC compressor supplies the air tank, which can then run air tools, fill tires, etc. We placed the air tank outboard of the compressor to protect the compressor from brush and trees along the trail.
29: With the tent carried toward the rear of the cargo box, it leaves clearance to access the Engel fridge, which is secured to the forward portion of the rolling tray.
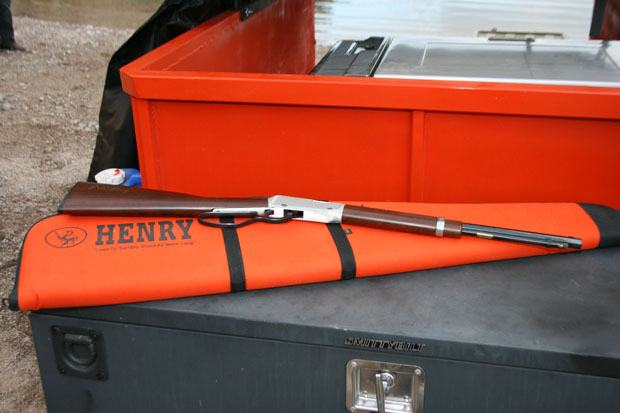
30: To enhance our camping experience—and to supplement the larder in emergencies—we include a Henry .22 rifle. We can plink with it or use it for meat if necessary.
31: Kevin designed fold-out working surfaces for meal prep. They fold down and are secured to the fender while traveling.
32: With the spare tire carrier swung wide and the tailgate down, the interior of the trailer is easily assessed. The tray can also be rolled out and the two legs can be dropped to hold up its end.
33: For 12VDC electrical appliances equipped with a male cigarette lighter plug, we attached this multi-connector panel.
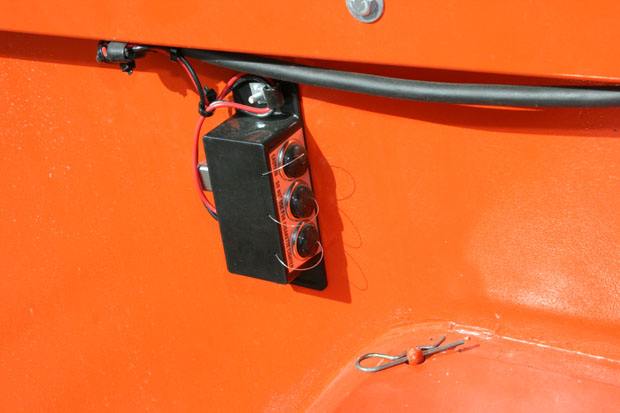
34: Years ago I owned a 1963 Toyota FJ45 ½-ton 4WD pickup. When I bought the FJ45 I found two 12VDC trouble lights using single-filament bulbs in a small wire cage with two hooks (one on the cage and one on the long cord) in the glove compartment. On the passenger-side firewall Toyota had mounted a double connector like this one. I still have those trouble lights (still with the original bulbs) and they make great camping lights, so we mounted this weather-resistant box.

35: Ready to roll, everything can be secured and packed. Automotive Touchup could not have matched the Jeep’s paint any better if it had come out of the same can.

Author’s Notes: You can increase the “fun factor” on a non-technical trail just by adding a trailer to your vehicle. It increases the technical rating of a trail by at least two. | I give my sincere thanks to Kevin Lake, Mike Barnes, and Precision Automotive in Kingman, Arizona, for all their work, suggestions, and support throughout this camping trailer project.
We are committed to finding, researching, and recommending the best products. We earn commissions from purchases you make using the retail links in our product reviews. Learn more about how this works.