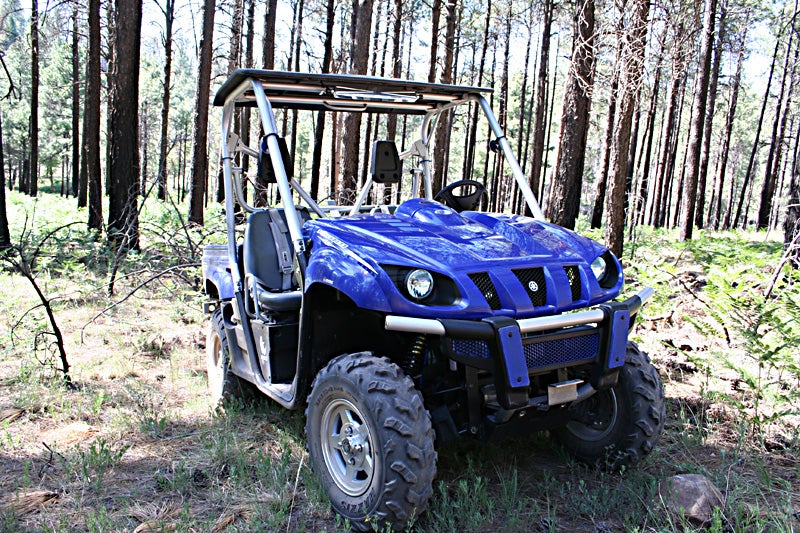
Project Blue Horn Rhino - "To Protect and Empower!"
This month we're going to add some protection, capacity, and reserve power to the Blue Horn...
This month we’re going to add some protection, capacity, and reserve power to the Blue Horn… Anything we add to this project is going to look good no matter what it may be. Having a vehicle that looks good doesn’t mean that it doesn’t get used; it just means that the quality of the equipment, installation, and proper care after the ride are in existence. As with any project, always allow for a realistic amount of time, a comfortable workspace, and the right tools to do the job. Cutting corners on any project will usually come back and bite you at the most inopportune time.
Getting down to the business of Protection
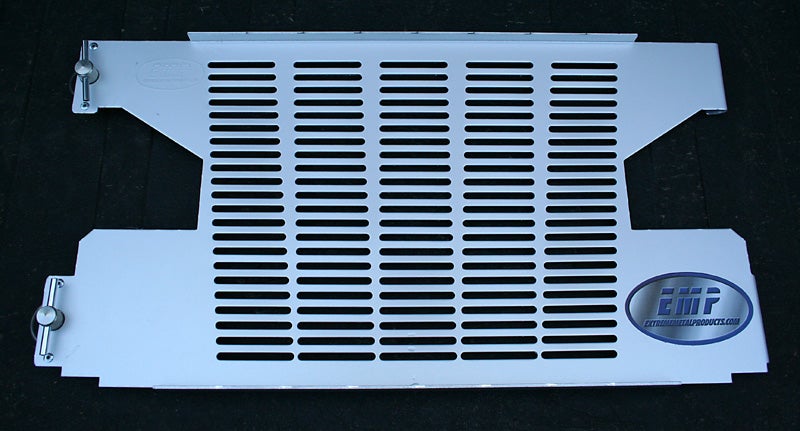
First, let’s look at two vulnerable spots we have at the very front of the Rhino; the radiator and oil cooler. These two heat exchangers contain the life bloods of the engine and yet they are the two most susceptible pieces of equipment at the lead of your vehicle. Not to worry though, Extreme Metal Products has a quick connect radiator guard made of 5052 Aircraft Aluminum that is fast and easy to pull on and off for cleaning and dislodging twigs that may find their way into the guard. This guard is also the ticket for those who frequent rocky trails and gravel roads, we all know how those sharp rocks like to ricochet off of the tires and into the front of the vehicle. No special tools or knowledge are required, just two quick flicks of the wrist and the guard clips on or off.
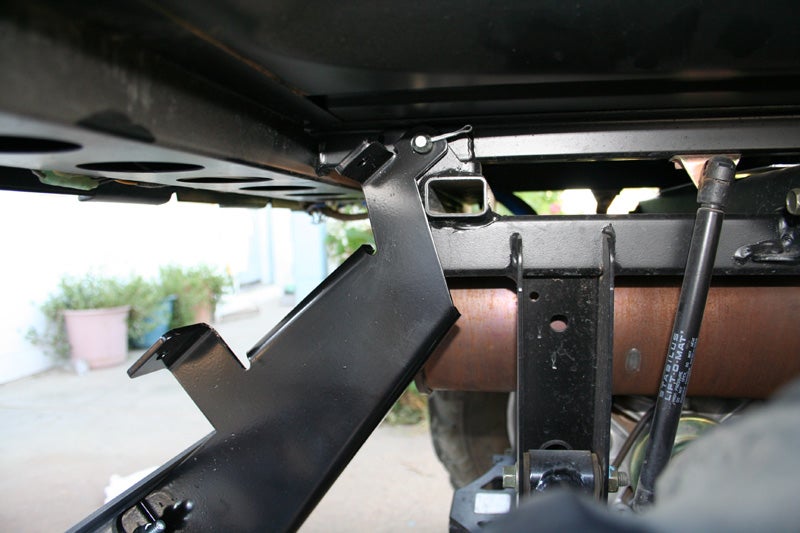
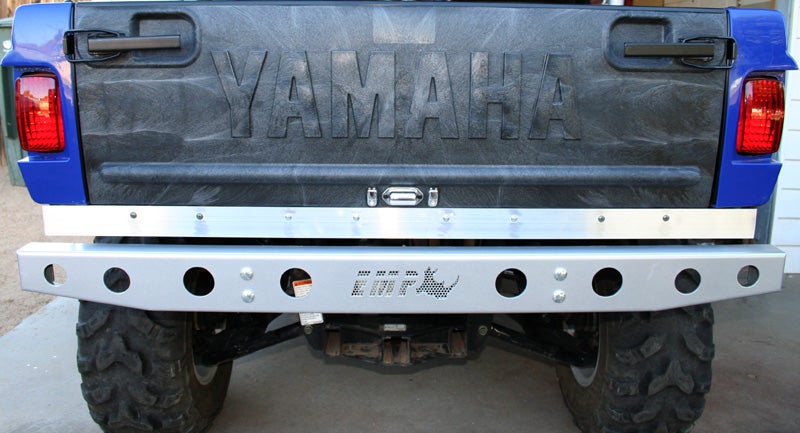
Extreme Metal Products also builds a bumper that not only protects the rear of the vehicle, but it also adds a look of completeness that the Yamaha engineers seem to have omitted. The bumper package is complete with (2) mounting brackets and all the hardware to mount everything securely to your ride. First I bolted the brackets to the bumper, and then removed the cotter pins from the hinge pins on the vehicle dump bed. Next, I slipped the new bumper brackets onto the hinge pins and re-inserted the cotter pins. At this point the bumper and brackets will hang freely while pivoting from the hinge pins (which is nice because EMP built these out of heavy gauge steel). Mounting the bracket on the hinge pins allows this install to be performed by one person very accurately (A+ for forward thinking). I lifted the bumper into position, marked the four holes of the bracket under the bed with a marker, drilled the holes in the bed, inserted the fasteners, and viola the bumper is now a permanent part of the vehicle. The bumper itself is available in black or silver powder coating depending on your Rhino model, or personal taste. After the install I decided to add a piece of aluminum flat stock to cover the tailgate hinge utilizing the existing mounting screws to support it. I’m very impressed with the look, quality, and ease of installation of these items from Extreme Metal Products and I’m sure you will feel the same way.
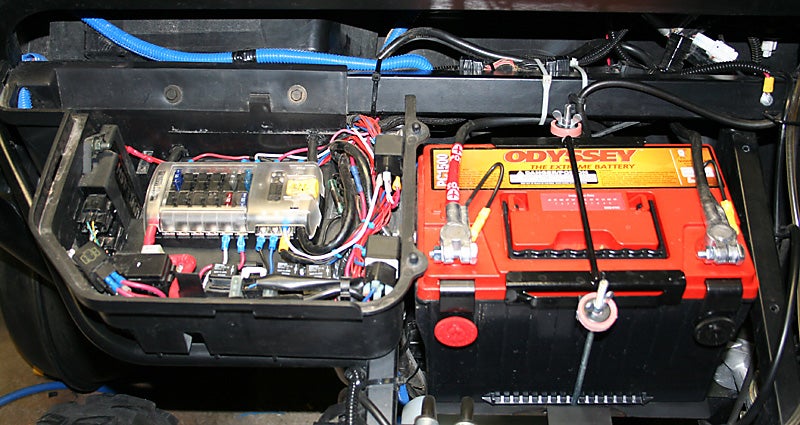
Power and Protection Just about any product we add to our vehicles will use power in one form or another. The power we’re going to speak of now will be power of the direct current nature. Whether we’re using lights, a winch, or a stereo, we’re utilizing power from our battery. The stock battery has only so much capacity, and most of us who are still using the stock battery are more than likely pushing its limits. The project Rhino is just about ready for a larger battery, but first I want to upgrade to a proper fuse panel. Currently all of the separate fuse holders I have installed for additional loads are littering the battery box in an unsightly manner. After shopping around I located a fuse block built by a company by the name of Blue Sea Systems that met the needs and physical limitations of the Project (not to mention my wallet). This item is a reinforced polycarbonate, marine grade, 12 circuit fuse block that accepts ATC and ATO blade type fuses.
With the equipment in hand I returned to the Rhino and removed the stock battery from the battery box which left a deep hole that I didn’t want to install the fuse block at the bottom of. I chose to build a shelf the same height as the existing ledge near the factory relays for easy accessibility. Fortunately I was able to locate a molded plastic part that “after some trimming” fit just like a glove. Keep in mind that whatever you build to support the fuse panel will be subjected to a large amount of vibration and some moisture. Now that I had a mounting surface, I began to clean up the wiring a bit. I re-routed existing circuits and identified them so that I could install the fuse block. Once the block was centered, I installed the mounting screws and began trimming the wiring to the correct lengths. I went ahead and temporarily set the existing positive and negative battery cables under their proper terminals on each end of the new block. These 2 locations will be the same positive and negative points that the larger cables from the new battery will terminate. On this block there are 12 positive fused circuits available along the sides (six on each side) as well as 12 negative points (6 on each side) that are stacked together on the top. The maximum rating per circuit is 30 amps, so be sure that you size the fuse and wiring for the proper current load. ODYSSEY POWER
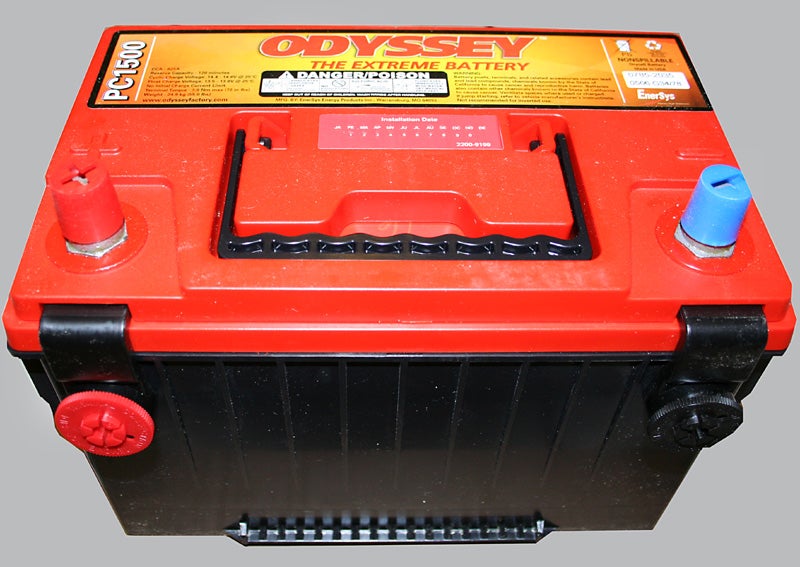
Now comes the power…My next step was to contact West Coast Batteries Inc. to find out which of their Odyssey Batteries would be best suited to power our project. West Coast Batteries recommended the Odyssey PC-1500DT battery. This is an Absorbent Glass Mat ( AGM) sealed, dual purpose battery. This battery performs the characteristics of two separate
Back in June I installed a battery tray supplied by Arizona Sports Center that will support this 53lb. Odyssey with no problem. I’ve decided to mount the PC-1500DT upright, and once it’s in the tray I will route the main cables to the panel. Maneuvering the battery into position was a piece of cake since they’ve included a nice pivoting handle balanced in the center of the battery. I chose #4 battery cables to feed the fuse block and routed the wires toward the dash of the vehicle, then behind the stock battery box. I drilled a hole across from each termination point of the fuse block for the battery cables to enter into the old battery box. I lifted the old battery cables that went to the stock battery off of the block and installed the new #4 battery cables, then re-installed the existing cables on top of the new cables and installed the nut, then tightened the connection. Once the main cables from the battery are installed on the fuse block these cables can be installed on the Odyssey battery (be sure polarity is correct). When all connections are tight, be sure to test each circuit one at a time to verify everything is working properly. The next step is to properly secure the Odyssey battery. There are several mounting options available at your local auto parts store that will keep your new power source from vibrating out of your ride.
I feel confident using my accessories at night now that I have ample reserve as well as the capacity for future additions. It’s always better to plan ahead and not put the cart before the horse, because accessories such as winches and high wattage lights will quickly drain a system that is not built to handle the extra loads. I would like to thank Rick Ott from Extreme Metal Products and Tony Goulet from West Coast Batteries for their contribution and support of this Rhino Project. As always, ride hard, tread lightly, and travel often… Mike Martin
Extreme Metal Products:
Quick Connect Aluminum Radiator Guard Yamaha Rhino Rear Bumper West Coast Batteries Inc. www.odysseybatteries.com Blue Sea Systems 12 Circuit Fuse Block PN:5026 |


|
Off-Road.com Newsletter Join our Weekly Newsletter to get the latest off-road news, reviews, events, and alerts! |
Follow @Off-Road
 Your Privacy Choices