Universal Shock Proof Stereo - Do It Yourself
Drown out all the broken part noises you've been trying to ignore!
In Which I Try To Be
Funny
You know what? My truck shakes and vibrates like a perpetually wet and blind dog wandering through the desert at night in December. With the hiccups.
Awww, now I feel sorry for the dog.....
Anyway, this is a product of the general state of most trail rigs. Unbalanced off road tires, dented wheels dented driveshafts and stiff heavy chassis lend to a teeth chattering kidney damaging ride. This may be an exaggeration for some, but at various stages in some of my projects, I've been in fear of my retinas detaching.
The point being (there it is!), that it is hard to keep most consumer level CD decks from skipping when installed in what are generally, old, cold, clanky trucks. I had a fairly nice deck in my truck that was neutered by vibration into a basic radio. Even when it wouldn't skip, in winter the cold would render playing CD's a fond and wonderful dream, but never a reality.
What? Fix the vibration? AHA! You forget where we drive these things. Off road terrain make the tunes skip more than a giddy schoolgirl on her birthday after she has found a bright shiny penny. Having an unbalanced rolling parts pile rolling over this awful terrain compounds the problem.
There is another problematic street intersecting the cold, inoperable, skipping CD player avenue. That street would be the problematic prospect of installing a stereo in a truck that is mostly or totally custom, as are most buggies, truggies, fuggies, and other odd non stock vehicles. Most off road trucks are also so old, they won't have proper wiring pre run anyway. In addition, if you want to install a CD player in your console or any other position other than horizontal, the player may not even work!
Well, I'm not here to complain and retail you with stories of horrid things, I'm here to mop. Err, I mean, help you along with a project.
SOLUTIONS! I'm filled with 'em. I'm like discount solution warehouse over here. (Credit to SB)
Ok, we are now going to go through the painstaking mind numbing process of wiring a stereo in PROPERLY, with custom touches to let it stand alone in ANY vehicle. The basic idea is to run the stereo independently off of the battery by way of switches.
WARNING
This is not an audiophile guide, it is just an base level explanation without advanced speaker wiring and explanations and assumes a basic grounding in low level audio wiring theory, so keep that in mind, tin ear. Also, not all methods are skip proof, only the ones incorporating portable audio players are skip proof, and some of them can be made to skip if you beat them enough.
Come to think of it, this article is kind of a vague niche market item. You need to know enough to wire in the equipment, but not so much you car about advanced speaker setups. Hopefully though, it will help you in some way. Onward!
Pick, Choose, Wire, Engage
Ok, here are the first steps:
(Note: I use deck, head unit, and CD player interchangeably
1. Decide which route you want to take. You can have a main head unit like the one you see in every car or you can not have it.
The advantages to having a head unit are that you have a radio and equalizer and many other various features right there, along with being able to power four speakers.
The disadvantages to having a head unit are increased costs in some cases and a possible increase in theft potential. it can also be hard to mount a head unit in some vehicles. If you choose a CD head unit it may HAVE to be mounted horizontal to use it's inherent CD capability and my malfunction in bad weather.
The advantages of not having a head unit are simplicity, ease of hiding the components to prevent theft, and minimal investment, though you will now need an external amplifier to apply this article's methods. This method also allows for a more weatherproof and versatile system.
The disadvantages are that you loose the advantages of the head unit, and some other stuff I can't think of, I'm sure.
2. Pick your components. Decide which of the above methods you want to use. Refer to the wiring diagrams further along to help you decide.
Head unit:
If you want to run one that is. You can get a cassette deck or a CD deck. If you plan on running a portable, you may want a cassette deck for a cool multifunction hullabaloo! Pick a name brand with the features you want. MP3 playback, satellite radio, equalizer, radio, there are many different models to choose from. I have had great luck with Pioneer, and that is what I use, but there are other good brands out there. If you plan on having a lot of amps, get a deck with a lot of pre outs. If you want to just run speakers off the deck only, make sure the deck is powerful. If you want to install this cleanly in the dash with a proper wiring harness and stock speakers in stock locations, you have treaded improper water wanker, this is for off road custom switched crazies. Just kidding, but that clean wiring stuff will NOT be covered, though the diagrams can be helpful.
Amplifiers:
If you want loud loud loud, this is where you need to stock up. Stock decks put out maybe 32 watts per channel constantly, while an amp can put out anywhere from 30 to 700+ watts out per channel constantly. You will really want an amp if you want your stereo to have highly defined bass, or if you want everything generally loud. If you run open top with no doors, you are going to need to drown road noise.
You don't need to buy high end amps, but don't by junk either. Consider how you will be wiring in your speakers to your amp and buy accordingly.
I run two amplifiers, a 150x2 and a 300x2. Audiovox and Profile respectively.
Speakers:
Make sure they can handle the power you plan to put into them. Again, don't buy junk. In a lot of cases you will be basically looking at 6"x9" speakers in boxes and maybe a subwoofer or two in a box. If you want to put speakers in factory locations, make sure you buy the proper size. I run two 12" subs, two 8" subs, two 6.5" speakers, and two horn tweeters. It's loud, not fancy, but loud.
Portables:
These are vital to no head unit installs. You can hook a portable audio device to an amps input with an 1/8th" Headphone jack to Stereo RCA adapter cable, available nationwide and everywhere. The possibilities are endless, MP3, CD, Tape, Satellite Radio anything you can carry around on your belt and plug headphones into can probably be hooked to an amp. You can also run a portable through an auxiliary input on select head units. The head units with CD changer input usually have aux input capability.
Keep in mind you can take portables out of the truck and enjoy them in other places, as opposed to an in dash unit.
Wiring:
Thick, with lots of terminal ends. Giant multicolor spools of wire. I recommend getting an amp wiring kit for each amp you install along with a big roll of heavy gauge speaker wire. You will also need a large assortment of terminal ends and a pair of terminal pliers. You may also need electrical tape, but you are not twisting wires together and taping them. That makes you a bad person.
Speaking of wiring, I take no responsibility if you shock yourself to death, so be warned.
*cough*
Onward!
Installation
Ok here is the short short short list of steps for wiring in your super cool stereo. Refer to the diagrams if you get lost.
1.
Install the various speakers you have. If using boxes, make sure they are SECURELY strapped and or bolted down. Nothing runes a cool guys and or gals day like a speaker box flopping around and or cracking said cool guy and or girl in the head. And or and or and or.......
2.
Install your amplifiers, but do not wire them yet. Make sure they are also secure, and have proper ventilation.
3.
Install your head unit, but do not wire it. Actually, wiring it installed is hard, so install as much as possible. May want to go all cool custom console like myself.
4.
Install all main electrical parts like battery terminal lugs and switches. If you want to use a portable, you are going to want to install an auxiliary cigarette lighter for it's power.
5.
Following the wiring diagram, wire everything up. The stereo deck is color coded properly. The amps are to also to a point. Use proper terminal ends, correctly rated fuses, correctly rated switches, and correctly rated wire. The product boxes should have the amp draw information somewhere. For safety, you will want to unhook the negative battery cable too, no use welding when you don't want to weld if you get my drift. Oh yeah, ground to nice clean bare metal with ring terminal ends. Those little circles on the diagrams or grounds aren't too helpful in explaining what they are. I also just realized I forgot the ground wire for the auxiliary cigarette lighter power source. Simple enough though, refer to the red sentence.
-
Pictures And Diagrams Make Everything Better
|
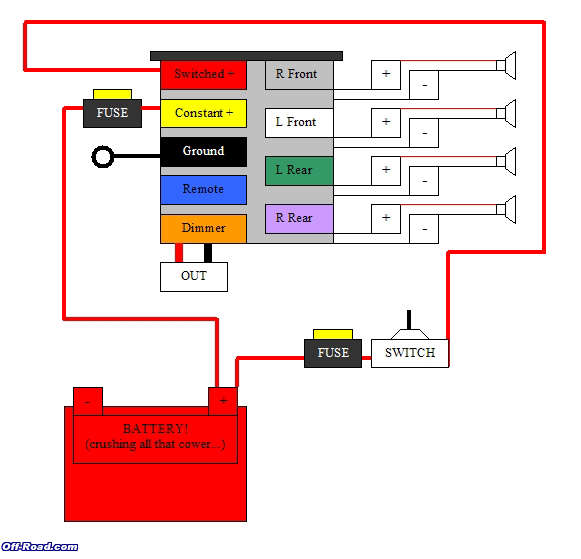
The basic stand alone switched deck wiring diagram. The cone things are speakers! |
 |
|
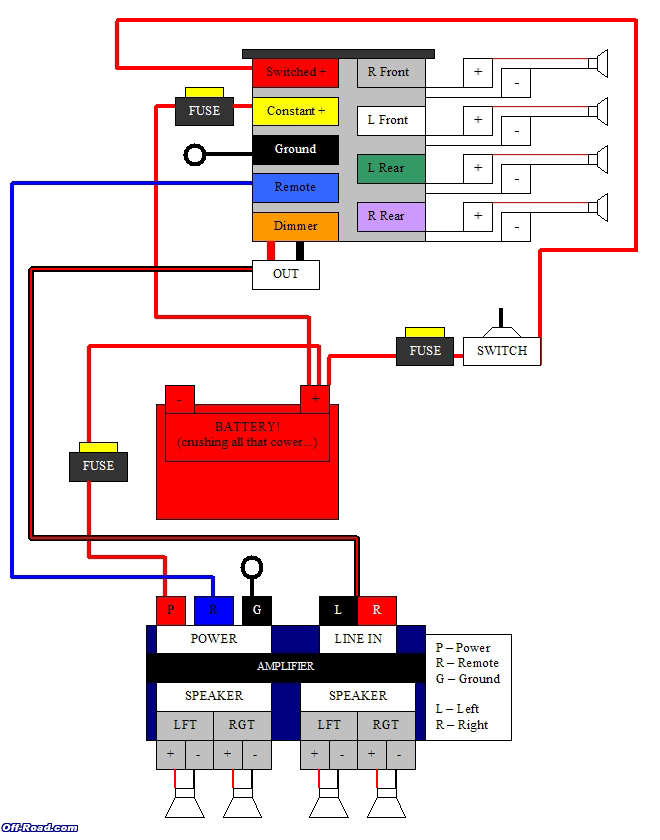
The basic stand alone switched deck wiring diagram. NOW WITH AMPLIFIERS !!! |
 |
|
The deluxe with bacon stand alone switched deck wiring diagram, with amplifier and and portable! My setup, works great! |
 |
|
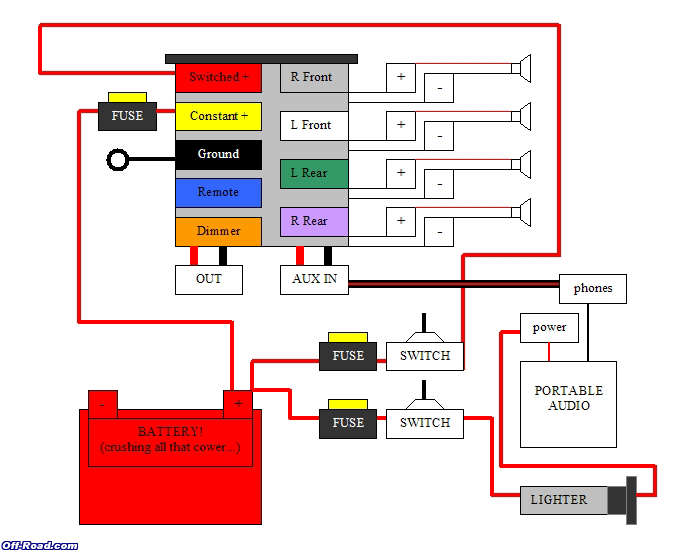
The oddly compelling stand alone switched deck wiring diagram, with portable, but without an amp. |
 |
|
The whole stinky smelly point of this article. The NO deck wiring diagram with portable of your choice! |
 |
-
Well, I hope those helped! Now a look at my system, wired as stated above!
-
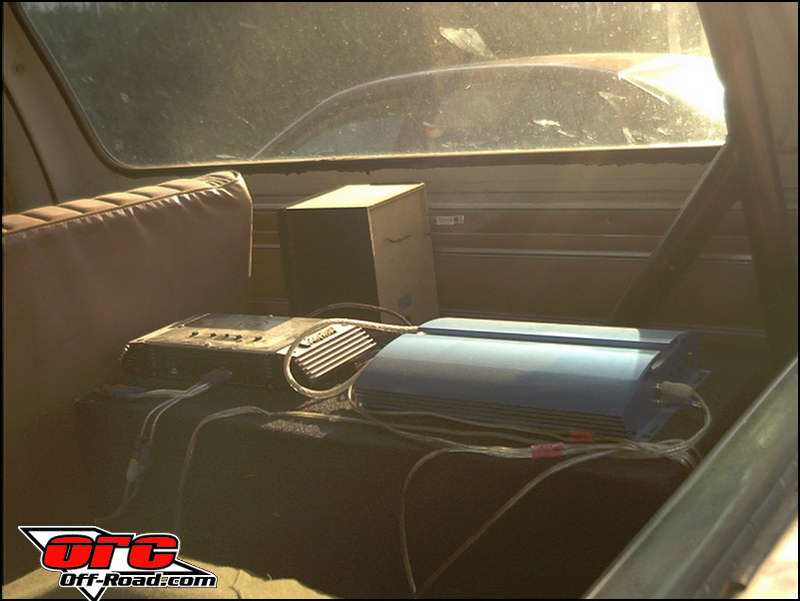
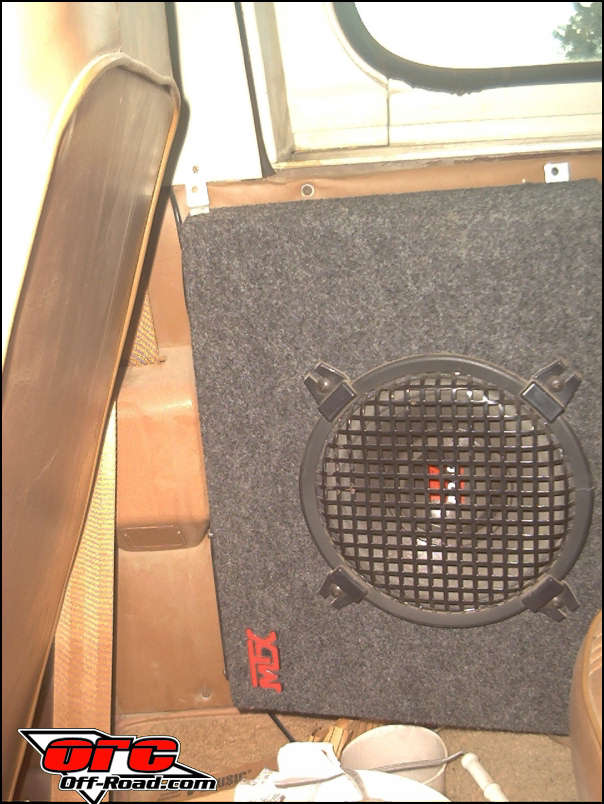
| I just screwed my amps onto my subwoofer box. The box is screwed to the floor. One time falling into the back window was enough. |
 |
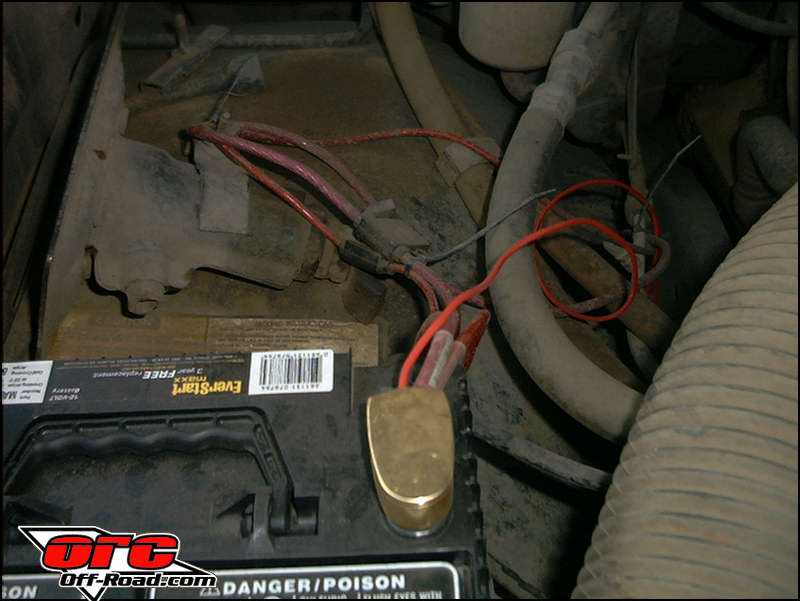
| Proper battery connection is a must, along with in line fuses. Jamming a bare wire end between the post and the cable clamp is not good enough. |
 |
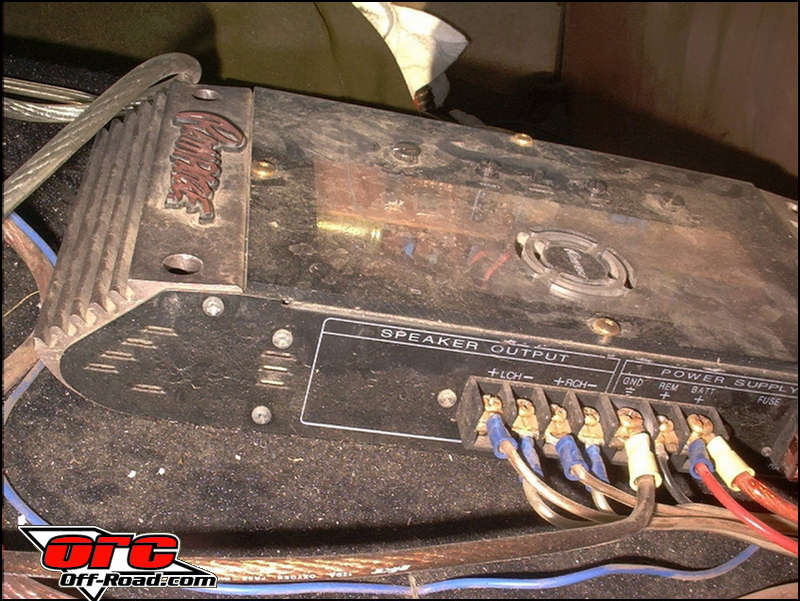
| Terminal ends are the best! My other amp actually is designed to take bare wire. Make sure yours is too if you plan on shoving bare wire into it. We need no fires or damaged equipment. |
 |
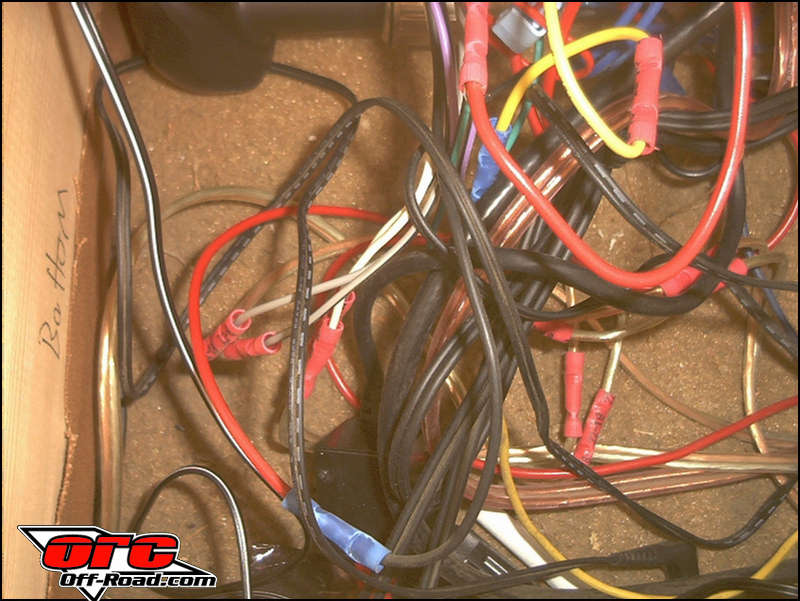
| Hey, I bet this is even more helpful than the wiring diagrams! |
 |
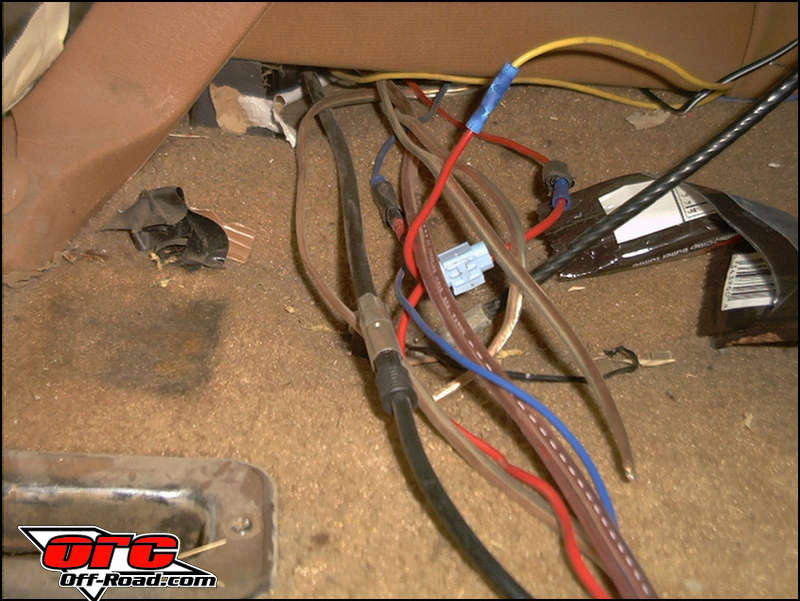
| Splicing different colored wires together end to end is a sure fire way to confuse anyone who may own your truck after you. |
 |
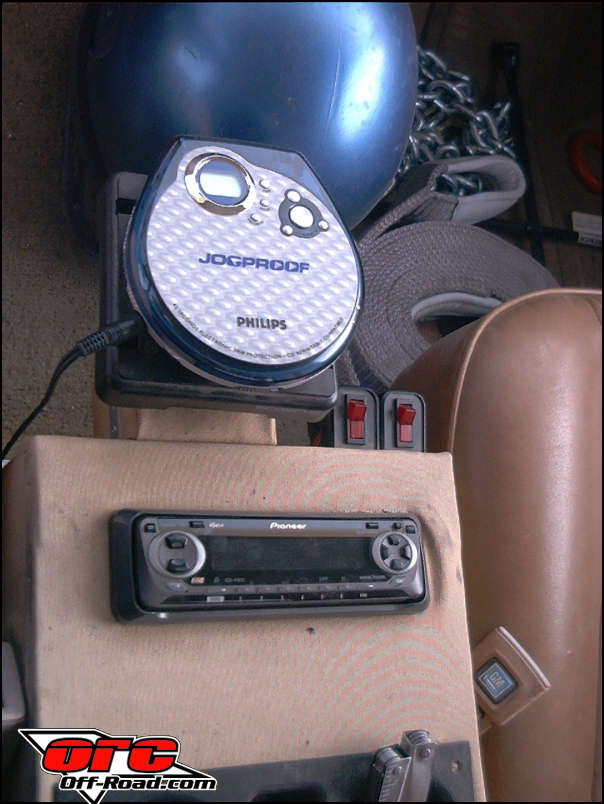
| The auxiliary input on my cassette deck. |
 |
| The stock radio is left untouched with the super cool RJ switch method! |
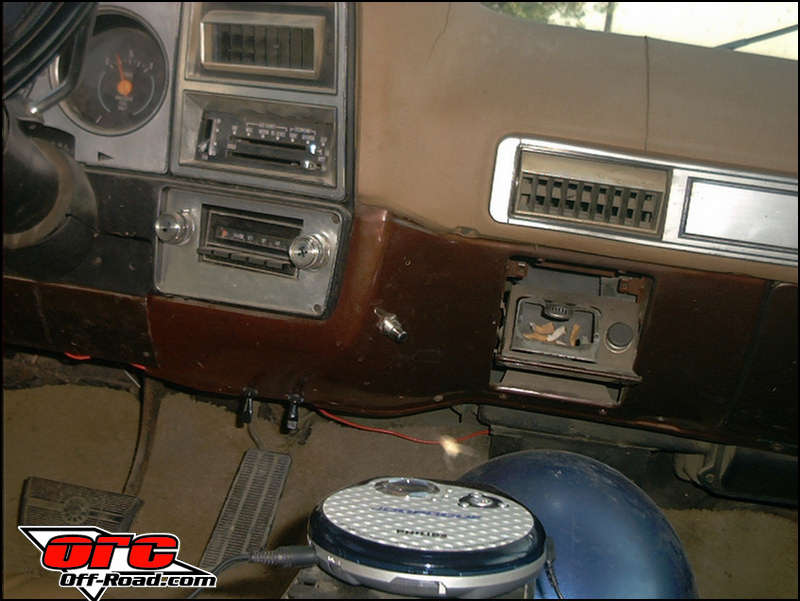 |
| My setup. I recommend lighted switches, They help you remember to turn the stereo off. |
 |
| Using old house stereo speaker boxes is a fun way to recycle. |
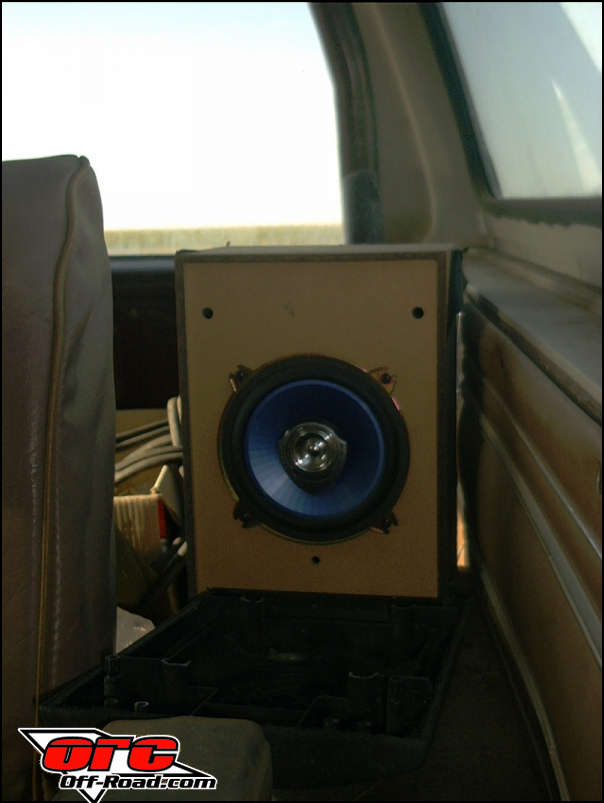 |
| These fit nicely right there. Yep.... |
 |
Hopefully, you now have the basic knowledge to wire in a cool stereo in your trail truck. Now you can detach your retinas head banging. See, I referenced something I said at the beginning of the article. It's a literary..... thing.
Good luck and thanks as always!
|
Off-Road.com Newsletter Join our Weekly Newsletter to get the latest off-road news, reviews, events, and alerts! |
Follow @Off-Road
 Your Privacy Choices