 |
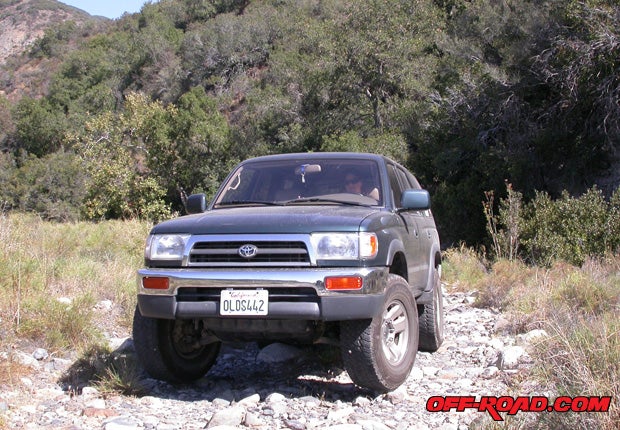
It’s not hard to wring 200,000 miles out of your Toyota truck, be it 4Runner, Taco, pickup, Cruiser or otherwise. Stuff will wear out, sure, but even that happens in a reliable, Toyota-esque fashion, with the worn-out bit usually giving distinct signs that it’s on its way to the grave.
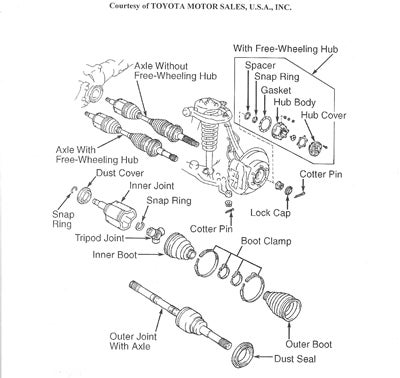 |
| Exploded view of the half-shaft and related assemblies, courtesy of Toyota and Mitchell Repair Information. |
Notable amongst these polite failures are the half-shafts up front (also called drive axles) on all of the “shift-on-the-fly” 4x4 Toyotas (with the constantly spinning half-shafts that are, in essence, ticking off the mileage by wearing out). The boon of in-cab 4x4 control – no more hub switching – is made with a tradeoff of increased wear in the half-shaft’s CV joints, which now are hard-linked to the hubs, turning at all times in tandem with the front tires. Convenient, neat and wearing constantly.
Let’s be specific: the part wearing is not the shaft itself, but the constant-velocity (CV) joint inside the rubber boots, two per axle assembly, four per 4Runner. The boot keeps the grease on the joint and protects the joint from moisture and grit. High-angle use speeds wear, as does lots of exposure to changing temperatures and moisture levels, such as anywhere but the desert, plus things like road salt and submersion. Half-shafts wear out on free-hub Toyotas too, but not so quickly unless you’re abusing them (though parts like the boots deteriorate at equal rates, especially in harsh condition).
There is a notable positive flop to the flipside bane of constantly turning half-shafts, and that’s ease of disassembly. We were into the guts of our All-Pro spacer experiment on the unstoppable gen-three 4Runner when we noticed our energetic style of trail play had finished off two of the 175,000-mile CV boots. The splitting half-shaft boot is often accompanied by copious grease redistribution and small drips of it in your driveway as it builds up in the undercarriage. Boot death is one of the hallmarks of pending replacement (another timely reminder from Toyota’s engineers, thank you), and is often the first notification, though you also might notice slight grumbling sensation when turning, or a grinding sound and sensation during all motoring. Let it go too long and the insides of the joint will be ground up, and you could lose your core deposit.
PAGE 2
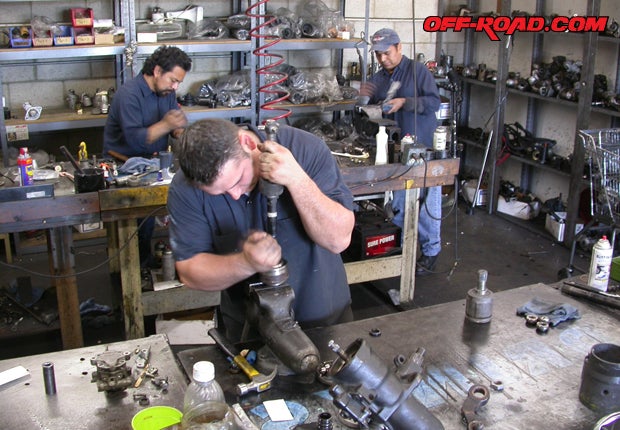 |
The rebuilders at San Diego’s AES never stopped moving. |
Remove & Rebuild Your Half-Shafts
A lot of this guidance will apply to all half-shafts, but you should be reminded that the specifics are Toyota 4Runner and Tacoma-sourced.
There’s a certain beauty to the moment when an opportunity to fix one thing provides a chance to fix another. Call it “killing two birds with one stone” or the efficient military term for a sniper who drops two Charlies with one bullet. If you’re into a project like swapping coilovers on your 4Runner, and you see the CV boots are split and pushing grease past the cracks, why not? We were already in there, the front suspension split apart trying to fit All-Pro’s spacers on our Tundra front-end (read our prior story here – it didn’t work, but it was our own damn fault). Both outboard CV boots had fragmented, likely during our Thanksgiving run to the Blythe area, an old mining region chocked with high-articulation “this” and pointy “that.” It’s no matter - the CVs were blasted, and had evenly distributed their gooey contents to the suspension. Swap time.
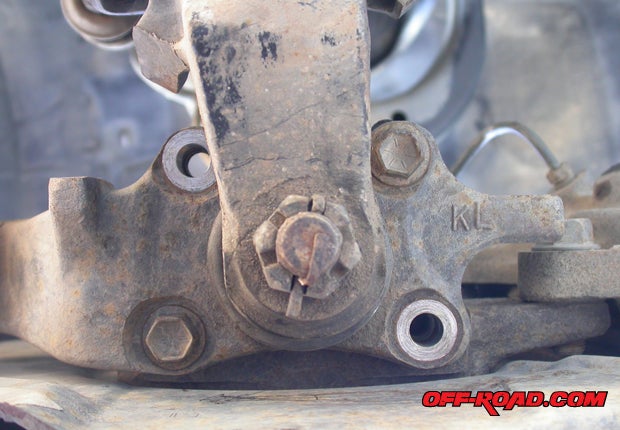 |
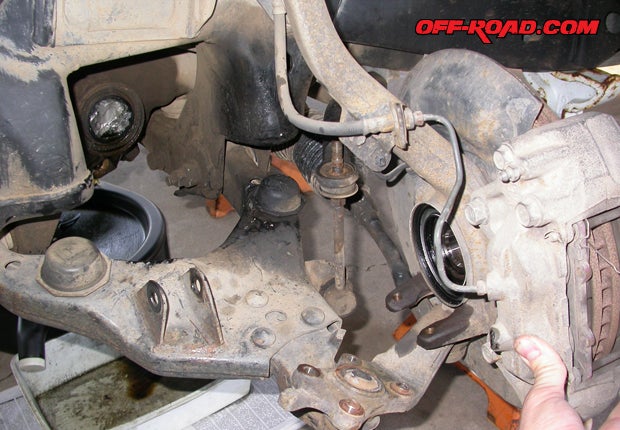
Viewed from below, the lower end of the knuckle disconnects at these four bolts. |
Short of buying a set of new half-shafts (good fit but pricey), a used set (questionable quality), or rebuilding them ourselves (possible, but something of a dark art), we went to the dark artists themselves and had them rebuilt locally. In our case – SoCal and San Diego-based folks – our pals at Big “O” La Mesa pointed to an outfit in Mission Gorge just east of San Diego: AES (Automotive Exchange & Supply, 619.282.3207). Big “E” at Big “O” used them for rebuildable items like drive axles, starters, alternators, gearboxes and power-steering pumps (plus the racks), and Big E’s referrals are usually gold. We did the unexpected-visit routine, and AES’s sprawling facility (building after building of rebuilding) might not have been spic & span, but they were really busy – always a good sign. We dropped off our half-shafts in the afternoon, and the next morning they’d been torn down, cleaned, prepped and rebuilt, ready for reinstallation.
 |
| After you pull the half-shaft, it’s not a bad idea to cork the hole in the diff to keep dirt and moisture out, but have a drip pan beneath it just the same. |
PAGE 3
 |
Fully apart, there’s tons of room to work – the half-shafts come out easily. |
Drive Axles Go and Come
With the steering knuckle and hub unbolted from the lower A-arm (a four-bolt proposition that should have you thanking Toyota’s engineers yet again), the assembly swings sort’a suspended by the upper arm. We’d drooped this away with the half-shaft attached while working on the coilover, but it was only a matter of temporarily bolting the bottom of the knuckle back together and putting leverage to the large hub nut to remove it. The half-shaft slides in with an interference fit, retained by the drive axle hub nut on the end of the shaft with a cotter pin and lock cap. The easiest extraction of that monster nut came with a crowbar positioned between lugs, leveraged against the driveway so that the hub assembly could not rotate, then applying a 1 3/8” socket (about the same as a 35mm) on a half-inch breaker bar. Leverage is king.
Make sure you don’t use a steel hammer, drift or bar to punch the driveaxle out of the hub. It’s an interference fit that begs for the “BFH”: resist the temptation. Use a brass hammer, or another non-marring soft metal that won’t distort the threads and splines on the drive axle. Absent a fine device like a brass hammer (one of the weird tools you see at estate sales you never knew you needed), we’ve had luck with a section of 2x4 and a four-pound sledge. Think soft-hard.
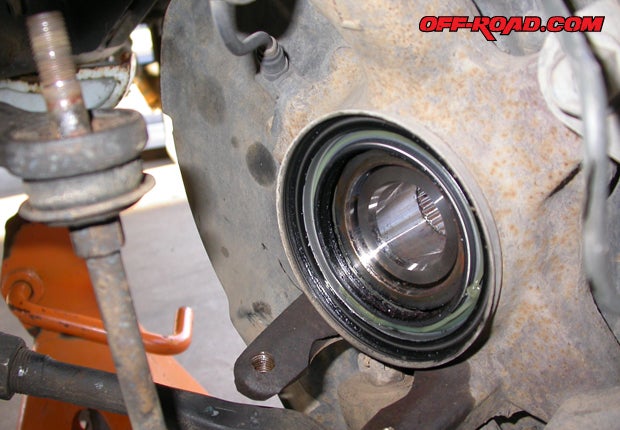 |
Before you reinstall the outer end of the driveaxle, wipe down and grease up the hub seals. |
The half-shaft assembly is held in the diff-case by a ring-clip on the end of the shaft inside the diff, which is basically a ring of wire in a recessed groove, like a C-clip without the square shoulders. It’s not a C-clip, though, so you don’t need to remove it from inside. You do need to POP the half-shaft out. It takes some patience and finesse, but it will come. We found that a pointy pry-bar set between the diff and the inboard tulip (the large metal cup with the CV-joint inside), leveraged against a subframe member, allowed just enough POP to get the axle free. You want the ring-clip to slide out, so push the half-shaft IN, and then pop it outward with the pry-bar – you’re basically taking a soft running start at it. Try the POP once or twice, then rotate the axle and do it again (you’re letting the ring-clip center itself). A few tries and it’ll be out.
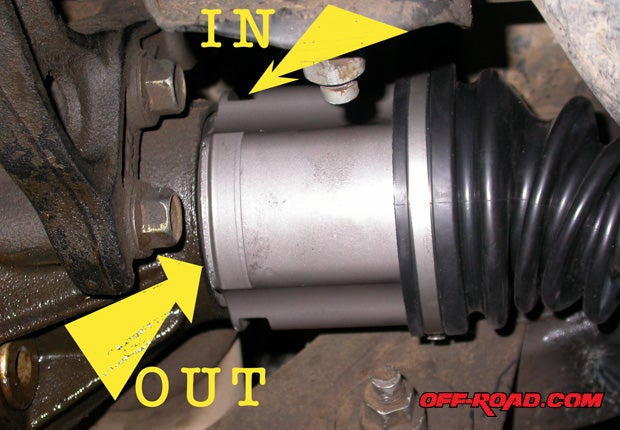 |
| From this view of the tulip, you can see where to leverage for the removal POP and where to push for the installation POP. |
With the half-shafts rebuilt, they go back into place more easily than they were removed. Try putting a glob of axle grease on the ring-clip – it might not help, but it couldn’t hurt. Slide the axle in, gently at first until you bottom out, and then firmly repeat the same maneuver by hand until it goes all the way in (you can feel the ring-clip POP past the detent in the diff). If that doesn’t do it, tap the axle from the tulip (gently – we put the same pry-bar against the inboard grooves in the tulip and tapped it repeatedly), rotating the drive axle every few until it popped.
With the inner end of the drive axle in place (distinguished by the ring-clip – pay attention), slip the outer end into the backside of the hub as far as it will go, then cinch the hub nut to torque (bracing it in the same manner as before). We cleaned and greased the diff’s axle seals and the parallel seals in the hub. At this point, assembly is the reverse of removal – you’ve heard the speech. The half-shaft swap is not complicated, especially if you’re in there already for suspension stuff. Now if science could just rebuild our ankles like our CVs.
 Your Privacy Choices