If you just returned from the alignment shop after being told your ball joints need to be replaced on your TTB Bronco this page is for you. You're probably still in shock from a $300 plus quote, most likely this is only labor. Well if you're even remotely mechanically inclined hopefully this page can help save you some $$$$. Special tools you'll need include a locknut spanner ($10-20), a 1 5/16" wrench, and possibly a ball joint separator, aka pickle fork ($5-10). A 2-lb mallet or similar is also helpful, a grease gun, and maybe some snap ring pliers. You will need to rent a ball joint press, Autozone rents them for $100, completely refunded upon return. JCWhitney also sells them for about $90. This was performed on my 1990 Bronco w/Warn Premium hubs. Auto hubs differ only slightly. The pictures reflect the passenger side, but the driver's is no different. After removing the wheel and safely securing the vehicle, remove the hub cover using an allen key to remove the 3 or 5 bolts retaining it. You may need to gently pry the cover off if it won't pull off by hand.
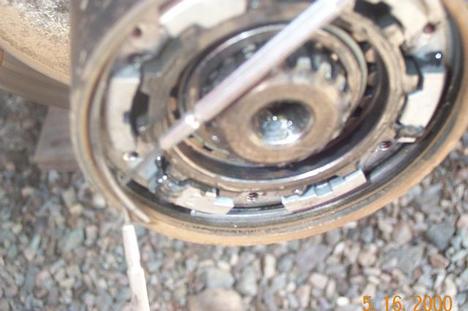
See photo 1.

Locate the snap ring on the end of the axleshaft and remove it w/snap ring pliers. See photo 2.

Next is a c-clip which rests in a groove and can be difficult to see at first, see photo 3. Use a pick, or small screwdrivers, such as those for servicing eyeglasses, which I did. Use one screwdriver to push part of the clip up and then another to pull it toward you.
Now the locking hub will slide out. It's easiest to partially re-thread two of the hub cover bolts and use them as handles. See photo 4.

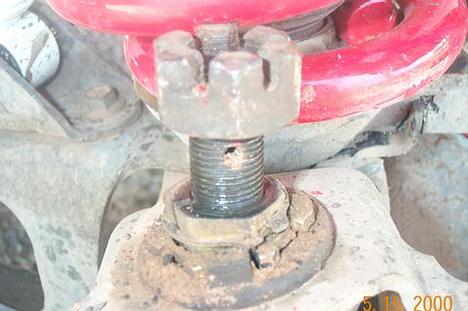
Photos 5 and 6 show the locknut spanner tool. Use it to remove the locknut. Under that will be a washer w/holes drilled in it. This is best fished out w/a magnet in my experience. Then use the locknut spanner again to remove the adjusting nut. I failed to take pictures of the nuts but you can't miss them, they've got 4 notches which line up w/the tabs on the tool.


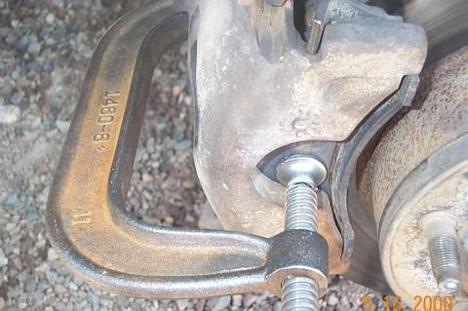
You can not remove the rotor until you remove the caliper. I have the "slider pins" which must be driven out w/a punch or similar, see photo 7. If no pins are present there will be two bolts on the backside which anchor the caliper. The caliper may not pull off until it's piston is retracted, you can do this w/a 6" c-clamp, see photo 8. Retract the piston only as much as necessary to avoid overflow at the reservoir. Do not allow the caliper to hang by the brake line. Remove the rotor, be ready for the wheel bearing to fall out the front.

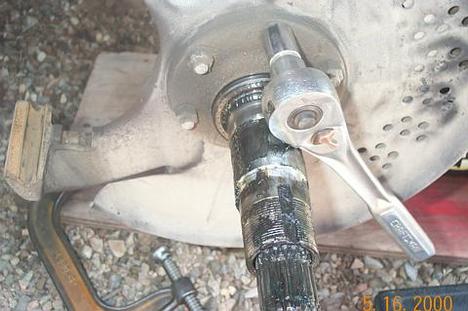
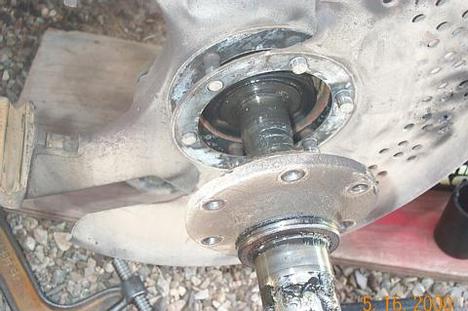
Remove the spindle nuts using a 9/16" wrench. Then remove the spindle and brake shield, see photos 9 and 10. Now the axleshaft will pull out, see photo 11.

Remove the upper ball joint nut using a 1 5/16" wrench. Thread the nut back on upside down until it is nearly flush w/the ball joint stud. Give it a few good whacks to break it free from the camber adjuster. You can now remove the camber adjuster, noting it's position for replacement. In my case, I was able to simply leave the camber adjuster in place, but this may not always be ideal. See photo 12.
Oops! Forgot to remove the tie rod from the knuckle. No problem. I did this similar to above, thread the nut on upside down and pound it out of the knuckle. See photo 13. You may also use a pickle fork or some sort of a gear puller. Now's not a bad time to consider replacement of the tie rod ends if there's play in the joints.
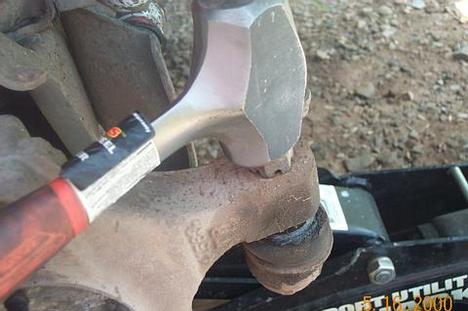
Ok, on to the lower ball joint. Loosen it's nut using a 1 1/8" wrench. See photo 14. It's probably a good idea to leave the nut threaded on a little so that when you get the knuckle free it doesn't fall on your foot. Pound on the lower ball joint stud until it breaks free. If it's particularly stubborn consider some penetrating oil. Here's where you can also use a pickle fork if pounding does not work. Wedge the fork between the ball joint and the TTB arm and drive it in using a large hammer. If all goes well your knuckle is now free and your knuckles are not bleeding too bad.

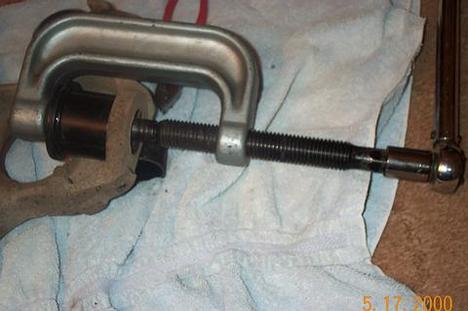
Now all that's left to do is press out the old ball joints and press in the new. See photos 15 and 16. Note that the lower ball joint has a snap ring which must first be removed. Also, you must first remove the lower ball joint in order to access the upper w/the press as seen in photo 16. Likewise, the upper must be pressed in first upon re-assembly.
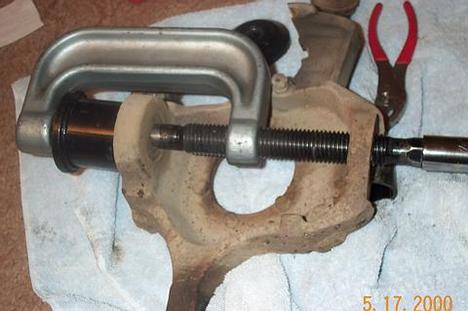
I'm not going to attempt to describe exactly how to use the press, just play around w/the different receiving cups and it will become clear. Be sure to thoroughly lube the ball joints before re-installing the knuckle. Otherwise, install is the reverse of removal. Also be sure to properly preload the wheel bearings, any shop manual will describe the procedure. Well, hope that covers it! You've now saved hundreds of dollars and learned a whole lot about the front end of your truck! Keith