Saturday, the air is crisp, the bronco is packed, the right hand seat is filled with (insert name here) you start the bronco when (insert name here) says "what about the spare tire? You look over your shoulder past a fully packed bronco and you can just make out the spare tire leaning against the garage wall. Your answer goes something like god *$#**@#$%** son of a *&*%$*@#. Skip now to Sunday night when I got back from wheeling. Like some of you I needed some place to keep my spare tire. (no wise cracks Kym) The stock swing out carrier is useless, cracked and torn sheet metal, loose, broken latches, etc. With these thoughts in mind I built the bumper/tire carrier you see in these pictures.
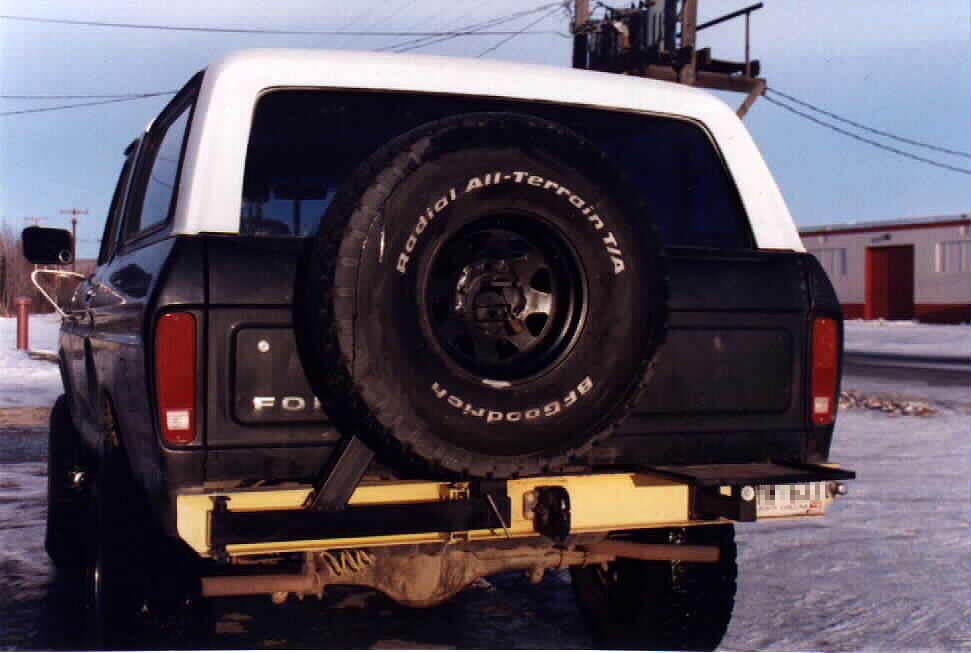
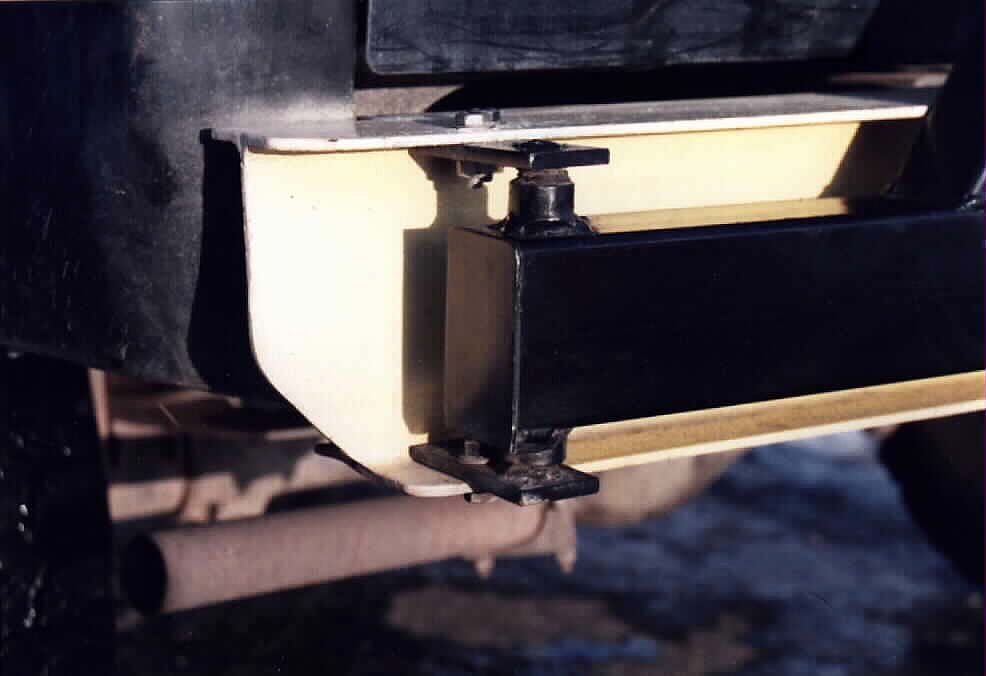
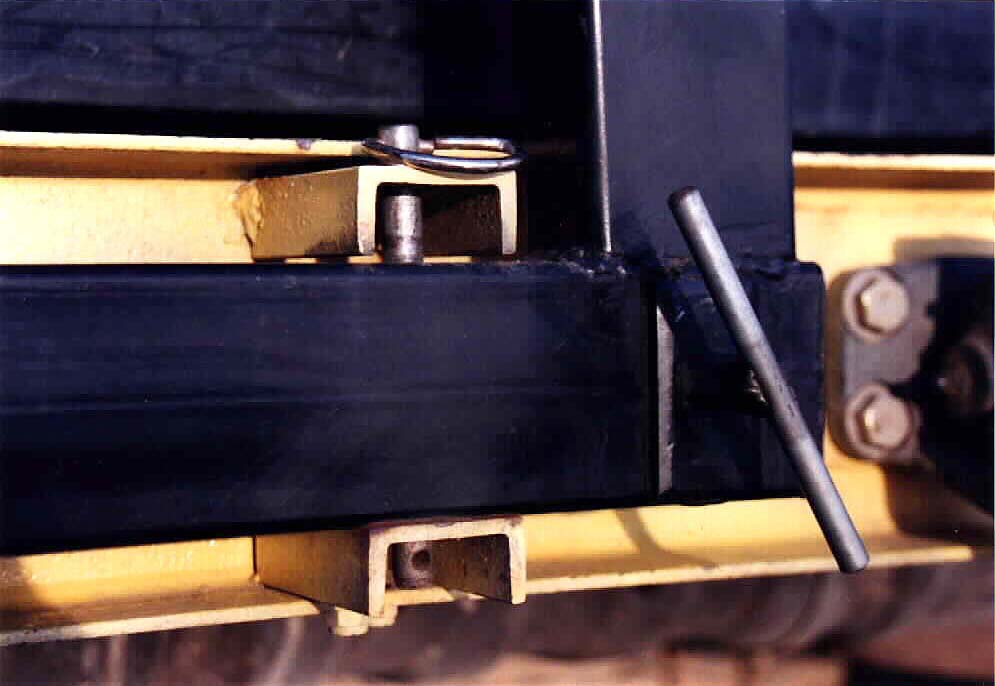
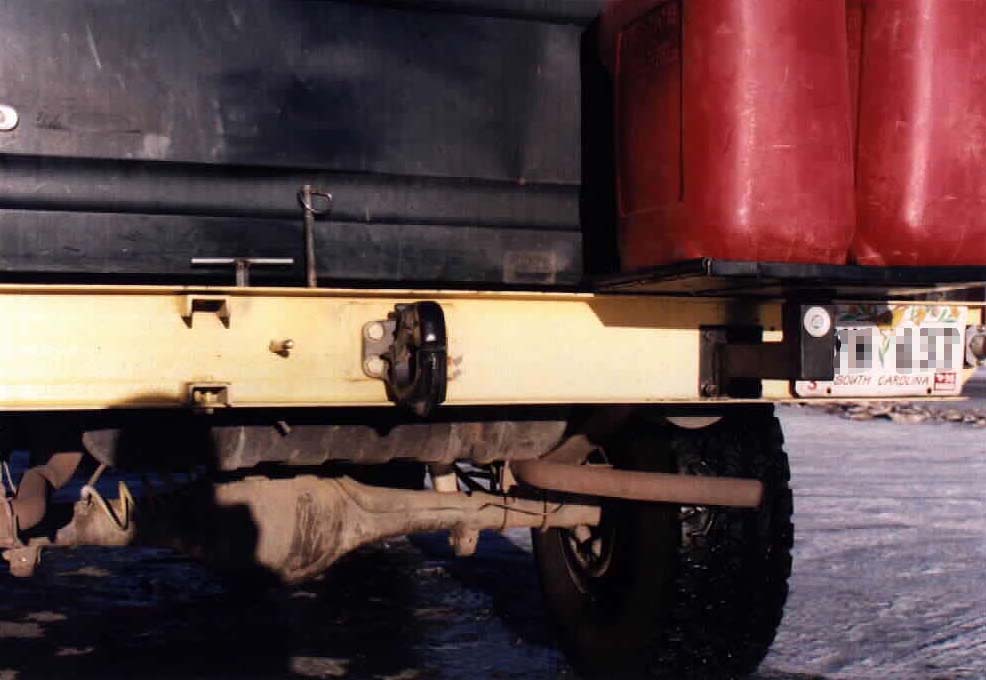
The bumper is made from 5 in x 4in I-beam 73in long. The left side where the carrier is attached is boxed, to resist twisting from the carrier. The lower ends are tapered for added clearance and a small notch is cut on the inside outer edges so the bumper fits as closely as possible to the body. The bumper mounts in four places. Two 3/8 in plate brackets were made to attach to the frame horns, one mount is attached from directly behind the pintle mount to the frame cross member and a final brace goes from the left inside end of the bumper to the frame. The last one (left end to frame) was a post fabrication addition to reduce flex in the bumper caused by the carrier. Tire Carrier pivot and mounting is accomplished with a custom hinge made from 5/8 in threaded rod, 1 in solid round stock that was drilled and tapped and two end plates holding the whole thing to the bumper. Holes were cut in the left end of the carrier and the now hollow and threaded round stock were pressed into place , then welded. A grease fitting was then added for later use. The 5/8 in threaded rod was screwed into place, cut off at the correct length and mounting tabs welded. Mounts are bolted to the bumper so the carrier can be removed.
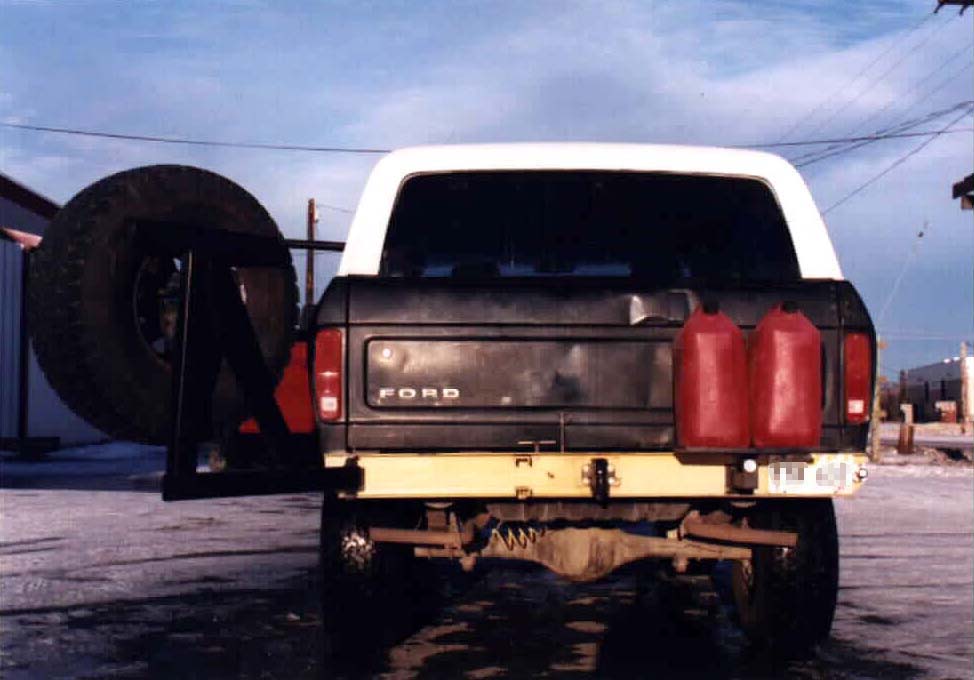
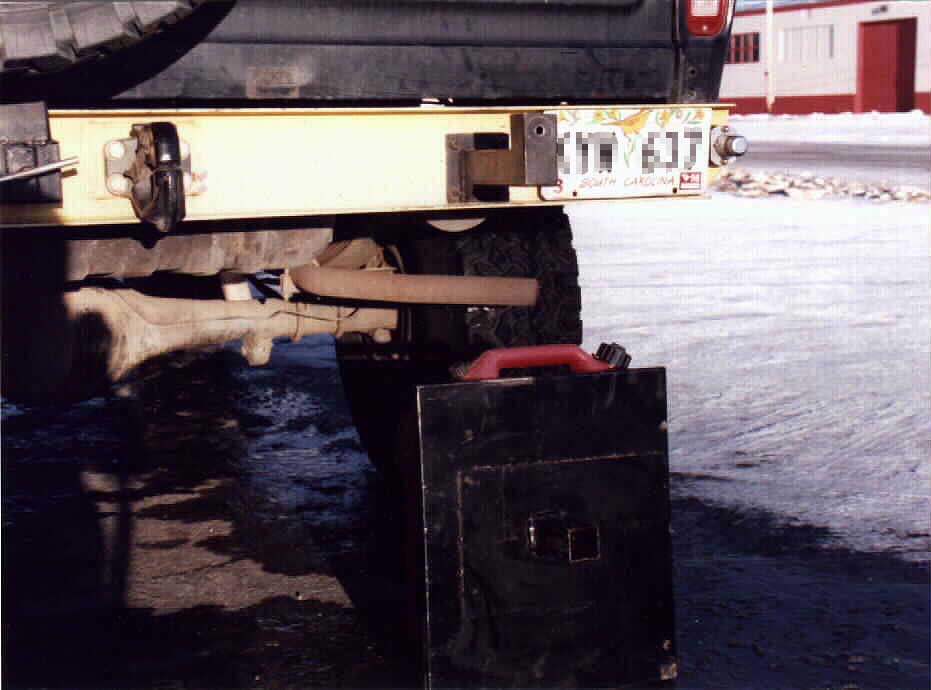
2 X 4 in .090 wall tubing was used for the carrier. The actual mount for the wheel is a portion of the original ford carrier grafted on. I chose to build it in a "left hand" design for two reasons, (1) I like to be different. (2) I believe the visible field of view rearward is larger with the tire directly behind the drivers head. (but opinions vary) The carrier is built so that when open it will allow the tail gate to fully function. Someone said "necessity is the mother of invention" and so it is with me.
Through the countless contacts and friends I've made on the Bigbronco list it was passed to me that I should have at least 10 gallons of extra gas available to me for my trip to Alaska. That necessity bore the idea and was responsible for the fabrication of the gas can carrier you see in these pictures. Nothing more than a male receiver type mount and platform with female receiver. It's ugly but it worked.
Overall I'm very happy with the design. It's worked well for over 22,000 MI. Many of those off-road or enroute to alaska on the dirt roads of the ALCAN HWY. Like most of my projects, this too was built mostly from stuff at hand. Meaning there are better materials available. ie. lighter, stronger, better looking. If I was to do it again, and I will. I'll use 2in X 6in tubing for the bumper itself and a better (read not home made) hinge. Hopefully this tech article will give you an idea of what might work for you. Feel free to contact me for any specific dimensions, or building guidance. Erik Marquez
admin@bronco78.com
|
|