click on any picture for a larger version
This site details a great way to add a sturdy roof
rack to all Ford Broncos utlizing standard parts from either Yakima
or Thule. By following the instructions here you will have a roof
rack that will not only carry a lot of weight but will also provide
you with an incredible amount of versitility in configurations for
carrying different items.
Step 1. Get the right parts!
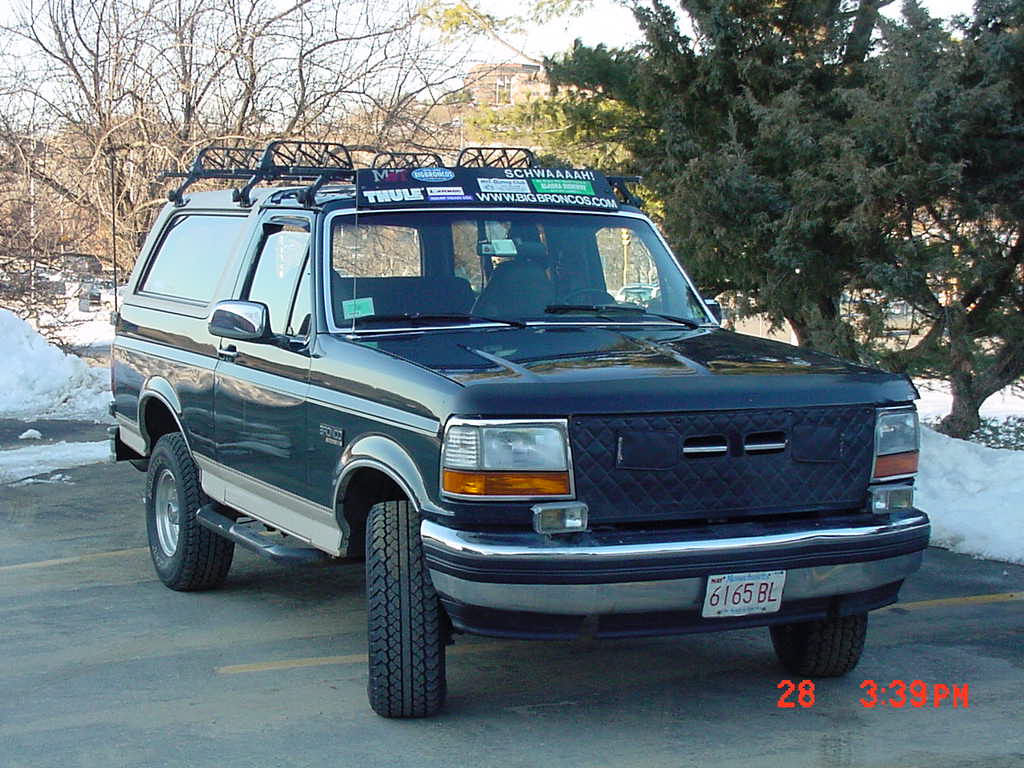
To install a good roof rack you'll need to acquire a standard set of rain gutter mount feet and load bars from Thule or Yakima. I have a set of 64" bars from Thule which are the perfect width for most applications. If I need anything wider I simply strap two 2"x3"x8' pieces of lumber to the existing rack using hose clamps.To mount the racks to the fiberglass top you'll also need to get two sets (4 pieces total) of the "fake gutter mounts." This is simply a small plate that has a lip at the bottom (see rear bracket in photo below) to act as a "rain gutter" to which you can secure the roof rack. The plate comes with a rubber gasket to help seal out the weather, two bolts/nuts/ and a backing plate. You will need to also get some silicon sealant and longer bolts for use on the Bronco.

- Photo 1. Picture of the "Fake Rain Gutter" mounts with the standard load bar attached. Notice that the fake gutter is at the same height as the rain gutter above the door.
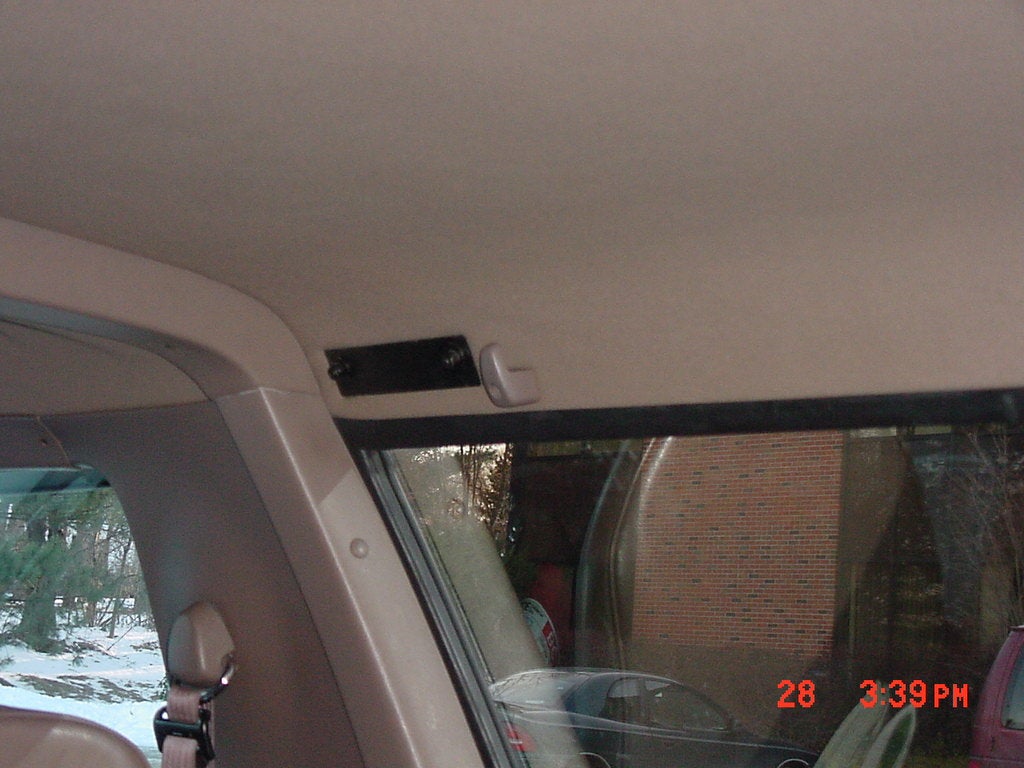
- Photo 2. Picture of the interior backing plate for the fake gutter mount bracket.
Step 2. Locate the proper position for the mounts.
There are several points to keep in mind here.- You want to make sure that all of the fake gutter brackets have their lip at the same height as the stock gutter height. This allows you to have all three load bars at the same height which is nice when carrying lumber, canoes, etc... It also allows for more flexibility on how you carry accessories like bikes and skis (see Photo 3).
- You want to make sure that the rear brackets are spaced properly front to back to create the proper distance between the load bars for bicycle mounts. If you mount the racks correctly you can use the "short tray" bike mounts which allow you to attach the front forks to a mount to the middle bar (in my picture) and the rear wheel to a short tray on the rear bar. If the distance between the bars isn't correct for this setup you'll have to go with a long tray mount which runs between the two bars and costs 50% more! To measure this distance take the front wheel off of the bike and set it one the ground. Measure the distance between where the front forks hit the ground and where the wheel touches the ground. This is the distance you want to have.
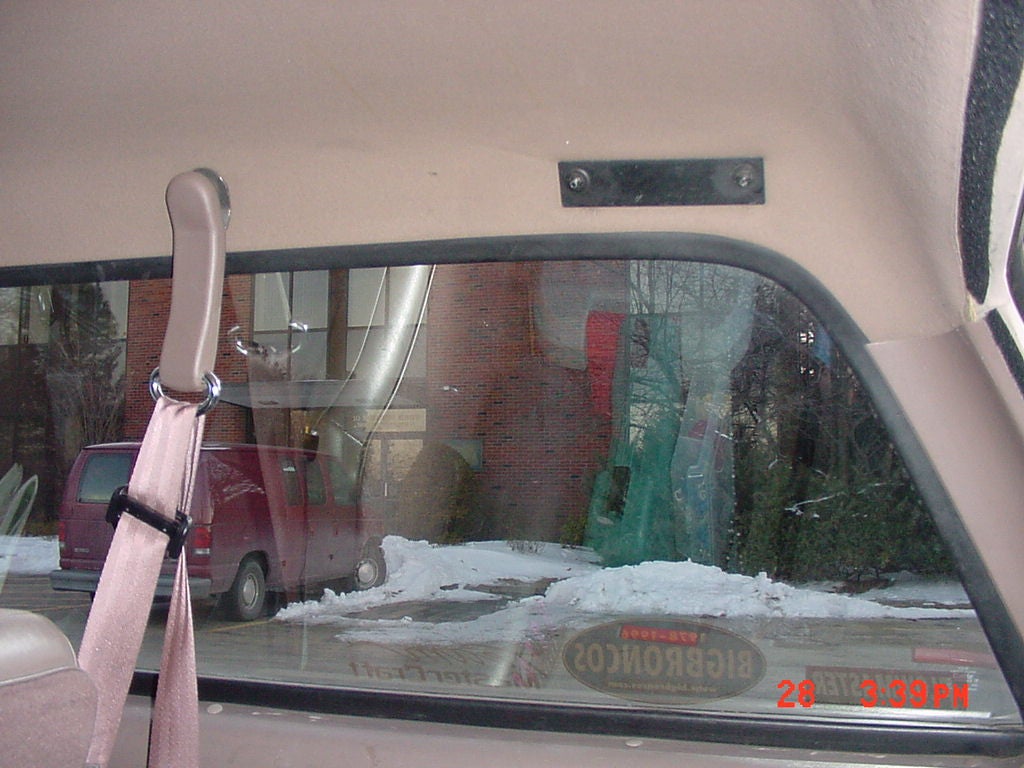
- You need to make sure that the mounts will not interfere with anything on the interior. This means that the middle bar (e.g. the front bar on the fiberglass top) needs to fit in between the trim and the clothes hanger. This is critical! (see photo 4)
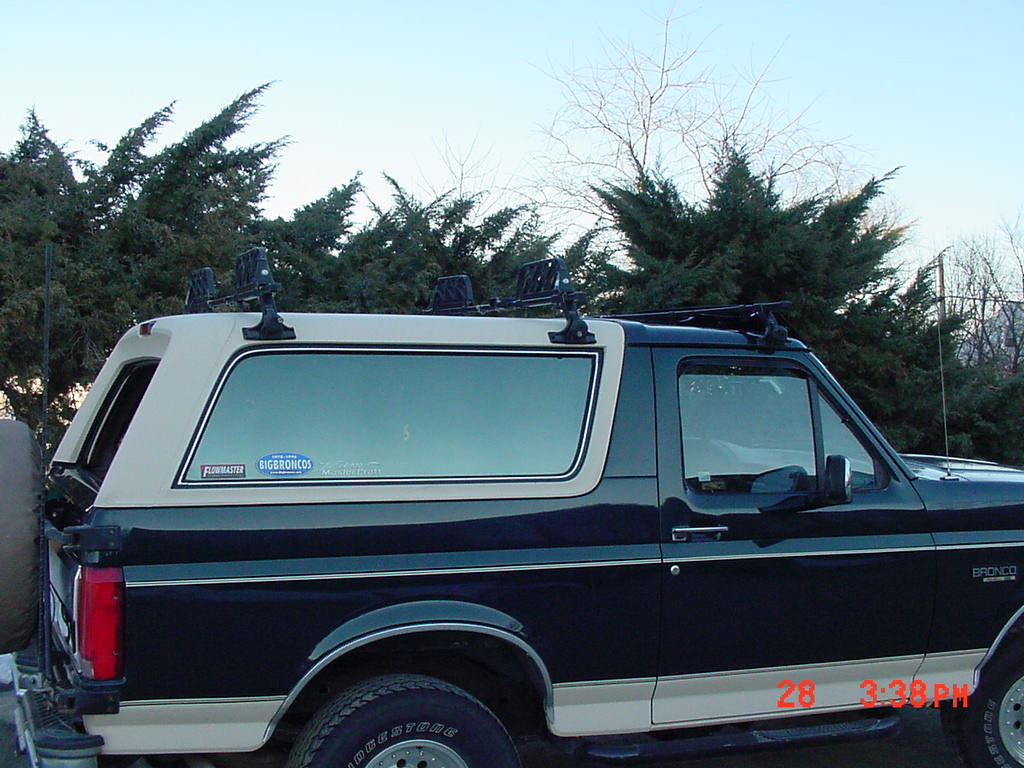
- Photo 3. Picture showing the locations of the load bars.
- Photo 4. Picture showing the interior location of the middle load bar on the fiberglass top. Notice that it is far enough back to avoid the trim between the cap and the cab, but far enough forward to avoid interfering with the clothers hanger.
Step 3. Mount the brackets
To do this simply mark where the holes in the fake gutter brakets are and get out your handy drill! Start with a small pilot hole to get a feel for the process and be sure to drill at 90" to the fiberglass top from the outside.. NOTE: The top is composed of several layers of material including a very sturdy metal plate in the middle which is hard to get through (this is how you can carry lots of weight!). You'll drill through one layer and will then have 1/4" of free space and will then hit the next layer, etc... NOTE: Be carefull when drilling through the interior headliner. The drill bit has a tendency to try to grab the fabric and rip and tear it. You can put a piece of tape over it to help stop this and I recommend drilling the headliner from the inside after you have broken through from the outside. Put a liberal amount of sealant on the holes and around the holes in the rubber gasket for the "fake gutter mounts" to ensure a good seal agaist the dimpled fiberglass top. As far as I'm concerned more is better in this case. I ended up remounting the brackets twice until I got them to stop leaking! Now just bolt everything together. Don't crank down on the bolts too much. If you use a 4" socket driver handle and go till it's super-snug you should be all set. Because of the sandwich-like construction of the top you can actually start to pull the layers together which you don't want.Step 4. Enjoy!
That's it! Mount the load bars to the brackets and throw all the gear you want on the roof. I have bike mounts, canoe mounts, ski racks, a safari rack which all go on the load bars. I've found the safari rack to be a great addition for wheeling trips. You can throw a cooler up there or a spare tire, my hi-lift is mounted to one side of it and my shovel and axe go on the other side. If you need wider bars than the standard 64" (e.g. for carrying two canoes side by side) you can get a couple of 2"x3"x8' pieces of lumber and strap them on top of the standard load bars using pipe clamps to hold them on. I've had 7 canoes on top of the truck (pyramid style!) using that setup.Questions?
Give me a holler: Scott FitzGerald stf@alum.mit.edu|
|