Here at Off-Road.com we love products that provide a super simple solution to an existing problem. If the install process is a snap and doesn’t leave us throwing wrenches across our driveway we are downright smitten. Our love grows even stronger if that product works exactly as advertised.
For all of these reasons we love Quadzilla’s (www.quadzillapower.com) new rail pressure gauge for 2003-2007.5 Dodge Rams with the 5.9L Cummins diesel. It is a compact gauge that reads up to 27,500 psi, offers maximum and minimum rail pressure recall and also has alarm functions. There is no wire splicing or taping needed for installation and it only took us about 30 minutes to put it into place. An optional kit is also available that reads fuel pressure between the tank and the injection pump and is recommended to give you full coverage of your fuel system.
So why should you even be concerned with fuel pressure? Shouldn’t only those pushing a ton of power be worried about fuel pressure? Even with a stock Dodge fuel pressure should be a concern. The lift pump (located in the gas tank) is not exactly bulletproof and if it fails you have a dead Dodge on your hands. Besides the lift pump, the injection pump can also fail with the same result. Both of these can actually take awhile to fail completely so with the right gauge total failure and a non-operable vehicle can be avoided.
With a suggested retail of $149.99 the Quadzilla Rail Pressure Gauge is about as cheap of insurance as you can get. We put one on our 2005 Project Heavy Metal Dodge Ram to give us peace of mind when traveling in the many remote locales we visit. Unfortunately we couldn’t get our hands on the optional fuel pressure kit for monitoring the lift pump in time for this story but we plan to get one soon. Follow along as we show just how easy it is to monitor the vital fuel parameters of your Dodge Cummins diesel.
 |
 |
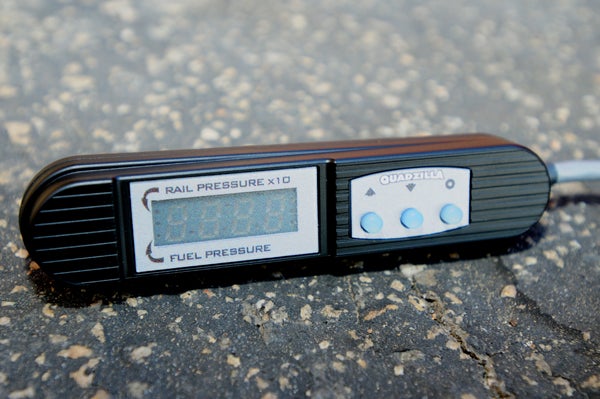
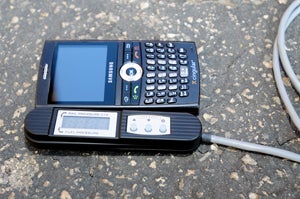
| After seeing advertisements for the gauge we were surprised at its tiny size. In most of these ads a huge picture of the gauge is feautured so we naturally thought it was bigger. However it is only one inch tall and just under 4.5-inches wide. We threw our cell phone in the picture for scale. | One of the nice features of the Quadzilla gauge is that it comes with a full wiring harness making it completely plug and play. The harness is a nice piece with a weatherproof connector for the rail fuel pressure sensor and not some cheapie.There is no splicing needed. |
 |
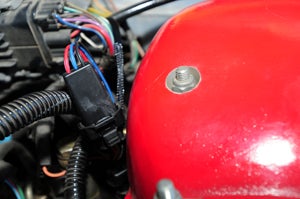 |
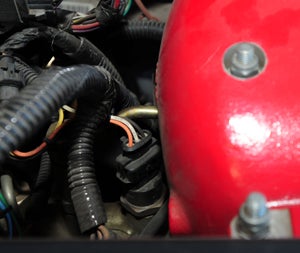
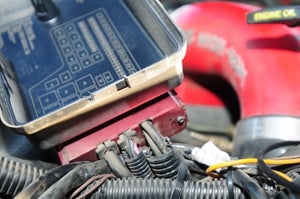
| The instructions do not say where the factory fuel rail pressure sensor is located but we figured it was on the fuel rail and were right! It is the sensor with three wires coming out of it just to the side of the intake on the driver's side of the vehicle. Be careful removing it as there is a clip that must be pushed inward before it can be pulled off. | Quadzilla's wiring harness then plugs into the fuel rail pressure sensor allowing the gauge to read pressure. The factory wiring then piggy backs into the Quadzilla harness so the vehicle's computer still gets the proper readings. |
 |
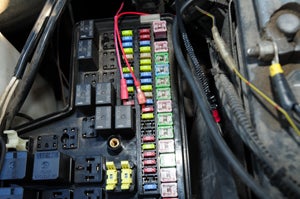 |
| A fuse tap is used to supply power to the gauge. If you have never used one before it simply slides over one prong of the fuse and is a clean way to tap into an existing fuse. | The instructions tell you which fuse to use making the job extremely simple. Once the tap is on the fuse all you have to do is slide it back into the box. We already had an existing fuse tap in place for our Banks system. |
 |
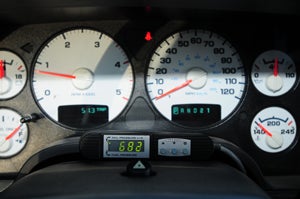 |
| Its a good idea to notch the lid of the fuse box to allow proper clearance for the wire. Then make sure that the wire actually goes through the notch when putting the lid back on. | All that is left is to route the wires through the firewall and mount the actual gauge. We used the velcro tape provided to put it right on top of the steering column. It is easily viewed in this position and doesn't block any other gauges making for a clean install. |
 Your Privacy Choices