Project Chevy Tahoe: Short Shaft your Chevy
JB conversions and Six States Driveshafts
|
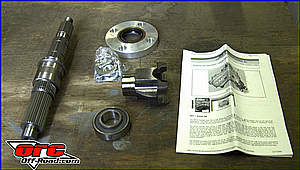
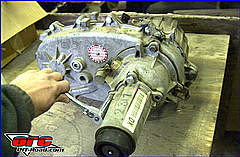
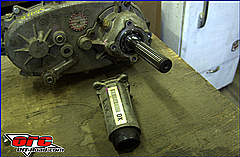
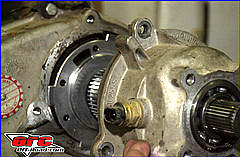
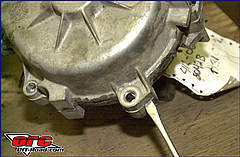
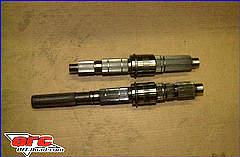
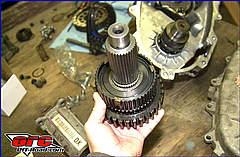
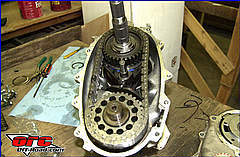
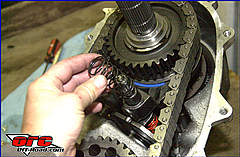
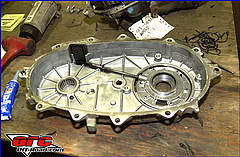
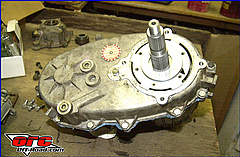
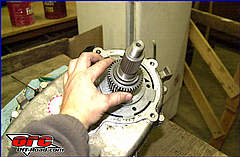
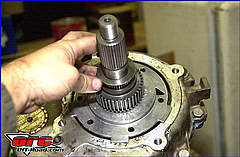
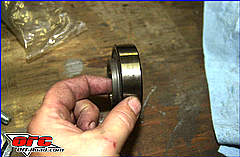
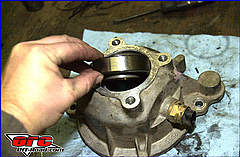
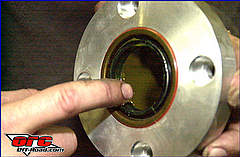
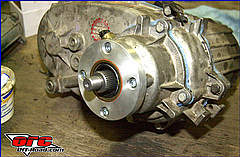
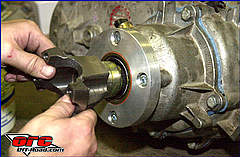
Chevy Autotrac. Uugh...... In 1998 Chevy introduced the Autotrac 4WD system to it's lineup. The NV246 transfercase is an electronic shift transfercase and combined with the computer system is what Chevrelet calls the Autotrac 4WD system. this system will automatically transfer power from the rear wheels to the front when any slippage is detected. The system operates transparently and can be left engaged indefinitely. It also has standard dash mounted switches that allow you to put the transfer case in 4WD High, 4WD LO, or 2WD High. While having a AWD system can be very handy to the soccer mom who may only occasionly have their vehicle in inclement weather it creates some problems. The system leaves your front driveshaft spinning at all times. This creates a couple problems. If you lift your truck you will find that most kits require you buy a new front driveshaft along with it. The new driveshaft is CV equipped and is necessary because most trucks that are lifted with an autotrac will experience vibartions due to the short front driveshaft that is always spinning. This transfer case also features slip yokes on both sides which creat a longer t-case and more wear on the bearings inside the t-case. They also create a situation where you can't drive your vehicle without both driveshafts installed. So why are we telling you how much we dislike the Autotrac 4WD system. Well take a look at the picture. Our NV243 transfer case recently decided to self destruct. Interestingly enough my nephews Autotrac transfer case broke almost identically about 3 months before this. A little checking around and I found many users who had also suffered autotrac transfer case failures. In fact there is somewhat of a shortage of them at the wrecking yards and even a used one will cost you $1200 and up. A new one will set you back closer to $1600. Granted that our first autotrac transfer case had lasted us over 100,000 miles we still were not excited about replacing it with another one. So what were our options? Well I found many users who wanted to get rid of the autotrac but I could find very little information on users who had done any kind of swap. Basically the boltup options were either the NV241 or the NV243. Both were very common and found in many Chevy 1/2 tons in the 90's. The difference between the two is that the NV241 uses a manual lever on the floor board while the NV243 is an electronic shift t-case. Both have a u-joint yoke on the front and a slip yoke on the rear. The easiest coversion would be the NV241 but it requires you cutting a whole in your floorboard. We decided to go with the NV243 electronic shift and stick with push button shifting. This does give you an extra point of failure which is the shift motor on the side of the transfer case. Short Shafting our NV243 Transfer Case With the decision made to go with the NV243 transfer case we went to the wrecking yard and picked up a low mileage unit. The price of NV243 transfer cases was running around $600 which is nearly half what a NV246 autotrac case was. Next was getting rid of the slip yoke on the rear. We knew that this was a common conversion on the Jeep transfer case so it seemed we should be able to do this conversion on our Chevy transfer case. JB conversions to the rescue. A couple phone calls to JB conversions and we had a new short shaft conversion on it's way. We did have to supply John with a picture of our transfer case. Evidently the type of speed sensor varies and therefore John needed to see ours so he could make sure to ship us the right kit. John makes Slip Yoke Eliminator kits for the Chevy 241 and 243 and also for the Dodge 241 transfer case. This kit is a must for those installing big lift kits on their Chevy's and especially the shorter wheel base vehicles like the blazer or two door Tahoe.. John sells two versions of this kit. A super Short kit and a standard kit. The Super Short kit will add 9" to you driveshaft length. We opted for the standard length kit which still increases the driveshaft length by a substantial amount and will give us good driveline angles in our Chevy 4 DR Tahoe. Installation
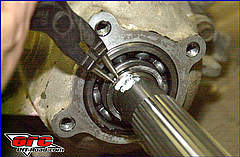
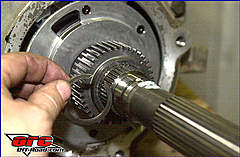
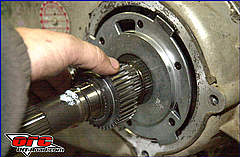
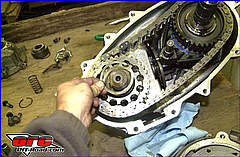
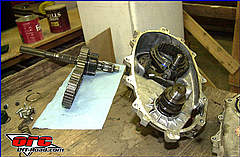
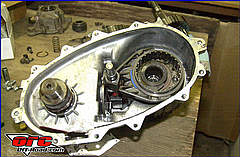
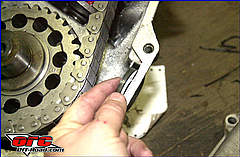
We are not an expert mechanic by any means and have never had a transfer case apart before. But after looking over the excellent instructions provided with the kit from JB Conversions we decided to tackle the conversion ourseleves. The only additional thing we needed was a tube of blue RTV sealant so we could seal up the case when we put it back together.
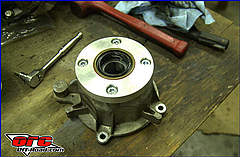
Summary The installation is now complete and it wasn't that hard. And I must say again that JB Conversions supplied one of the best installation manuals I have ever seen with a product like this. Install your new transfer case and then measure for drive shafts. We contacted Six States to build us some new drive shafts for our new Short Shafted chevy. Six States has many locations around the Northwest and can also ship to and from.We will talk about the new driveshafts next month.
JB Conversions, Inc. P.O. Box 2683 Sulphur, LA 70664-2683 Phone: 337-625-2379 www.jbconversions.com Six States Distributors www.sixstates.com
|

|
Off-Road.com Newsletter Join our Weekly Newsletter to get the latest off-road news, reviews, events, and alerts! |
Follow @Off-Road
 Your Privacy Choices