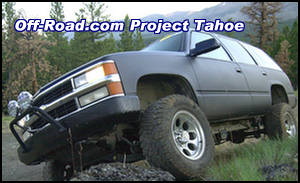
Project Chevy Tahoe: The latest in IFS lift kits
Tuff Country Suspension - 1998 Chevy Tahoe
 Our
Project Chevy gets more aggressive with the latest technology in
Chevy IFS suspension systems. When the suspension kits started
coming out for the IFS Chevys, the designs left a little to be
desired. To be honest, they were a nightmare for installers and the
kits turned out to be weak and squeaky.
Our
Project Chevy gets more aggressive with the latest technology in
Chevy IFS suspension systems. When the suspension kits started
coming out for the IFS Chevys, the designs left a little to be
desired. To be honest, they were a nightmare for installers and the
kits turned out to be weak and squeaky. If you are buying a kit in 2004 you are in luck - the newer designs available are a HUGE improvement. We stepped up our Project Tahoe with the latest design from Tuff Country. We chose the 4" lift with one piece subframe AND spindles. The one piece subframe eliminates the bolt-together subframes and other combinations that made up the early designs and makes a much stronger and simpler kit. The new spindles allow you to leave the upper a-arm in its stock location, eliminating cutting on the frame and drop down brackets, and still gives you the proper geometry. This combination cuts the number of parts required in HALF. Combine these together and it saves you money and time, as it makes it for an easier installation and a MUCH better lift kit than you could have bought a couple years ago.
 Project Tahoe had an older Rough
Country 2 1/2" lift which complicated the matters. If you are
starting fresh with stock suspension you will find it much easier.
You need to be very careful when changing lift kits because some of
the kits make modifications that are not reversible and the
modifications may or may not be compatible with the new lift. In
planning the change-over we referred to the downloadable
instructions from the Tuff Country web site. This is a VERY nice
feature provided by Tuff Country.
Project Tahoe had an older Rough
Country 2 1/2" lift which complicated the matters. If you are
starting fresh with stock suspension you will find it much easier.
You need to be very careful when changing lift kits because some of
the kits make modifications that are not reversible and the
modifications may or may not be compatible with the new lift. In
planning the change-over we referred to the downloadable
instructions from the Tuff Country web site. This is a VERY nice
feature provided by Tuff Country.
The old lift kit used new a-arms, so we needed to retrieve some stock a-arms for our new installation. A closer look also showed that we would need a stock control arm. The new Tough Country suspension kit uses a bracket that bolts onto the stock control arm rather than a replacement arm. Luckily the frame bracket modification that was previously
 |
Depending on the wheels you have you may also need to get some new wheels for your Chevy, since this Tuff Country kit requires wheels with 4.5" of backspacing. We had already installed some 17" Mickey Thompson Classic II wheels with 4.5" of backspacing so we were set. Also, if your vehicle has AutoTrac like our Chevy Tahoe does then you will need to get a new front drive shaft. The new drive shaft has a double cardigan joint at the front differential which will make sure that you don't get any vibration from the change in front drive line angles. You can get this right from Suspension Connection along with your lift kit.
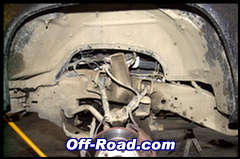
Installation We were still in the process of moving ORC headquarters, so our tools were in various stages of boxed/un-boxed and the garage was not even close to useable. So we turned to Advanced Auto and 4x4 Center in Enterprise, OR for some help with the installation of our Tuff Country kit. The guys at Advanced Auto have installed quite a number of Chevy IFS kits so they were very interested in seeing and installing the new Tuff Country kit with one piece subframe and spindles.
The installation pretty much requires the standard tools with the exception of the torsion bar unloader. If you are going to do this at home then we suggest that you order one. You can get one online from DriveWerks for $91.
 |
 |
|
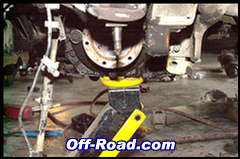
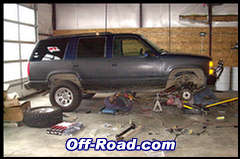
Getting our Tahoe up on jacks so that we could get
started.
|
Get rid of the mud flaps and remove and discard the
stock shocks.
|
 |
 |
|
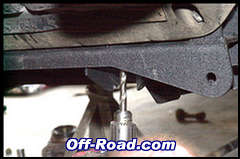
The stock skid plate comes off and is
discarded.
|
Remove the front driveshaft. That exhaust pipe will
have to be modified for the new driveshaft.
|
 |
 |
|
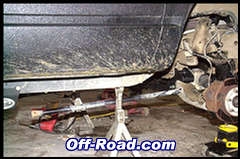
The torsion bars are unloaded then the torsion bar
cross member is removed.
|
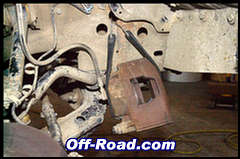
The front calipers are removed then hung out of the
way.
|
 |
 |
|
The sway-bar is detached then removed and set aside
for later.
|
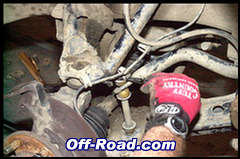
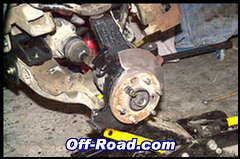
Remove the hub assembly from the stock
spindle
|
 |
 |
|
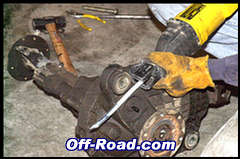
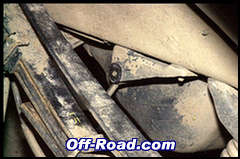
Disconnect the upper and lower ball joints then
remove the knuckle / spindle.
|
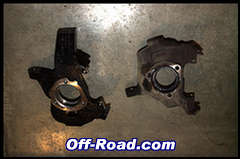
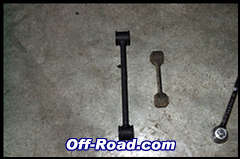
This is the new spindle on the left and the old one
on the right.
|
 |
 |
|
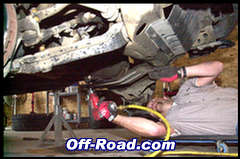
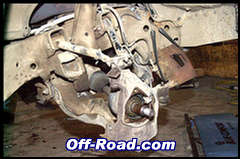
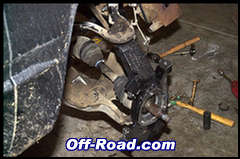
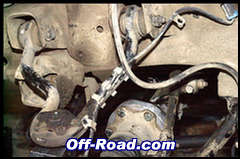
Unbolt the stock CV / axle from the front
differential and remove. Unbolt and remove the lower control
arms.
|
Lower the differential and cut the top ear off with
a sawzall.
|
 |
 |
|
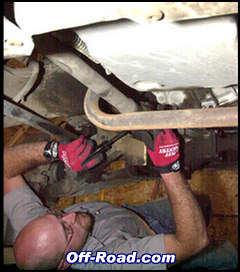
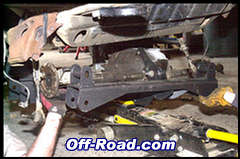
Install the new Tuff Country bracket on the front
differential.
|
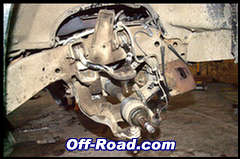
Raise the one piece subframe and differential back
into place.
|
 |
 |
|
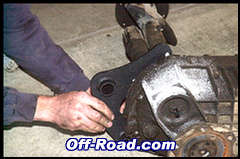
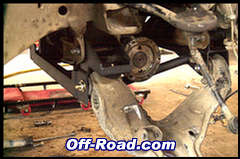
Install the the lower control arms into the new
subframe.
|
Reattach the front axles to the differential with
spacer and longer bolts.
|
|
|
|
Install the the lower control arms into the new
subframe.
|
Reattach the front axles to the differential with
supplied spacer.
|
 |
 |
|
Attach the new spindle to the upper and lower
control arms.
|
Drill holes in the frame to secure the new one
piece subframe.
|
 |
 |
|
Attach the hub assembly to the new Tuff Country
spindle.
|
Reattach the brake line to upper control arm.
|
 |
 |
|
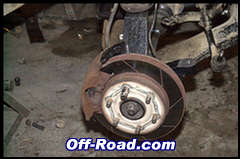
We reinstalled our PowerSlot Rotors and the
calipers.
|
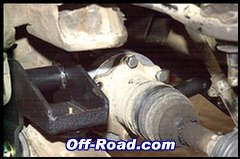
Drill new holes and attach the new crossmember drop
down brackets to the frame. Then reinstall the cross member.
|
 |
 |
|
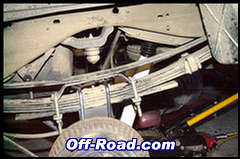
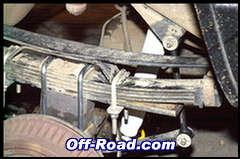
Reinstall the stock torsion bars.
|
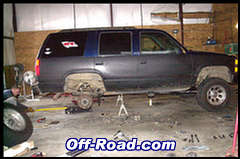
Installation of front suspension lift almost
complete.
|
 |
 |
|
Put the rear up on jack stands for
installation.
|
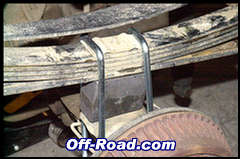
Install new lift blocks and new u-bolts.
|
 |
 |
|
New rear sway bar drop down bracket on left.
|
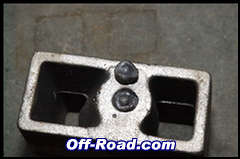
We did run into a problem with one of the rear lift
blocks. The pin broke out of the casting.
|
 |
 |
|
We reinstalled our Super Springs after securing the
new blocks.
|
We had a problem getting the stock sway bar bolt
out, as it hit the gas tank. We had to cut off with a
Sawzall.
|
 |
|
|
Install new rear shocks and new sway bar drop down
brackets.
|
This is the modified exhaust pipe making room for
the new location of the front driveline.
|
We are DONE. A very long day but we did manage to complete the installation in a single day with two people working on the installation. I expect most experienced garage mechanics could do the install in a weekend with a couple buddies to assist. The installation with the IFS suspension is still quite a job and much more difficult than installing a lift on a leaf spring vehicle but Tuff Country makes it easier with the new spindle/subframe kit. Final Touches
We slowly drove the short trip home, then headed to the alignment shop first thing the next morning. We dropped the Tahoe off so everything could be properly aligned. Later that day we picked up the Tahoe and then took it to the exhaust shop for it's final stop. The exhaust shop modified the front crossover pipe so that the front driveline could be reinstalled.
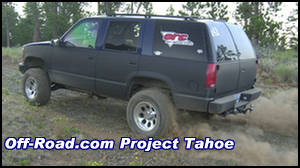 |
Testing Since the install, we have already put another 5,000 miles on Project Tahoe, travelling to and from events, often under heavy interior loads or towing. The new Tuff Country Suspension is performing very admirably. The squeaky suspension is gone. This has alone been very nice. The ride quality has been as good or better than the shorter Rough Country lift. Though we should note that there is a noticeable difference on the highway due to the additional height. The Tahoe has a little more dip and roll than it did before. It took about 1,000 miles or so to get used to that, but now we don't even notice it. The additional 2" gives the 33" tires a little more room to move and the whole Tahoe a more aggressive look.
What's up next? With over 130,000 miles on it, it looks like the Tahoe is going to be around a while. And those road trips just keep getting longer - so we are installing a new back seat entertainment system with in-dash DVD player and Rosen Entertainment 7" headrest monitors. Following that we will be updating the front of the Tahoe and replacing the stock chrome grill, with a black grill and Grill Craft insert. That chrome has already outlived it's welcome, many many months ago...
|
Off-Road.com Newsletter Join our Weekly Newsletter to get the latest off-road news, reviews, events, and alerts! |
Follow @Off-Road
 Your Privacy Choices