Project Chevy Tahoe: RCD Light bar for your Sport Utility Vehicle
Project Kickin' It Update
|
||||||||||||||||||||||||||||||||||||||||||||||||||||||||||||||||||||||||||||
|
||||||||||||||||||||||||||||||||||||||||||||||||||||||||||||||||||||||||||||

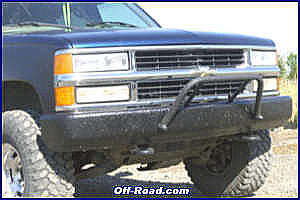
 Now that
Project Tahoe has been grabbing LOTS of attention with it's Perma
Tech paint job we had to get back to work on this project. We now
have the protection from rock chips but we need some more light for
cruising those backroads at night. This month we will install a new
light bar from Race Car Dynamics in Jamul, California. next month
we will install some lights on our new light bar.
Now that
Project Tahoe has been grabbing LOTS of attention with it's Perma
Tech paint job we had to get back to work on this project. We now
have the protection from rock chips but we need some more light for
cruising those backroads at night. This month we will install a new
light bar from Race Car Dynamics in Jamul, California. next month
we will install some lights on our new light bar.
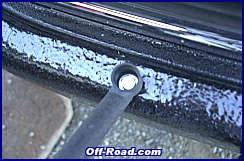
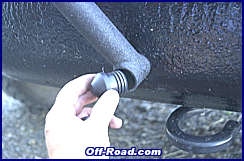
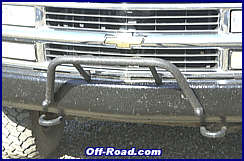
 A very simple installation and a very nice product.
(The chrome grill is definetly going to have to go.) Watch for a
PIAA light installation next month.
A very simple installation and a very nice product.
(The chrome grill is definetly going to have to go.) Watch for a
PIAA light installation next month.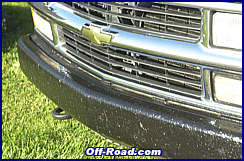
|
Off-Road.com Newsletter Join our Weekly Newsletter to get the latest off-road news, reviews, events, and alerts! |
Follow @Off-Road
 Your Privacy Choices