Project Chevy Tahoe: Jet Power for your Late Model Truck or Sport Utility Vehicle
Off-road.com visits Jet Performance
products for easy bolt-on Jet Power
October 2001
Late model vehicles use various types of computers that monitor and control the engine based on specific driving factors - some have chips that are easily removable, others do not. JET Performance Products in Southern California has a chip, module or computer upgrade to fit almost every application. By installing a JET system, a Chevy 350 (as in our Tahoe) can expect a gain in the range of 20 horsepower. Retail - approx $300, depending on your vehicle 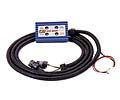
While at JET we also needed to resolve a couple other issues with our Tahoe. We recently installed some larger tires and needed to bring our speedometer back in range. Jet has a Speed Control Unit (SCU) module that is just the ticket. The JET SCU 2000 interacts with the vehicle speed sensor. It allows transmission shift points and speedometer calibration where tire size or gear changes have been made. An added feature that some may consider an important benefit, is that there is no more top speed limiter. Retail - $180 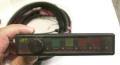 The final product we're installing at this time
allows us to firm-up the shifts on our transmission. The Tahoe has
especially soft shifts from the factory, especially for towing. JET
builds a Power Shift Controller that gives you the ability to
select between four different transmission settings of shift
firmness - Stock, Stage 1, Stage 2, Stage 3 (also referred to
as "Race" in JET literature) Retail - $250 The final product we're installing at this time
allows us to firm-up the shifts on our transmission. The Tahoe has
especially soft shifts from the factory, especially for towing. JET
builds a Power Shift Controller that gives you the ability to
select between four different transmission settings of shift
firmness - Stock, Stage 1, Stage 2, Stage 3 (also referred to
as "Race" in JET literature) Retail - $250
|
|||||
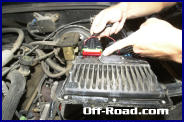
The Power Control Module computer chip looks at various sensors such as the manifold vacuum, coolant temperature, throttle position and RPM. It then adjusts spark timing, air/fuel ratios, etc. These minor changes provide major improvements to horsepower and torque available at various driving conditions (can you say "improved gas mileage?"). Choosing the correct chip is very important. Depending on your vehicle and the intended application, there are three chips available from JET Performance Products: Stage 1 is intended for installation on stock engines with no other modifications. Stage 2 is designed for modified vehicles. Both these chips are street legal in all 50 states. Stage 3/Powr-Shift is the ultimate, and is defined as "an aggressive transmission program." Not guaranteed to be street legal, and probably not necessary for your rock crawler, but wouldn't it be fun to try?... *Check out http://www.jetchip.com/faq.htm Installation of Stage 2 Power Control Module
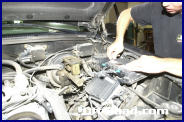
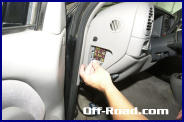
Disconnect negative battery cable Locate the stock ECM/computer (chart provides guidance where it can be found on each vehicle)
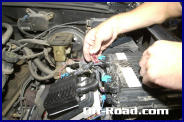
Remove ECM/computer from its hold
down bracket to access all factory wire harness connectors.
Unplug the ECM computer harness (color will depend on
vehicle)
Plug the JET wiring harness into the stock ECM/computer where you unplugged factory harness Plug the factory harness into the JET PCM
Plug the PINK wire from the JET PCM into the 3M connector.
Reinstall the ECM/computer into its original location, reattach any hold down hardware as originally attached. Start vehicle and make sure the SERVICE ENGINE LIGHT is NOT on. Drive the vehicle to make sure everything is working perfectly! 20 HP in under 20 minutes, Amazing!
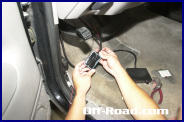
JET Power Shift Why a shift controller? Most sport utility vehicles are designed with comfort in mind, not performance. What may feel best to you as a passenger may not be what is mechanically the most sound - in fact, it is not. The smooth shifting an automatic strives for comes from the transmission "slipping" gradually between gears. Especially when performing under load such as towing, it is difficult for the transmission to ensure this smooth shift. By accepting a firmer grab of a gear (felt as a subtle jerk in motion), you are allowing the transmission to lock in solidly, and potentially prolonging the life of the transmission itself. Installation - The JET Power Shift Controller is manually adjustable, so access to the control is inside the cab. The exact instructions (with simple, clear diagrams, thank you!) explain how simple the installation is: Mount the Power Shift box in the desired location. Connect the RED wire to a 12 volt KEYED source (the fuse box is a good choice). Make sure the power is on ONLY when the key is on. Connect the BLACK wire to ground. Run the remaining two wires to transmission - model 4L60E should run to passenger side, 4L80E should run to driver's side. Crimp the 2 Scotch Lock connectors to the other side of the C&D terminals.
Plug the connectors from the Power
Shift into the connectors that you crimped onto the transmission
wires. It does not matter which wire color is plugged in to
either of the connectors.
NEED ADDITIONAL IMAGE SHOWING CONTROLLER IN VEHICLE Settings range from Stock (which basically does not take advantage of any Power Shift control), to Stage 3 (or, as I have come to call it, "Whiplash". Second driver assures me they don't think it is that bad, and in fact, prefers it. It has a high-performance feel.) We generally leave ours set to Stage 2 which definately gives driver and passenger a firm nudge when it shifts, especially from second to third gears, but at least it doesn't spill your drink out of the cup holder! *It's important to note that when using the Shift Controller, the transmission resets only when the engine is restarted; if you change the setting while driving, the indicator light will change but you will not notice a change in shifting until the next time you start the vehicle.
Locate relay center under dash on driver's side Remove Velcro backing on SCU2000 and mount next to the relay center.
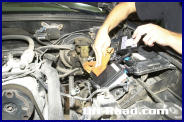
Run extension wire supplied to fuse panel. * The SCU must have a good and continuous 12V power source Run SCU2000 wiring harness through firewall at steering column grommet.
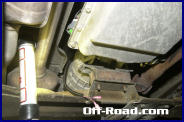
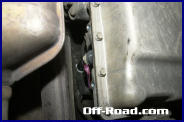
Run harness along frame rail toward the reat of truck to back of transmission. Note: Our installer, Robert from Jet, has found a much easier way to do this. Robert located a boot passing through the tranny tunnell. This allows a much shorter and more direct route for the harness .
Plug SCU harness into speed sensor
|
|||||


|
Off-Road.com Newsletter Join our Weekly Newsletter to get the latest off-road news, reviews, events, and alerts! |
Follow @Off-Road
 Your Privacy Choices