Photos by Kelly Miltimore and Justin Fort
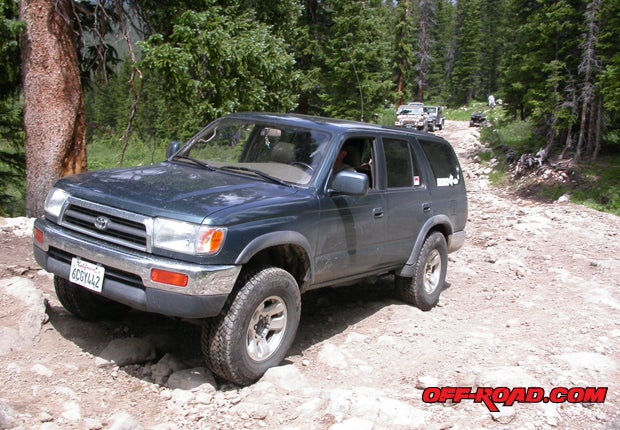 |
| After a ton of investigation, our third-generation 4Runner's suspension finally came together. |
More Gen 3 4Runner Build Stories: |
If you own a third-generation Toyota 4Runner – one built from 1996 through 2002 – and you’ve tried to build out the suspension, with any effort your investigation has probably found a bottomless list of ways to do so.
OEM-based, factory-tuned, aftermarket, desert, expedition, spacer, coil, arms and legs and cats and dogs, they’re all available in your effort to put your 4Runner up enough to satisfy your style of off-road use. We’ve done some reading, some experimentation and some thinking and have come to a few conclusions – mainly that we’re going to start with the TRD Tundra-based front suspension.
By the way, last month we went through the Tundra big-brake swap for the third-gen 4Runner. The rotor-warping fade of the original 4Runner brakes is gone. We’ve even had a couple nasty panic stops (not intentionally), and those big binders might just have saved a few standard So Cal phone-chattin idiot drivers’ day.
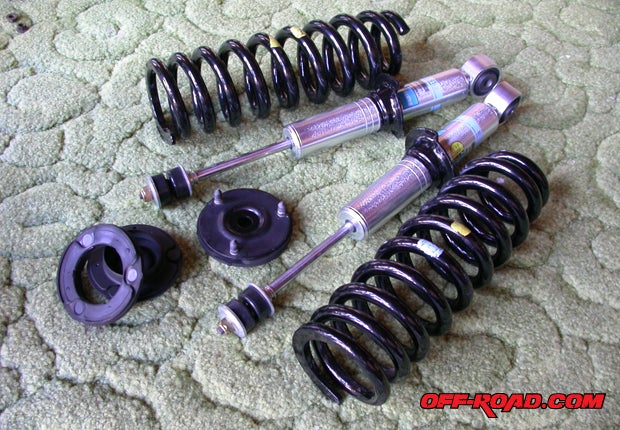 |
Bilstein 5100 and TRD blue/yellow-yellow/yellow, with modified top-hats and not much else. |
Hard Facts are Kind’a Soft
If you’re doing the math and want lift numbers, the fuzz-effect is in full. Different specs between different rigs make it tricky to clarify changes in lift beyond rough figures, and we have on good authority from vendors that even different runs of the same part-number can have variations. Think about it – an SR5, Sport, Limited or base-model 4Runner will all take the same spring and shock combo in front, but none of them will sit the same. Transmission and engine choice, options, use and abuse, model year, even your 4Runner’s place in the weekly build cycle can alter its stance. Manufacturer’s tolerances exist for a reason, eh? You’re never going to be sure to the millimeter, and the TRD-Bilstein combo we’re using might put an extra centimeter on your rig over ours.
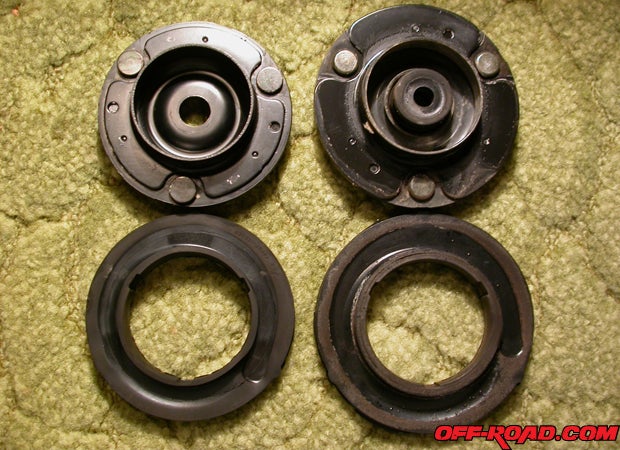 |
| On the left is the 1996-2002 4Runner/Tacoma top-hat and isolator, and on the right the first-gen Tundra. You’ll need the Tundra isolator, which slips on to the 4Runner metal hat. The stud-span on the Tundra top-hat is too big for the 4Runner’s upper perch. The fit is perfect. |
Details of the Process – Lifting The Front End
One of the pleasures of this project has been the subject itself. Toyotas in general, and the third-gen 4Runner in particular, are a treat to wrench upon. Even the tricky parts figured themselves out in a linear, consistent fashion – it’s as if the engineers intended the truck to be repaired, not thrown away or clunked.
PAGE 2
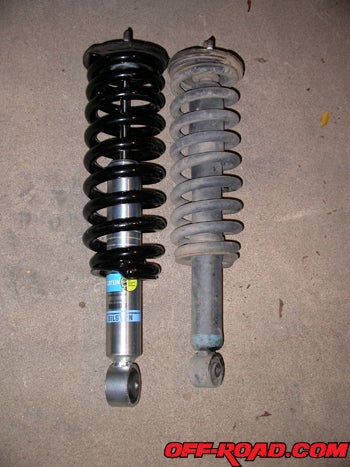 |
Loaded TRD/Bilstein coilover (left) and factory (right). |
For this application, the TRD springs, dripping with factory quality and simple effectiveness, were combined with a set of Bilstein 5100s. It’s an OEM-centered combination that offers builders and newbie modifiers a coilover that mounts directly, with no mechanical alterations and just one tweak. It replicates the confidence brought by using parts from the same manufacturer that made the originals (keep in mind that Bilstein made the original TRD Tundra shocks). You can reuse factory coilover bits (minus the 5100s), though a set of 4Runner/Tacoma top-hats must be combined with a set of Tundra top-hat isolators to make the combo work. Junkyard, please.
In our case – SR5 ’97, auto transmission, sunroof and the V6 – we netted about four centimeters of height with Toyota Racing Development’s Tundra springs, parts 48131-AF090 and 48131-AF100 (left & right). Yup, these are the famous blue/yellow-yellow/yellow TRD springs, available from Toyota dealerships and TRD retailers all over the place (ask for your official Off-road.com discount). That a little more than an inch and a half in front – important, because it’s safe for your half-shafts without a diff-drop. It’ll also make most 33-inch tires fit without complaint, and could make 31s look a tad smallish (though very stuffable).
More Gen 3 4Runner Build Stories: |
The hidden gem and source of future modification fun will be the adjustable-perch Bilstein 5100 shocks, in particular the BE5-6929-HO (what Bilstein calls a high-performance leveling shock for the first-gen Tundra). The leveling capacity comes from the adjustable lower perch on the shock. The same unit that will take a Tundra from nose-down to slightly nose-up (there’s about 2.5 inches/60mm of adjustability) is all up for a 4Runner, with the lowest setting on the 5100 bringing, in our installation, 1.5 inches, or four centimeters of lift. Bilstein already manufactures the OEM shocks for Toyota Racing Development’s Tundras and Tacomas, so we didn’t stop to question the quality. There are numerous other shock choices for a 4Runner suspension, but between our interest in exploring the TRD Tundra option and making an easy OEM-based choice that would inspire confidence and ready modification, we went back to parts used by the factory.
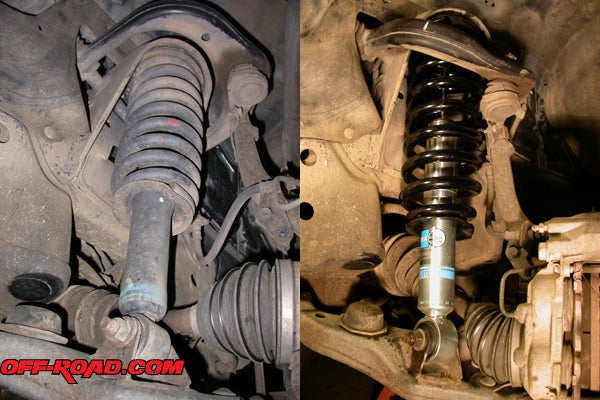 |
On the left is the original 4Runner coilover, while on the right is the TRD/Bilstein coilover installed. |
Torn now, we are, between using the Bilsteins and their adjustable perch to increase front-end lift, and using a top-out spacer that mounts between the coilover top-hat and the upper perch. One would be super-economical, the other provide a neat opportunity to introduce an HDPE spacer or other plastic spacer (using elongated studs) to reduce translation of suspension-to-body vibration. A top-out spacer would also preserve the spring rate, while the adjustable perch on the shock body could bring us closer to full-droop in the Bilstein, possibly compromising function on our lighter-than-Tundra application. Oh, the joy of finding out – stay tuned.
PAGE 3
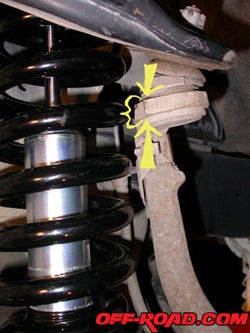 |
The only spot of serious labor: you’ll see the small tooth of metal on the top of the steering knuckles. It’s obvious what needs to be removed. Round it off before the TRD/Bilstein coilover goes in. |
Removing the front coilover assembly is as quick as jacking up your truck, popping the front tire and wheel off, loosening the top-hat nuts (don’t remove them until the bottom through-bolt is loose), and then slipping the bottom bolt out. The top of the shock will follow the bottom out as a whole unit. It’s heavier than it looks. Follow that with cleaning of all the pockets, perches and openings because 4Runners tend to keep dirt everywhere, and the new/clean parts going in will appreciate a tidy new home.
The only real labor invasion of the bolting process is to grind a small horn of metal off the top of the steering knuckle, as we’ve indicated. It’s not much more than flashing, and a few minutes with the four-inch grinder or 10 minutes with a flat file will make it go away. The Tundra coil wrap is slightly wider than the 4Runner, and this bit of metal gets in the way of full-lock travel.
Two moments of big rat engineering are also required to install the TRD Tundra-based front shocks. It’s nothing heavy – just leverage. Actually, heavy would be good – the leverage required on the upper A-arm is full-grown man style. No one will get hurt, but if your girlfriend weighs less than 130 or has girlie arms, call the dude next door with the beer belly, unless he also has girlie arms. Point is, when you need to slide the bottom bolt through the shock, you’ll need a little extra compression on the upper arm (take a crowbar from the top of the arm to the hinged inboard point at the back of the arm, and lean on it) just for an instant.
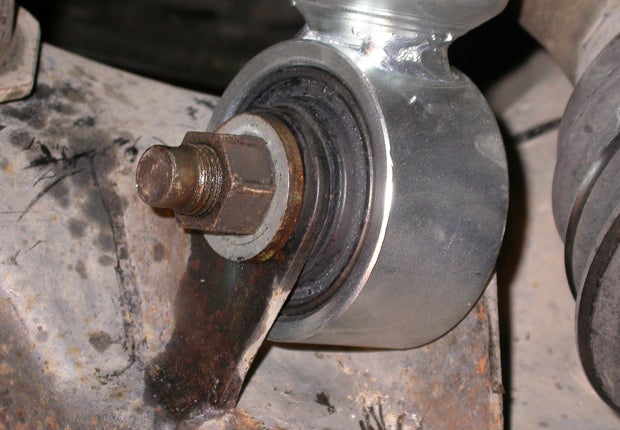 |
The lower shock mount, which is just a bolt, is not the best place to find leverage – work from above. |
We’ll report back with the 4Runner’s rear suspension (thought-heavy, process-light) and how it all works as a package in a week or three. Hint hint – it works. This isn’t a tricky installation, but there are too many details not to call the selection process complicated. We’ll have before and after pics too, for your eyeballing-the-lift pleasure.
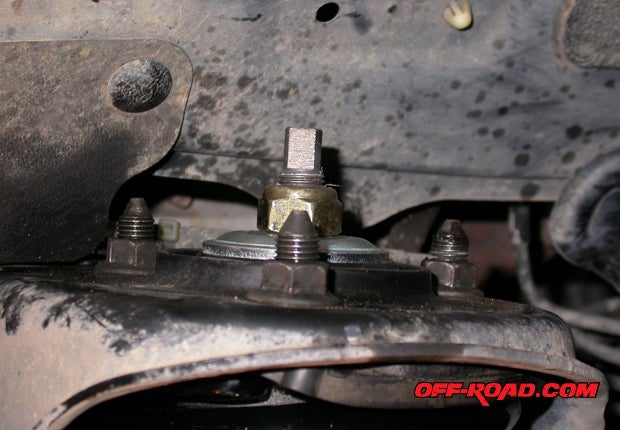 |
| The top of the unit bolts in with limited drama – three bolts and a little Liquid Wrench and you’re good. |
 Your Privacy Choices