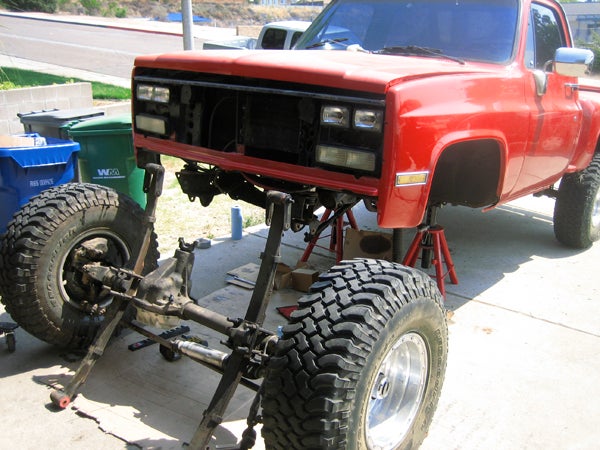
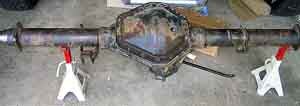
Project Big Bad Chevy really isn’t so big and bad in its’ current state. While it may look bad and does fairly well off-road, if we pushed the big Chevy to the limit the half ton axles will certainly break. Large tires, nasty off-road obstacles and a heavy right foot are recipes for disaster on off-road trails miles from spare parts! The tiny half-ton axle shafts are sure to snap in extreme off road conditions so it is time for an axle upgrade. The strongest axle combination General Motors offered to the public in their trucks was their 1-ton series, namely the coveted Dana 60 front and the rear 14 Bolt full floater axles. The only thing stronger is the Rockwell axles but those are too much for our needs.
Our current front axle is the ½-ton Corporate 10 Bolt axle with 28-spline shafts and a 8.5-inch ring gear. The Corp 10 axle is similar in size to the Dana 44 but the Dana 44 uses 30-spline shafts. We decided the Dana 60 would be the perfect axle for what we will be doing in our Chevy. The Dana 60 has larger 35-spline inner and 30-spline outer axle shafts, uses one-inch larger bearings on the carrier and the pinion shaft, incorporates larger, heavier duty bearing races, and has a 9.75-inch ring gear. The Dana 60 is much stronger and beefier all around than the Dana 44 or the Corp 10. Even the axle housing on the Dana 60 is much stronger with a half-inch thick tubing and an extra beefy center section. The rear 14-Bolt full-floating axle is also tons stronger than the current 12-bolt we have. With this axle combination we should not have any issues on the trail!
There are a lot of decisions to be made if you are performing an axle swap on your trail rig. Lots of research is needed to make the proper choices for your application from choosing the proper gear ratio and locker, to rebuilding the axles to ensure a long and durable life. Swapping 1-ton axles into a lighter-duty Chevy is a fairly straightforward process but there are still plenty of issues that need to be addressed. This article touches on some of the necessary topics and selections to make your axle rebuild process a smooth one as we prepare our Dana 60 front axle and 14-bolt rear for their new home. In the next article we will discuss installation itself.
 |
 |
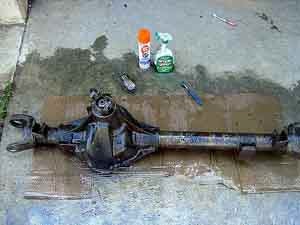
We found a set of 1-ton axles with 4.10 gears that came out of a 1979 Chevy truck that was used on a farm all its life. They were both complete but needed some attention to get them back to new condition. In this article we will try and discuss what we did and the parts we used to rebuild our axles and change the gearing. Our goal with each axle was to completely strip it down, clean, paint, install all new bearings, lockers, different gearing and reassemble. No small task by any means! After many hours of research and gathering parts we decided to give it a try ourselves. Just unloading the axles out of the truck was indeed no small task! |
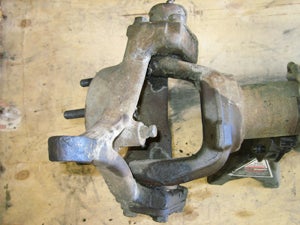
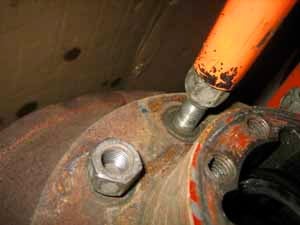
We started with the front Dana 60. Using an engine hoist we lifted the massive Dana 60 and rolled it out of the garage. The first step was to drain the fluid but we decided (read forgot) to skip this step and go for the good stuff! The first task was to remove the brake calipers and rotors. We expected to find two large bolts that hold most common brake calipers on. Our inexperience with this massive axle shined since there were no caliper bolts to be found! Quick searches on the web lead us to a caliper diagram which showed a small bolt and a support key that needed to be removed. We were able to easily find the screw but plenty of surface rust kept the support key hidden. A little WD-40 (proving to be one of our best allies) and a wire brush quickly revealed the elusive support key, which was tapped out with a punch. Once that was out, the caliper came right off. |
 |
 |
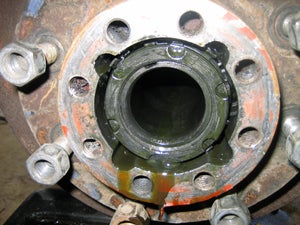
The next step in the process was to remove the OEM manual locking hubs by backing out the Allen head bolts. Once the hubs are out you will see a nut with tabs on it. You can rotate this nut with a screwdriver if you don’t have the proper slotted socket to remove it. Behind the nut are a washer and another nut. Once all three are out, the hub and disc assembly should slide off the axle. |
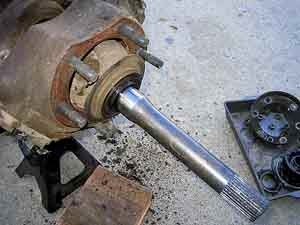
With the hub cleaned and ready to reinstall, the next step would be to remove the six bolts that hold the caliper bracket and disc guard in place. With these removed the axle shafts should slide right out. If you skipped step one like we did, be prepared for a stinky mess of gear oil on the floor. |
 |
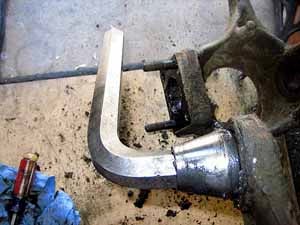 |
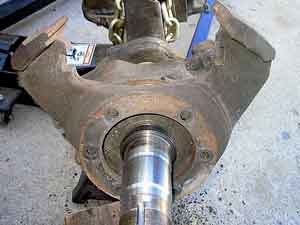
| Next we removed the steering knuckles to clean and paint them as well as rebuild the king pins. To remove the knuckles the king pin caps need to be removed which will reveal a couple washers, a spring, and the upper king pin bushing. | Now it’s time to remove the king pin. You will need a huge 7/8-inch hex wrench for this part of the job. We found one at a local tool supply house. We had read how difficult it is to remove the king pin due to the amount of torque used during installation and years of use. We put the hex wrench into the king pin and used a small sledge hammer to break it free. One good hit on the wrench and it was free! Next we removed the lower knuckle cap, a bearing, washers and a seal. With all of that removed, the knuckle comes off and is prepped for paint. |
 |
 |
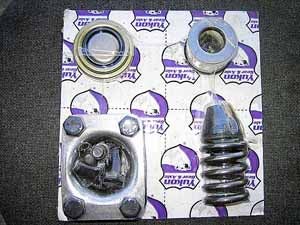
We used the king pin rebuild kit from 4wdfactory.com . It is complete with all necessary parts in one convenient kit. 4wdfactory.com is a great site with a wide variety of parts including axle rebuild kits, suspension parts, brake conversions, fabrication tools, winches, adaptors, etc etc. An all in one shop that should take care of all your needs! |
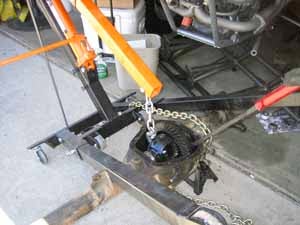
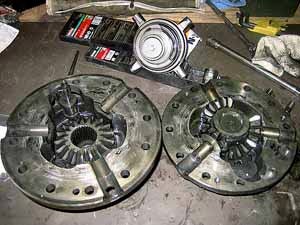
With the axle shafts out it was time to remove the ring & pinion along with the carrier. From what we read it looked to straight forward. By removing the carrier bearing caps we should have been able to pry the carrier assembly out of the axle housing. We were not able to do this even with a long cheater bar over the pry bar! We ended up using an engine hoist to snap it out of the axle housing. |
 |
 |
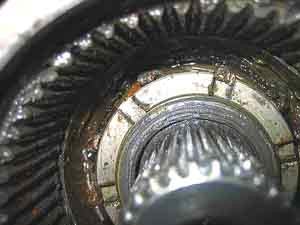
With the carrier out of the way it was time for the pinion gear to come out. First is to remove the large 1-5/16 nut and tap the yoke off with a mallet. With our trusty hammer and a quick blow to the pinion end the pinion popped right out! We removed the last couple of axle shaft seals and began cleaning everything. Lots of degreaser and a few hours with a wire wheel to remove rust and it was ready for a new coat of paint and reassembly. |
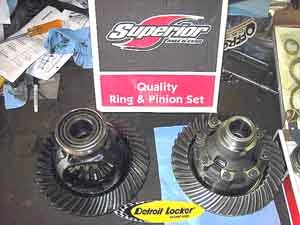
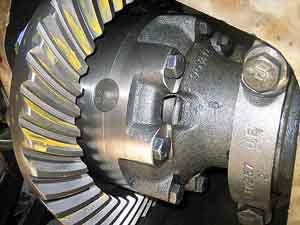
To ensure we keep both wheels spinning when the trail gets nasty we will be installing a Detroit Locker and a new Superior Axle & Gear ring and pinion. Just about everyone has heard of the Eaton Detroit Locker. They are extremely strong lockers that rarely fail and should be perfect for use in our hardcore Chevy. Eaton has been in business for a very long time and the Detroit Locker enjoys a good reputation for being one of the strongest lockers around. |
 |
 |
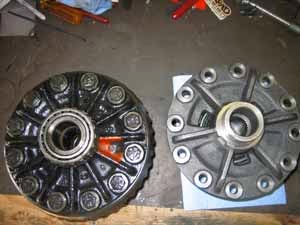
For our front Dana 60 the Detroit Lccker is a complete replacement carrier. For the rear 14 Bolt axle, the NoSpin (the caseless version of the Detroit) is installed into the OEM carrier. The NoSpin locker ensures 100% traction even if one wheel is in the air, yet it retains the ability to permit wheel speed variation during a tight turning maneuver. Lockers front and rear will significantly increase the capability of our big Chevy in the rough. |
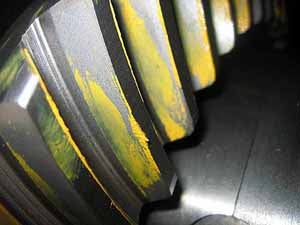
Superior Axle & Gear, located in Southern California, has been manufacturing axle shafts, ring & pinion gears, and other drive train components since 1934. Their ring & pinion sets are made from the purest 8620 gear steel forgings available. Computer controlled machining and heat treating ensures a perfect and strong product. Superior finishes each gear set with extra ‘lapping’ for better gear contact patterns and quieter operation. |
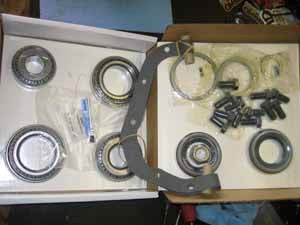 |
For our purposes we used 4.88 gears as well as their convenient rebuild kit which has all new bearings, seals, shims, bolts, and gaskets. We decided on the 4.88 ratio to give us decent mileage on the highway as well as good off-road gearing. |
Now it is time to reinstall new bearings and seals and finish buttoning up the Dana 60. The most technical part is getting the ring and pinion backlash set correctly. The rebuild kit from Superior Axle & Gear came with new pinion shims that were a hair too big to fit back into the axle. We decided we would be able to reuse the old shims since they were the same thickness. Next we needed to remove the bearing and a plate that was on the pinion shaft. We tried our best to press them off but ended up ruining this plate, which was needed to set the pinion shaft to the proper depth during installation. At this point it was time to call in the professionals to make sure our Dana 60 was rebuilt correctly and would last us for many years to come.
 |
 |
Enter Dwight Brinkerhoff from Horizon Performance Drivetrain. He is ASE certified, and has 25 years of experience and for 17 of those years Dwight was a master technician for Chrysler. He decided to start his own business and now works on a wide range of drivetrain components such as transfer cases, transmissions, gear swaps, locker installs, and builds custom axles for just about anything. We took our Dana 60 to Dwight for him to install the carrier along with the ring and pinion. There comes a point when you need to make the call that you need a professional! Dwight was able to install our new Detroit carrier as well as set the proper pinion depth and ring gear backlash with ease. |
For the rear 14 bolt axle we wanted to completely tear it down, clean everything and rebuild it from the ground up. For a locking differential we will be using a Detroit NoSlip locker and replacing the gears. The last upgrade would be to remove the heavy brake drums and replacing them with disc brakes and calipers from a 1979 Chevy truck. |
 |
 |
Disassembly was pretty straight forward. We began by removing the differential cover and draining the gear oil. Then we removed bolts holding in the axle shafts and slid them out. With the axles out you will see the spindle lock washer and nut. Bend the tabs of the lock washer back and if you don’t have the proper six-slot socket you can use a screwdriver to remove the nut. Once it’s off you can fish out the lock washer and remove the inner nut. Now the brake drum and hub should slide off the axle tube. |
Since we are converting to disk brakes, we used a press to press out the wheel studs which allowed us to remove the heavy brake drum. After we sand blasted and painted the hubs we will press the studs back in. |
 |
Once the carrier was split we quickly learned that we needed a new carrier to fit our new NoSpin locker. This carrier only had three slots for the spider gear ‘legs’ to sit in while our new locker had four. We called Superior Axle to see if they made new carriers. They informed us that they did make them but were out of stock at the time. We ended up trading our carrier and ring & pinion for the proper carrier at a local gear house. Once we had the proper parts we took them all back to Dwight from Horizon Performance Drivetrain to be properly installed. Again Dwight did an excellent job with a quick turn around time. |
Eaton Corporation
1111 Superior Avenue
Cleveland, OH 44114-2584
Telephone: (216) 523-5000
http://www.eaton.com
Superior Axle & Gear
9580 Commerce Center Drive
Rancho Cucamonga, CA 91730
Phone: 888-522-AXLE (2953)
http://www.superioraxle.com
Horizon Performance Drivetrain
11982 Woodside Ave Suite 106
Lakeside, CA 92040
619-990-1718
dbrinkerhoff@gmail.com
4wdfactory.com
(512) 759-6267
http://www.4wdfactory.com
sales@4wdfactory.com
 Your Privacy Choices