I finally got around to working on the gears on Project ‘93 K1500. After upgrading to the 35-inch Pitbull Rockers the truck has been crying for a gear change. Although in 4-low I was able to get the power needed to blow through just about any obstacle, it would not be a valid solution for towing or long term highway driving. That is where Richmond Gear came into play. With over 80 years of experience, they offer some of the best gear sets in the market today.
For Project ‘93 K1500, equalizing the ratio to the existing 3.42 was not going to be enough, as we tow ATVs for hunting season and our bass boat for fishing season (which is all the time!). The truck has also put on some extra weight; about 1300lbs, between the fully loaded tool box, weight of the 35x15.50 Pitbull Tires (don’t forget the spare), winches, brush guard, suspension lift, extra battery, alternator, and a full load of supplies and people. The techs over at Richmond Gear helped me to decide exactly what gear set would equalize the setup as well as a step up from that to compensate for the rest of our needs. Determining that the 4.10 gears would realign the truck with the original setup allowed us to pick the next step which would be the 4.56 ratio gear set.
I picked out a ratio that would get the power I needed, without ruining my ability to drive on the highway. So now it was time for me to work on the installation. Oh, by the way, be sure to pick up some installation kits with your new gear sets.
Installing gear sets can be rather complex for the do-it-yourselfers out there, and should be taken to a professional. However, Richmond offers a video that covers the main portions of the install process which will help you at-home mechanics (like myself), get the job done. Having done gear sets a few times, I would recommend a professional, especially if you don’t have a hydraulic press in your shop, which is necessary for the shimming stages of the install. In the remainder of this article I will show you the basics involved in swapping gear sets on the IFS and rear of Project ‘93 K1500.
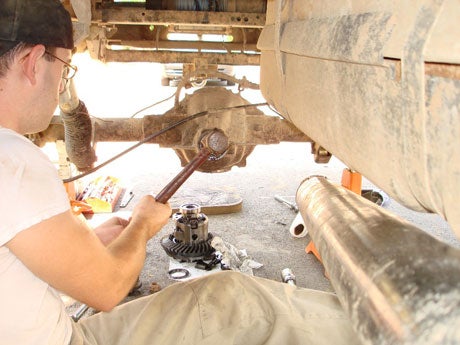
I began the install with the rear of the truck since I didn’t have to remove the entire differential housing.
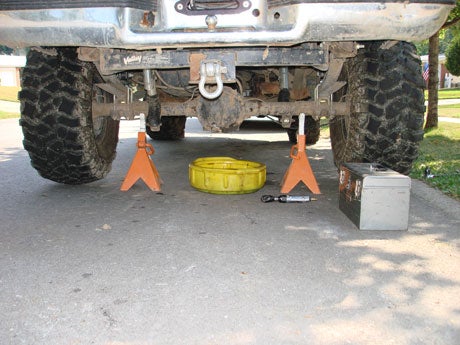 |
| First step was to raise the rear of the truck and support it on jack stands. Be sure to chock the front wheels. |
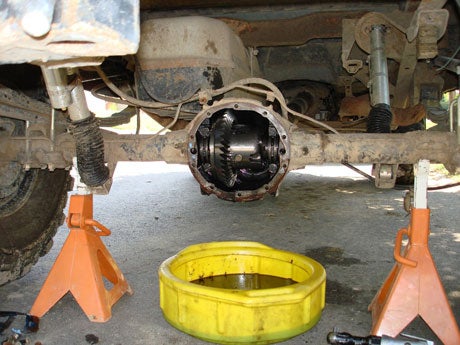 |
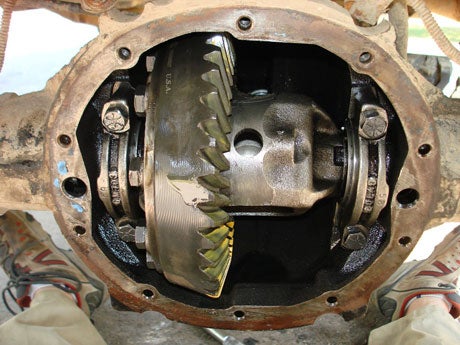
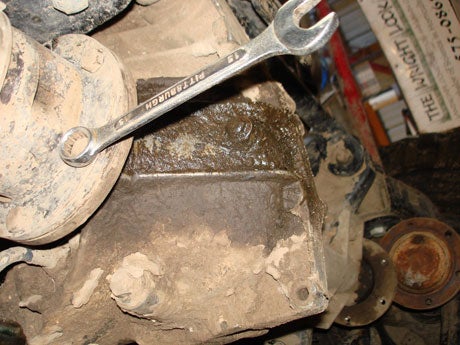
| Next, I removed the diff cover, starting by unbolting the bolts at the bottom and working my way up so that the fluid would have a chance to drain. While the remainder of the fluid was draining I unbolted the lug nuts and removed the tires so that the axles could be more easily slid out from the carrier after the c-clamps get removed. |
 |
| To remove the c-clips simply unbolt the center shaft and slide it out of the carrier. With that removed you can push the axles in just enough to remove the c-clips. Once the c-clips are removed, you can slide the axles out of the diff housing. |
 |
| Now that the axles are out of the way, unbolt the carrier by removing the four bolts on either side. Use caution when you do, as the carrier could fall out as soon as the clamps are removed. More than likely, you will have to pry slightly to get the carrier to come out of the housing. |
 |
| Next, I removed the driveshaft to allow access to the pinion nut. To remove the pinion nut without the yoke/pinion spinning I bolted one of the u-joint clamps back down and propped my large ratchet against the ground. |
 |
| Once the pinion bolt is removed I reached around to the open side of the housing with one hand and tapped the pinion out with the other, using my left hand on the rear side of the case to catch the pinion once it came free. |
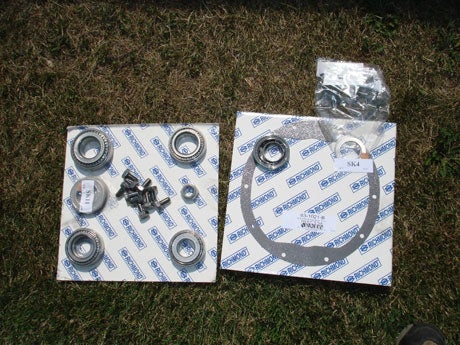 |
Now that the disassembly is complete, I am ready to begin reinstalling the new gear set and Richmond’s Powertrax Extreme Traction System. Laying out all the parts from the Installation kit helps to make sure you do not forget anything. When changing out carrier/pinion bearings, I took them to a local machine shop to press off and on for me.
|
 |
| With the new bearing pressed on I reinstalled the pinion. |
 |
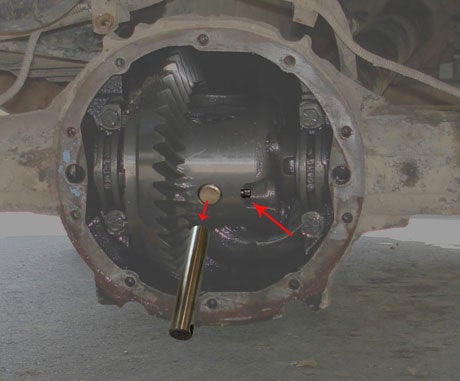
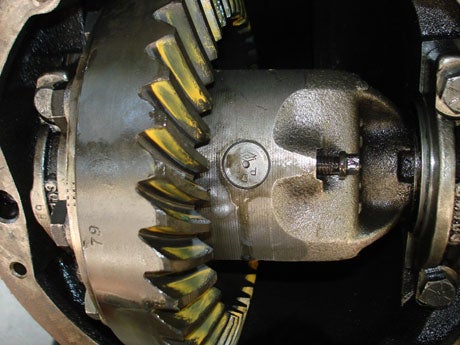
| Installing the carrier and shimming it as it was before should get you pretty close to the required spacing. You can check the spacing by painting the ring gear teeth with the supplied paint in the installation kit. Richmond’s Gear Sets come with a detailed chart showing the correct and incorrect patterns that should show in the paint. |
 |
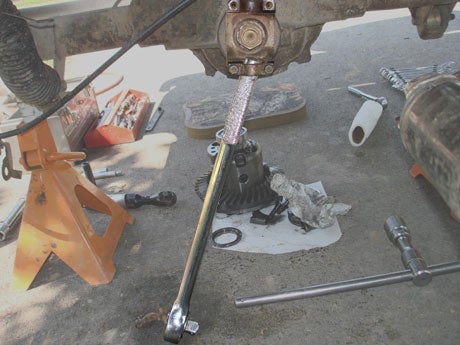
| After the pinion and ring gear are shimmed to the correct specifications, I reinstalled the carrier clamps and bolted it back down to the required torque (torque settings also can be found in instruction manual). |
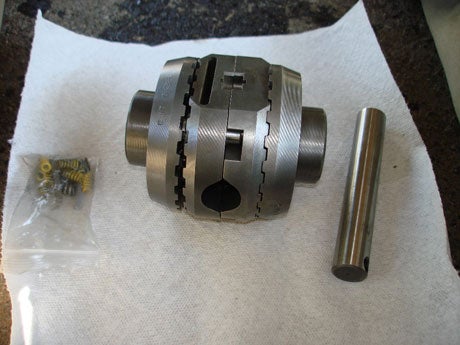 |
| Next, I can begin to install the Powertrax. It comes with a very detailed installation manual that got me through the install without any complications. The Powertrax separates into 4 sections and installs one section at a time starting with the ring gear side first. |
 |
| Install the first section into the left side of the carrier. Then, slide the axle back into the carrier, through the first section of the Powertrax and install the c-clip. |
 |
| Install the fourth section into the right side of the carrier and then the second section against the first section by the ring gear. |
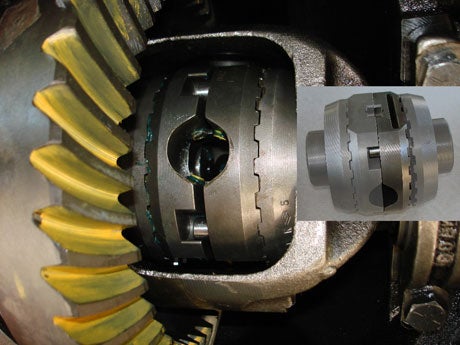 |
| Install the final section into the middle by sliding it in against the pins. Note that all four sections have to line up a certain way. The directions demonstrated all the diagrams to be sure this is done correctly. |
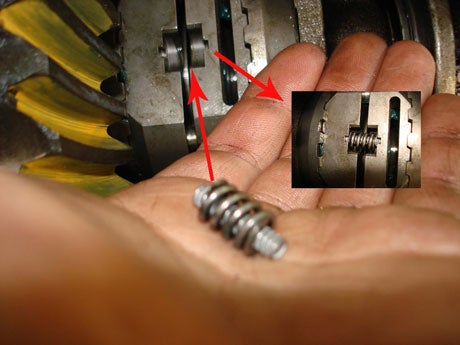 |
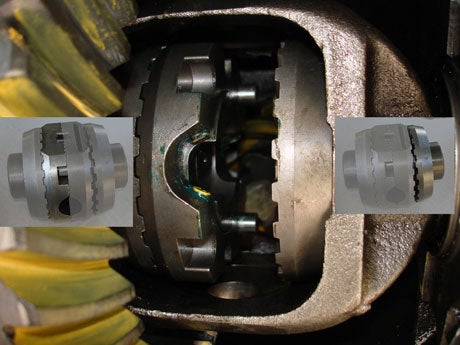
| With all the sections installed, carefully rotate the carrier around and place the 2 sets of springs on both sides of the Powertrax. |
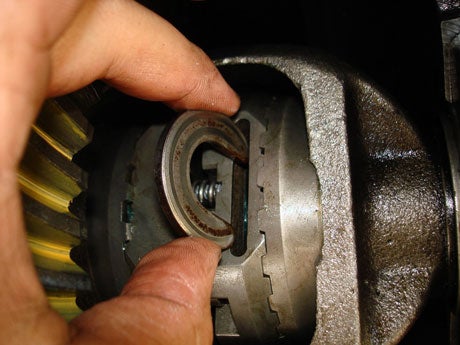 |
| Carefully slide the passenger side axle back into the carrier and then slide the c-clip through the Powertrax to keep the axle in place. |
 |
| Last reinstall the center pin and the center pin bolt through the carrier. |
With the back complete it was time to move to the front. Please note that this would be the second attempt at installing the front gear set. In my first attempt I did not shim the gear set properly and had the pinion depth set way too shallow. Although I was fairly confident using the stock shim as a guide, it turned out to be incorrect and I ruined the front gear set. This goes to show that a job like this is best left to the professionals. Even if you have done it in the past it is still possible for you to make a mistake and with gear sets, even the slightest mistake can be a crucial one. In any case, while reinstalling the front the second time I would take great care to be sure everything was lined up properly.
 |
| To start out, I unbolted the CV Shafts from each side of the differential housing. |
 |
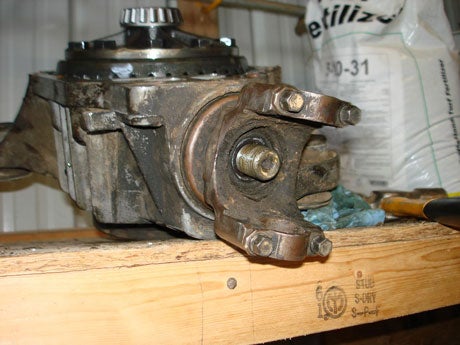
| With the CV Shafts unbolted and pushed to the side I then unbolted the passenger side of the differential housing (axle tube) from its mount. You could remove the mount instead, but realigning everything for the install would not be easy. |
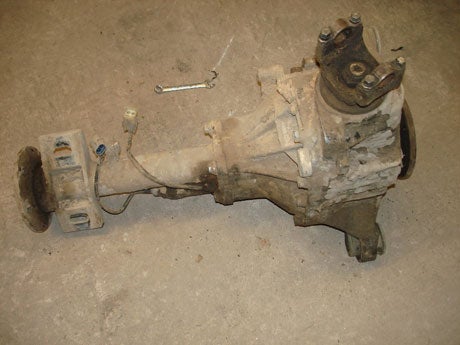 |
| With the two bolts on the driver side removed as well as the front driveshaft unbolted, I was then able to carefully remove the differential assembly from the truck. |
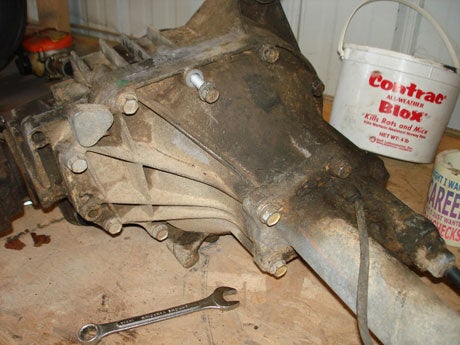 |
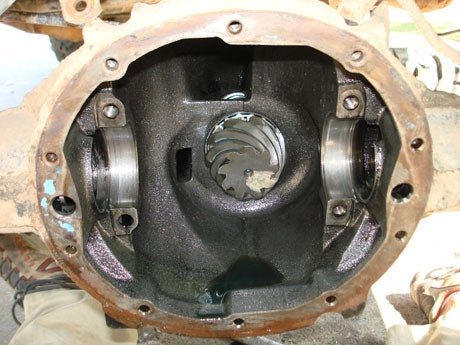
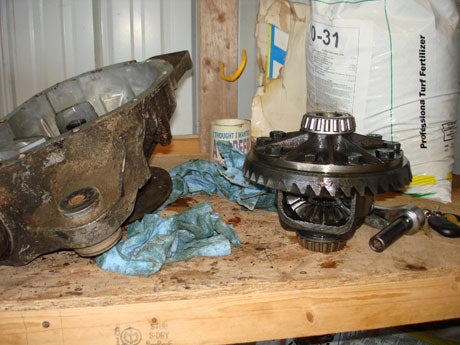
| After pressure-washing off what gunk I could and draining the fluid from the housing, I unbolted the housing to reveal the components inside. |
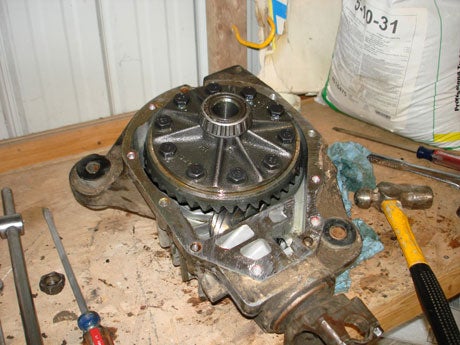 |
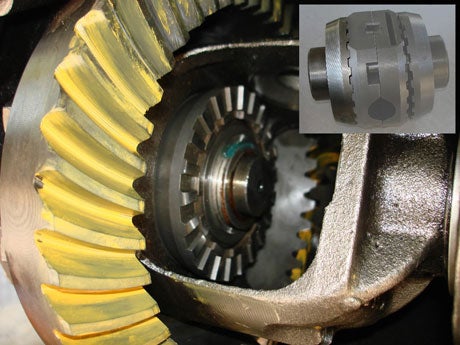
| Now that the housing is separated, you can see the differential inside. |
 |
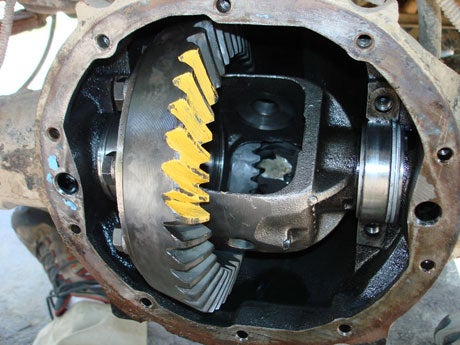
| To remove the differential, I slid two flat head screwdrivers on both sides of the ring gear and very carefully and slowly pried it out of the case. |
 |
| Next I unbolted the driveshaft yoke and slid that off to reveal the full stem of the pinion gear. |
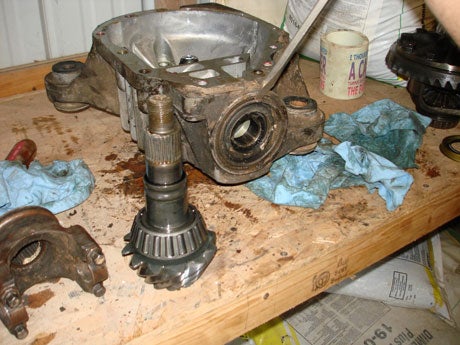 |
| Now that the yoke is out of the way I carefully hammered the end of the pinion gear shaft, hitting it into the differential housing case. Once the gear is out of the way I removed the seal at the opening of where the pinion gear was using a flat head screwdriver and prying gently. |
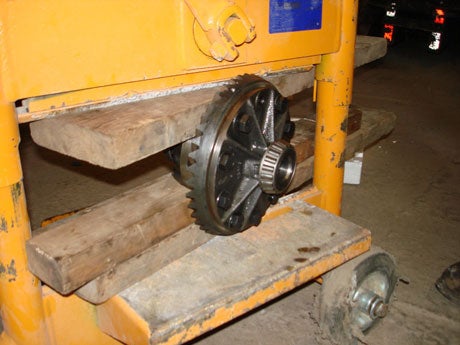 |
| Unfortunately I didn’t have a vise available at the time to hold the differential in place so I could unbolt the ring gear, so I had my friend help me by using the block breaker with a couple of 2x6s to distribute the pressure. **Note: The bolts connecting into the ring gear are reverse threaded and will not come out in one piece if you try to loosen them lefty-loosy righty-tighty.** |
With everything disassembled, I then bolted the new ring gear to the differential and pressed a new bearing onto the Pinion. I reinstalled the differential and pinion into the housing and then reinstalled the housing into the truck. Finally, with everything complete it was time to start driving around to break in the new gear sets. Be sure to follow the directions on how to break in your new gear sets. The break-in period varies depending on the application; track, street, towing, etc., and the instructions explain the different methods. Once I get the truck out again and get some pictures, I will be sure and post a follow-up on how the gears and Powertrax Extreme Traction System performs.
Source:
Richmond Gear
www.richmondgear.com
|
 Your Privacy Choices