How to build your own Custom Rear Bumper
Project 2000 Nissan Frontier 4x4
One winter evening a couple of my friends and I decided to take our trucks out though some uncharted trails. It was lots of fun until we came to this massive hill that was covered in snow and ice. I knew that I wasn’t going to make it up but I tried anyways. I wasn’t happy with my first try, so I had to do it again. This time I got about half way up the hill and was just feeling pretty good about it when the return slide began. The way down scared me a little bit because I was sliding backwards so fast and I couldn’t see where I was going. After that my friends told me, “You put a good effort in, call it a night”, but I decided to do it one more time, and this time I got even higher than the last.
That was great and all but that meant that I had an even father way to fall. As I was sliding backwards I could tell that I was going considerably faster than the first two times together. There was nothing that I could do. As I got to the bottom of the hill I must have slid to the right or left a little because I hit something really hard and the truck just stopped. I thought to myself what could that have been. So I pulled forward and got out of my truck to find my rear hitch and bumper bent down a good foot.
My hitch snagged a little mound of frozen dirt, and bent the frame all the way up the leaf spring mounts. I tried to unscrew the hitch and bumper but it was cold and the nuts and bolts were rusted on. My friend Jarred just happened to have a hack saw from the work that we were doing on his truck earlier that day and we plugged the saw in (on the power inverter that he has mounted in the truck) and cut the frame an inch form the leaf spring mounts.
Even though I had planned on making a new bumper, I wasn’t ready to do it because I didn’t have any good ideas that I liked. I thought that I could just do away with the hitch and forego any future problems (like it sticking in the ground), but I decided that I should keep it because whenever I get stuck it is fast and easy to put a D-ring in the receiver and attach a chain or winch line.
A great idea finally developed, and I was ready to start building it. My idea was to push the hitch as high up as I could, and attach it to steel angle iron that I would weld to the frame. I first started by taking measurements of the space that I wanted the rear bumper to fit into. Once I got my measurement I found that I was going to need about an 11-foot piece of high-grade steel. I went to my local metal yard where they told me that the steel I want was DOM grade. I also needed new frame rails from when I cut them off on the trail, and for that I would use the ¼” thick angle iron. Once I got the steel home I cut it in half because I wanted them to be equal in length.
Moving into the construction stage of the project, I first started with tack welding the hitch in place where I wanted it to be. It took about two hours just to get that where I wanted it. Once I had it tacked in place I decided on the new length of my frame rails, and welded them into place. It was not a whole lot of fun welding underneath the truck but it had to be done (That is where my friend Danny came into the equation!).
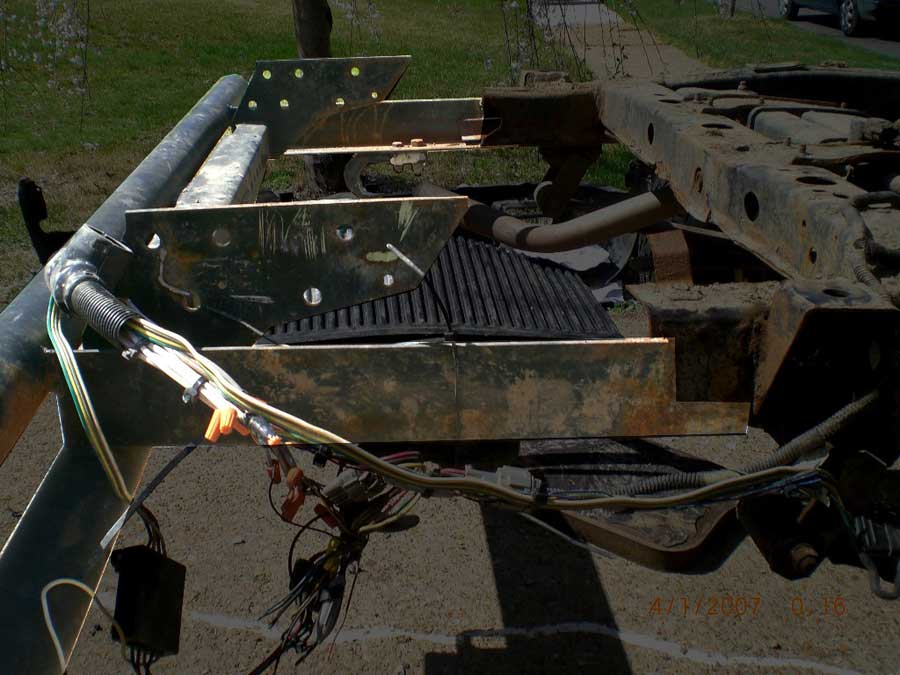 |
| If only we would have had the bed of the truck off when we were welding the new frame rails on. The highlighted parts show all the components of the new bumper. |
After I got the new rails and hitch mounted, it was time to weld on the pipes for the bumper. So I took half of a five and a half foot piece and welded each pipe to one side of the receiver part of the hitch (See Diagram), far enough back so I could still use it, and close enough so I could weld it to my frame. Then I took the other five and a half foot piece and welded it above the first pipe but close enough to weld on to the frame.
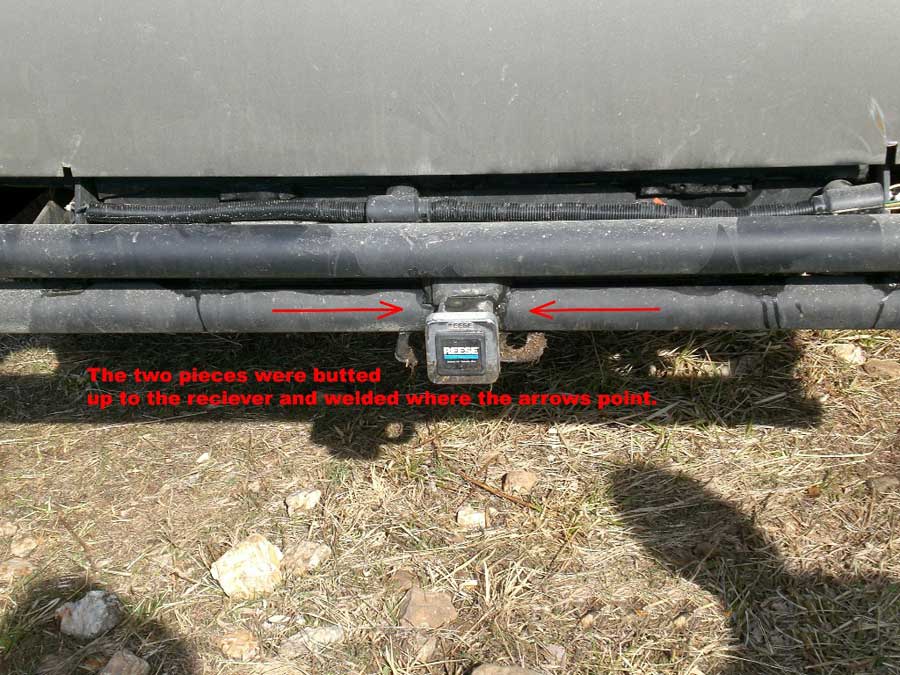 |
| The bottom pipe was cut in half and each piece was attached to the sides of the receiver. |
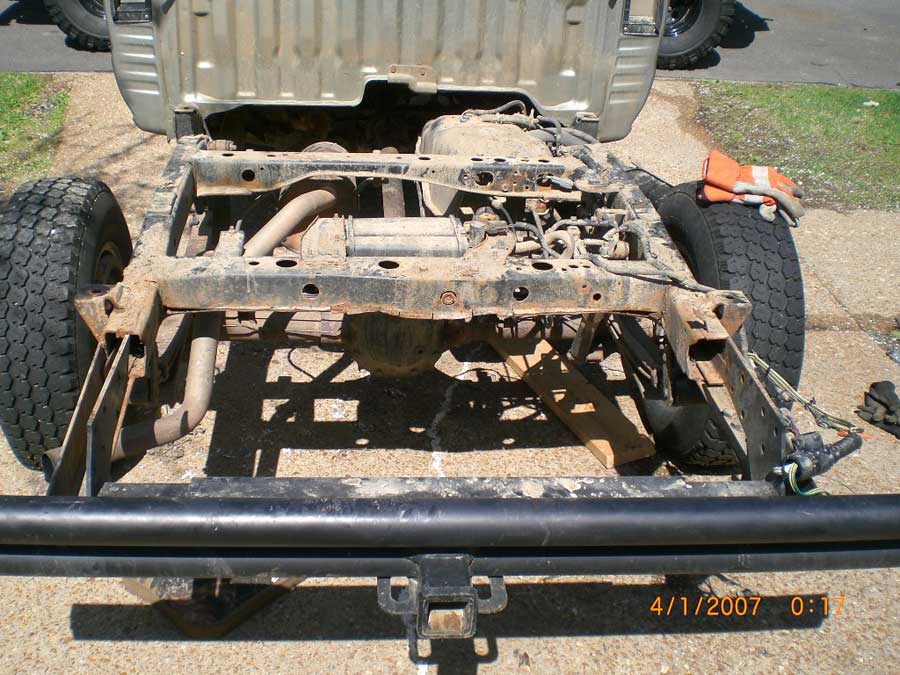 |
| Here is what the new bumper and rails look like from above. |
We also went ahead and bolted on some hooks to the new frame rails underneath the bed of the truck.
 |
| A hook under each angle iron frame rail would allow us to be pulled out and also return the favor. |
Finally it was time to test it. So we put about five to six hundred pounds between three guys on the bumper and it was as solid as a rock, and wasn’t going anywhere. The best part is that the bumper is strong enough that I can hook chains and ropes too to pull out other trucks or to be pulled out, and I have also found my self using the hooks more and more now. The best part about this project was its cost; it only ended up being a ninety-dollar project. It’s always good to go cheap and custom.
 |
| Not only did the completed bumper look great and cost very little, it is also strong enough for our off-roading adventures. |
 |
| It also works well as a handle when you need your buddies to give you a lift over a sharp hill. |
|
Off-Road.com Newsletter Join our Weekly Newsletter to get the latest off-road news, reviews, events, and alerts! |
Follow @Off-Road
 Your Privacy Choices