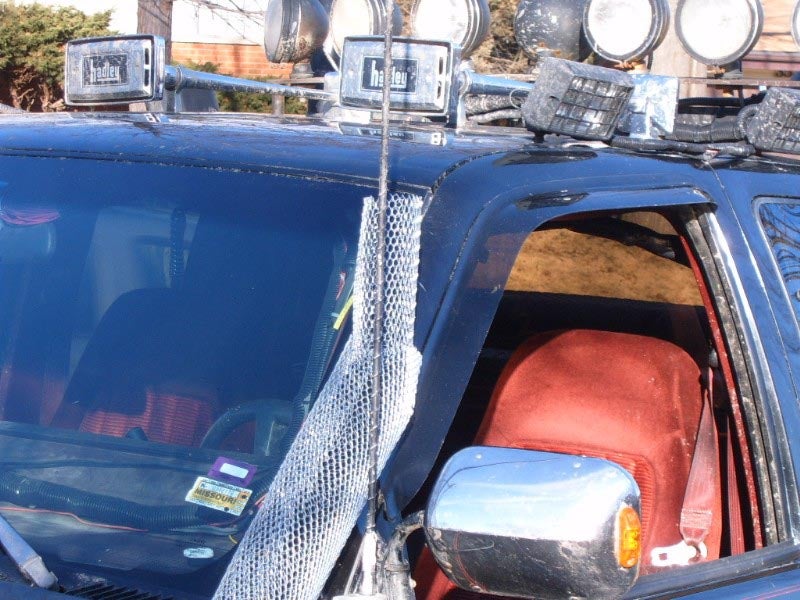
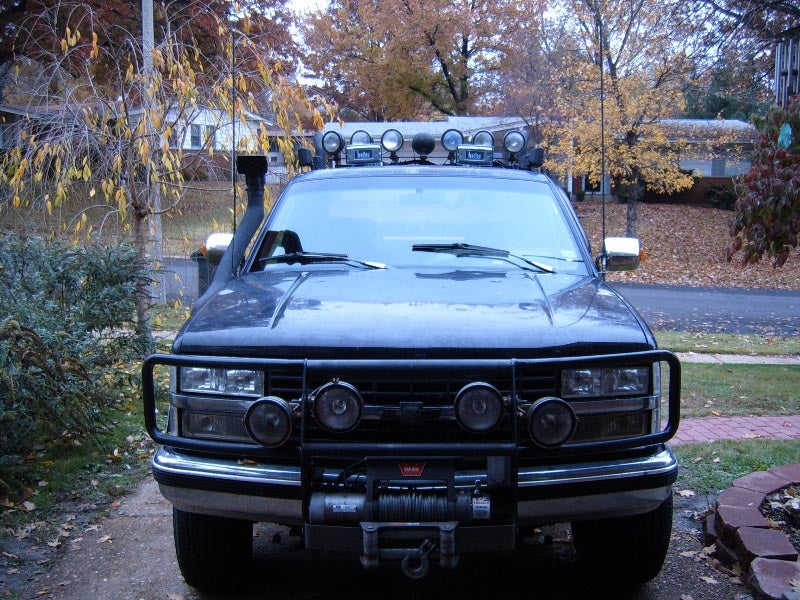
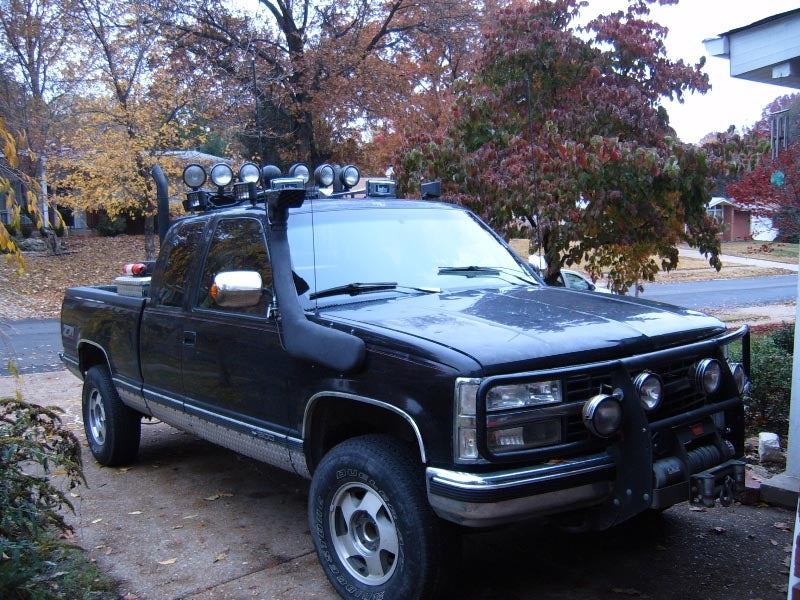
Everyone has probably at least heard of snorkels, but not everyone toys around with the idea of installing one due to the complicated procedure or more likely the expense involved with purchasing an entire kit. So why bring this up? Because you can build and install a fully functional snorkel for under $100, and NO it’s not just another one of those tacky looking PVC setups that you see posted all over the internet. It is a homemade setup, but rather than tacky PVC this much improved snorkel could be easily mistaken for one of those prefabricated $600 kits. Now, don’t get me wrong; the kits you can buy are fantastic and require a lot less work to install, and the PVC, although it’s not the most attractive feature on your truck, is a very cost effective alternative. However, not everyone has the money for the kits, nor wants something on their truck that looks like the plumbing under your house. And in my case, I don’t have the money and I haven’t actually been able to find a snorkel kit for Chevy trucks.
So here is an alternative that requires only a little ingenuity. The first step is to call your local Off-road Supplier and have them order a ram intake.
So here is an alternative that requires only a little ingenuity. The first step is to call your local Off-road Supplier and have them order a ram intake.
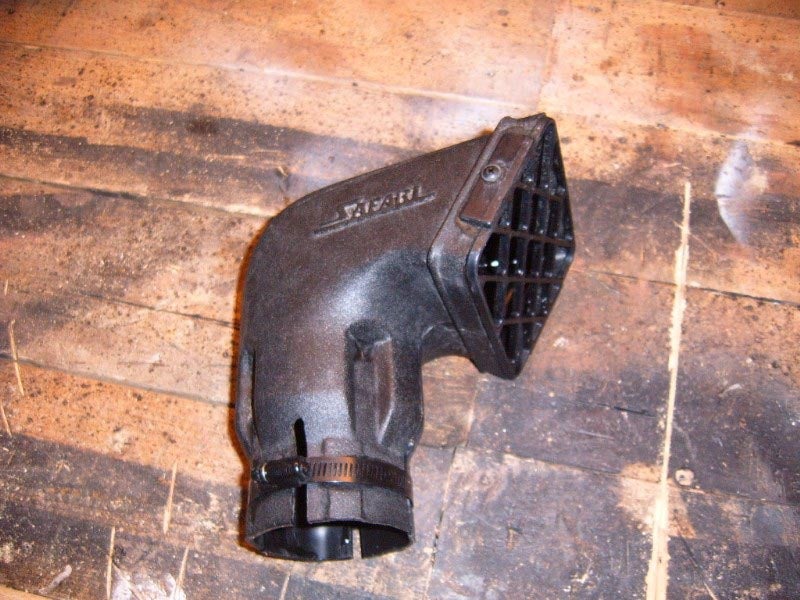
| This part is the most expensive part of your entire project but probably the most important to the snorkel setup. This is the uppermost part of your snorkel where the air enters. I didn’t mess around with making one of these because I was worried about how a homemade ram intake would perform while driving in the rain. The pre-molded ram intakes are designed to funnel entering rain water out through little channels under the clamp. |
|
||
| This part is the most expensive part of your entire project but probably the most important to the snorkel setup. This is the uppermost part of your snorkel where the air enters. I didn’t mess around with making one of these because I was worried about how a homemade ram intake would perform while driving in the rain. The pre-molded ram intakes are designed to funnel entering rain water out through little channels under the clamp. | |||
| My intake was purchased from Safari through a local Hummer dealership. The intake piece was only $56 plus shipping. |
|
||
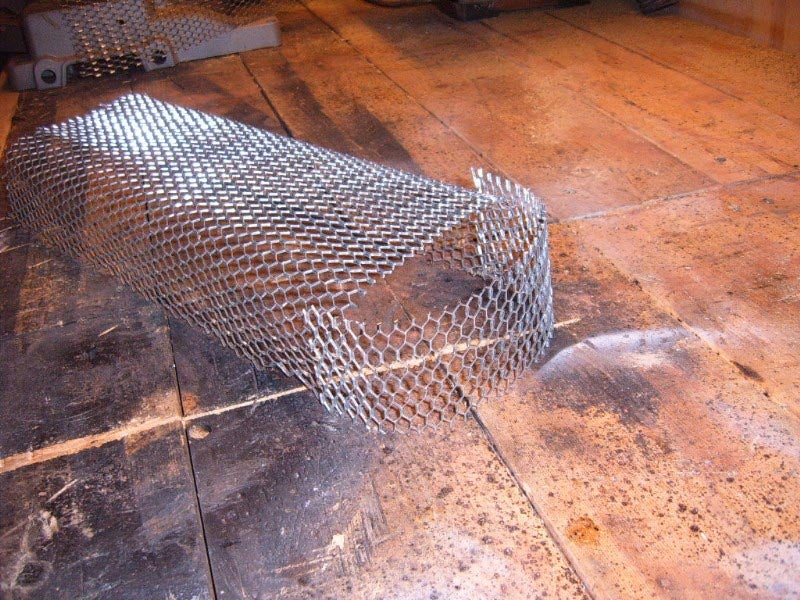
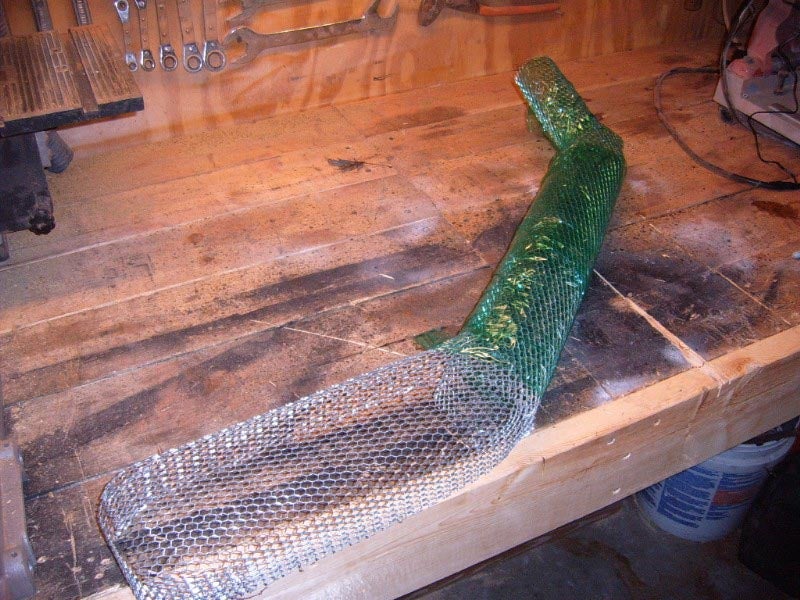
| Next, is the main section or the snorkel where the air will run through the outside of the vehicle before being redirected into the engine compartment. This is where the ingenuity comes in. First you need to pick up about a 2x5’ piece of stucco net from your local hardware store. Stucco net is similar to chicken wire only the holes are much more closely spaced. | |||
| The snorkel design will depend on your preference and application. I am a big fan of the way the Safari kits look so I designed mine around that. |
|
||
| First I formed the section of the snorkel that would fit up against the fender by simply bending the wire into a kind of valley shape. Then I cut a strip of stucco net just wide enough to fit on the very front of the snorkel. |
|
||
| Next is the section that will run up the side of the windshield. You’ll want to take a piece of stucco net and create a tube-like form out of it. Then cut it into a section long enough to reach within about 6-8 inches of the top of the windshield. |
|
||
| Next, form another piece into a tube-like section that is long enough to come within 1-4 inches of the top of the cab when sitting vertically on the diagonal windshield section. This is the section on which the ram intake will mount. | |||
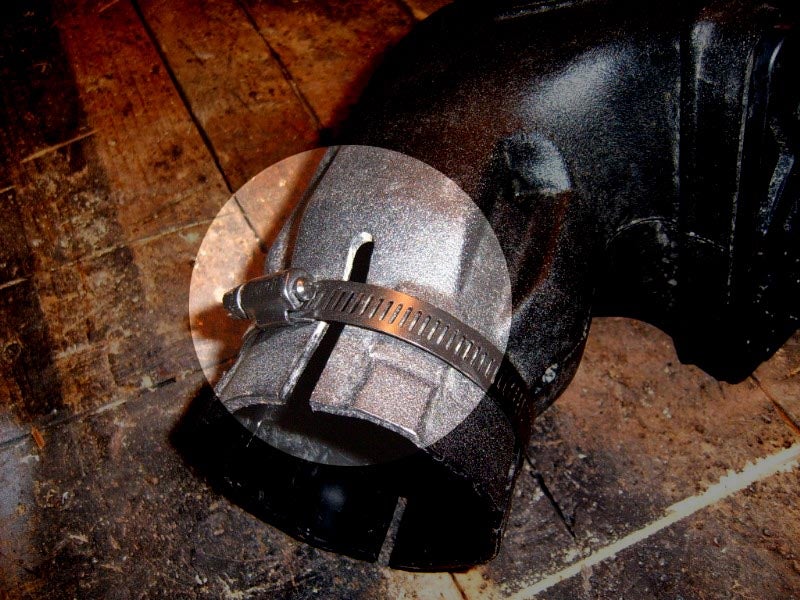
| When you make this section it is important to make the diameter small enough that when a layer of fiberglass and body putty is put over the wire the ram intake will still fit. In other words for a 3” ram intake, you will need a 2 7/8- 2 3/4” diameter opening for the stucco net where the ram mounts. The size of your engine will determine the size ram you will need. |
|
||
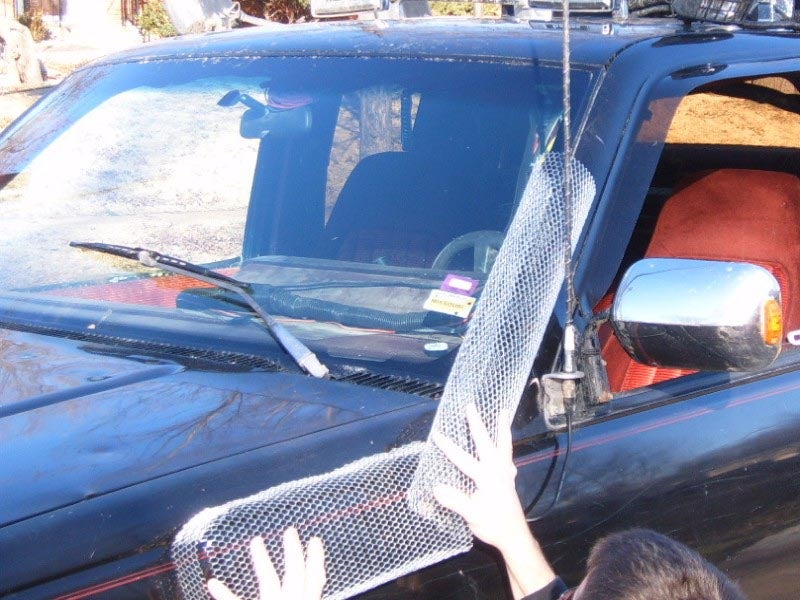
| Line up the 3 different sections you have formed one by one on your truck starting with the fender piece. I used some metal staples from a staple gun to connect my different sections together (using a needle nose and bending them around the stucco net as if they were short pieces of wire). |
|
||
| After your snorkel frame is completely assembled out of the stucco net, seat it up against your truck to make sure you are satisfied with the way it looks. Cut small pieces out of the net to fill and smooth out any open sections in the frame. Be sure the fender section runs closely to the edge of the fender as this will require silicone when all is said and done. |
|||
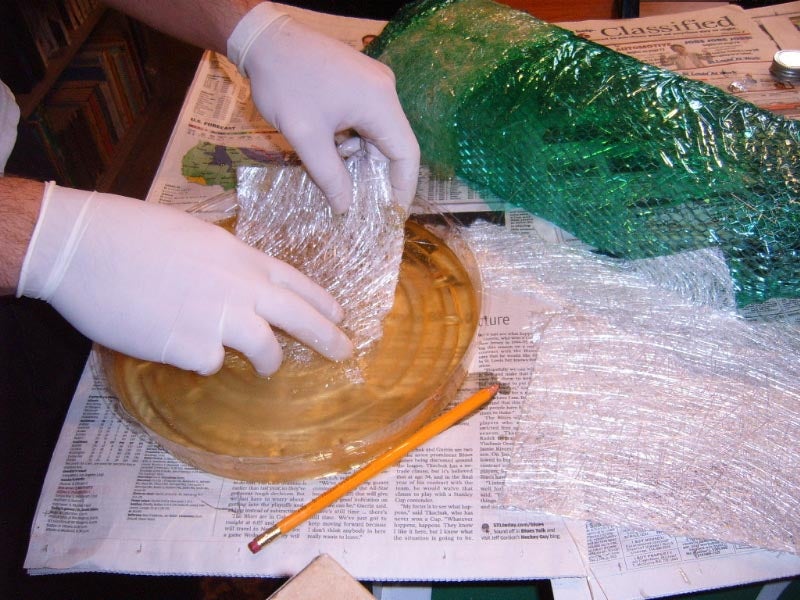
Next you must prep the frame before applying your fiberglass fabric. To do this, simply wrap the entire assembly in either cellophane or wax paper. When I made mine I used cellophane, but I suspect wax paper might work a little better. This will allow for easy removal of the stucco net frame from the fiberglass when it hardens. |
|
||
| Fiberglass and body putty is easy to come by at your local automotive paint shop. While you’re there, it doesn’t hurt to ask a few questions about the application of fiberglass and body putty. They are usually very informative and will get you everything you need. You shouldn’t spend more than $40 on the supplies there. |
|||
| Now, unless you are one who drives around through a lot of brush on a consistent basis, one layer of fiberglass should be sufficient. I used one layer of fiberglass on mine and just recently took it out through some pretty thick brush and suffered no damage. |
|
||
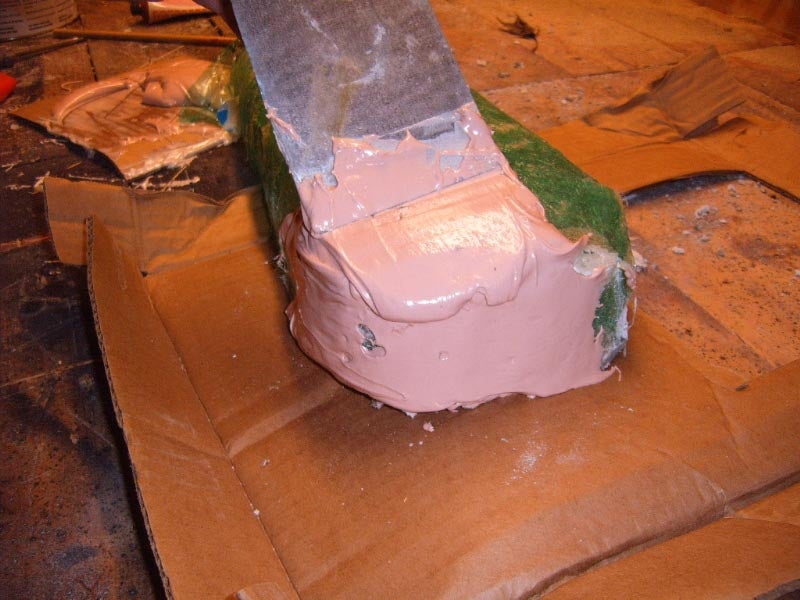
| The application of the fiberglass is relatively simple. All you need is the fiberglass fabric and the two-part epoxy. Cut the fabric into strips, mix the epoxy in a flat disposable dish (something like a drain tray for a potted plant works good), and then completely soak the strips one at a time in the epoxy mixture and place them on the snorkel frame (wear rubber gloves during this step). You will want to completely cover the snorkel frame except for the section that mounts along the fender. This section needs to remain open so that the stucco net frame can be removed after the fiberglass dries. | |||
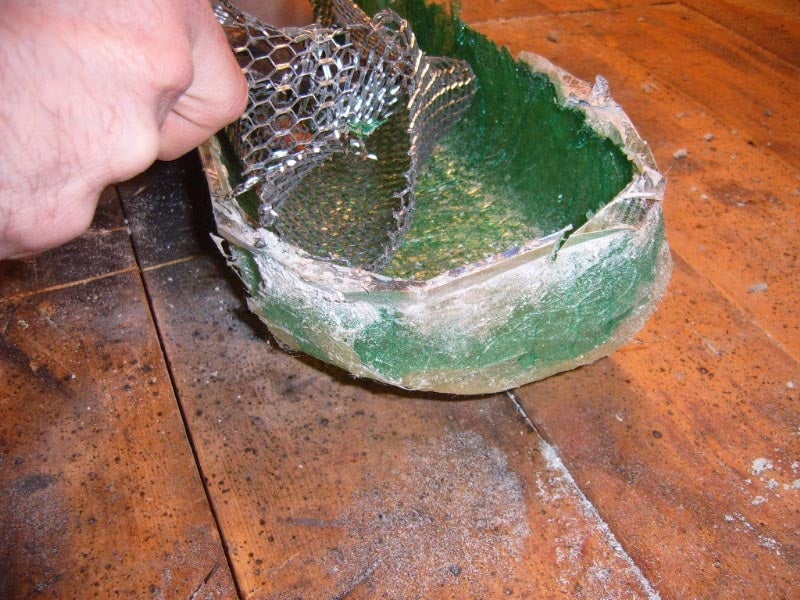
After the fiberglass has completely hardened, you can begin removing the stucco net. To do this I used a needle nose pliers and a diagonal cutter. Grab the stucco net on the ram intake side of the snorkel and began rotating the pliers. By doing this you will pull the net away from the inside walls of the snorkel. |
|
||
| Do the same on the fender side of the snorkel until the stucco net has been completely separated from fiberglass. Then simply pull the entire stucco net frame out from the inside of the newly made fiberglass shell (Be sure to pull from the fender side as you will probably not be able to pull the net through the ram side). Note, depending on whether you use two layers of fiberglass or one, the finished shell may be a little bit flexible in spots. The body putty will aid in strengthening these areas. | |||
| Now that you have a hard fiberglass shell in the shape of your snorkel, you can apply the body putty. When applying the body putty you want to make it as smooth as possible, to ease the sanding process. Also, you will want to be pretty liberal with the thickness so that it can be smoothed properly while sanding. If you put on a layer of putty too thin, you may end up sanding right into the fiberglass which in turn, creates a weak point. |
|
||
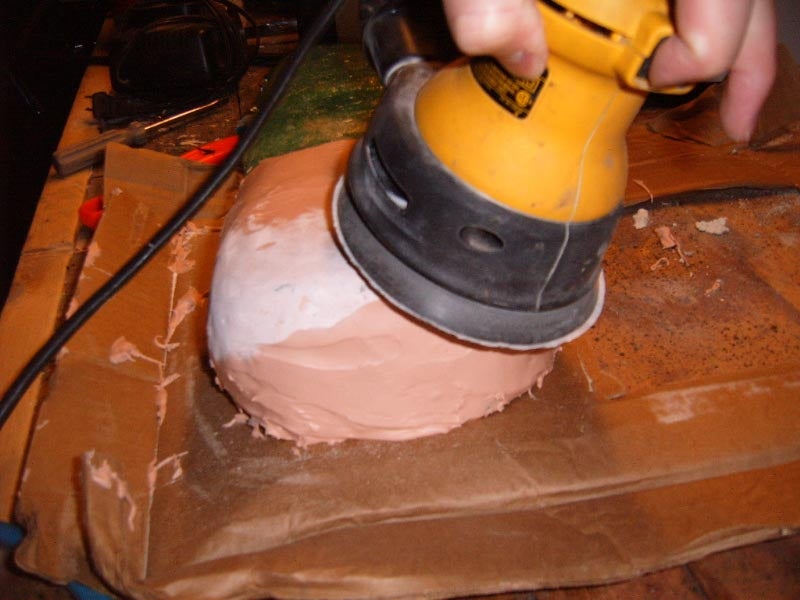
| After the fiberglass is completely covered with the putty sand the entire snorkel down until it is smooth. Test the ram intake to be sure that it fits snugly and sand down further if needed. |
|
||
| Once everything is smooth you can paint the snorkel using whichever paint you desire. Just be sure it is an outdoor rated paint. Also, be sure to put on multiple coats of paint. Luckily the paint adheres very well to the body putty so it will take a lot for the snorkel to get scratched. | |||
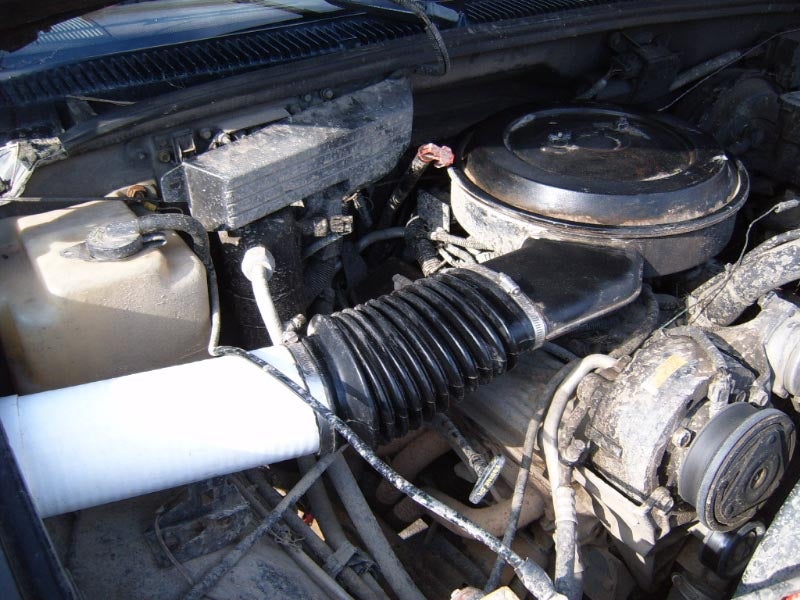
All that’s left now is the mounting and modifying of the stock air intake. I sealed up all of the stock components using high temperature silicone. Do not silicone the air filter cover to the air box or you will not be able to remove it to change the filter later. |
|
||
Your vehicle design will determine how you route the air intake hoses to the fender. Just be sure that everything you install has been sealed. |
|||
Also, you will need to cut a hole in the fender where the air intake from the truck will transfer through to the snorkel. Be sure to silicone around the hole in the fender where it meets the tube from inside the engine compartment. |
|
||
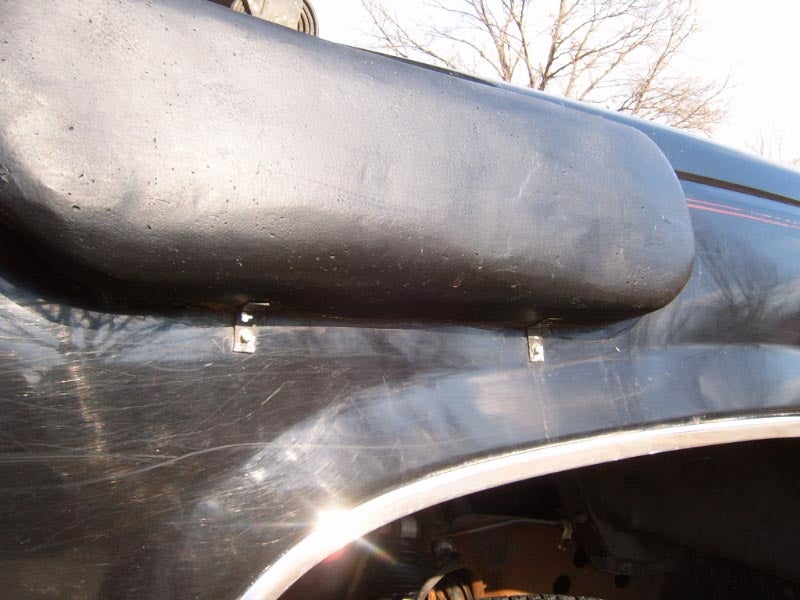
| I screwed four L-Brackets onto my snorkel to create a stronger mount (two on top and two on the bottom). This will also allow for the snorkel to sit stationary against the fender while the silicone dries. |
|
||
Now just finish off by clamping the ram head onto the top of the snorkel and you are finished. |
|
||
|
|||
| The job is definitely more complicated than hooking up a few pieces of PVC but will bring much more satisfaction in the long run. |
|
||
Many people will be impressed with the snorkel itself but when you tell them you made it yourself, they will we completely astonished. Trust me on that, it makes everyone take a second look. |
|
||


|
Off-Road.com Newsletter Join our Weekly Newsletter to get the latest off-road news, reviews, events, and alerts! |
Follow @Off-Road
 Your Privacy Choices