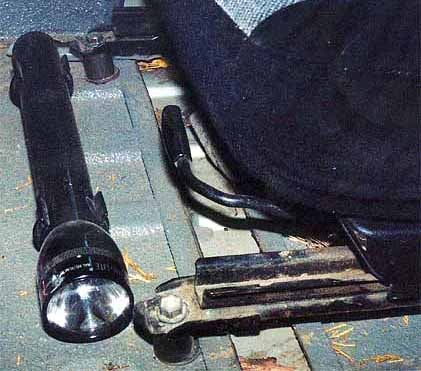
Here's how I installed my boneyard Mitsubishi Eclipse seats. If you're going to do this, when you find yourself a pair try to be sure to get the mounting hardware and inner seat-belt ends (the buckle ends) with the seats. Depending on the year of your Samurai (looks like '89 or later belts will match the Eclipse ones), you may be able to use the seat-mounted buckle ends with the Samurai's original belts. Pardon the junk in the photos, I'd just gotten back from the Rubicon when I shot the pics.
Tools and parts
| 12mm and 14mm sockets | Socket wrenches |
| Mitsubishi Eclipse front seats | Approximately 1 foot of 1" dia. thick-walled steel tubing |
| 24 flat washers | 8 lock washers |
| Hacksaw or other metal-cutting saw | 8 About 2?" grade 5 or better bolts to match the diameter of the original Mitsubishi mounting hardware. Grade 7 or 8 if you'll be using the seat mounted seat-belt ends. |
| Pneumatic or other cutter | Cutting disks |
| Safety goggles | Drill |
| Drill bit large enough to drill clearance holes for the seat mounting bolts. Use the Eclipse seat-rail holes as a guide. |
Preparation
Note: 16 of the flat washers should be large diameter ones with clearance holes just big enough for your mounting hardware. You'll use these either side of the Sammy floor pan to spread out the loading on the panel. The other 8 should be just big enough to provide "caps" to the tubing. If you like to over-engineer, you could use a piece of steel plate either side of the body panel instead of the large washers and spread the panel loading even further.
Unbolt and set aside those old, crummy Sammy seats (that's why you're doing this, right?)
Put on your goggles, mount a cutting disk, spot-weld drill or other angry tool, and have at the driver's side seat mounts. Unless you're very short, they'll make the new seat too high. You'll have to cut them completely away, so that either nothing at all, or nothing more than the portions flat on the existing body panels remain.
Didn't that feel good?
Cut yourself eight 1" pieces of steel tubing. You need to be reasonably precise with these, so the seat will sit level.
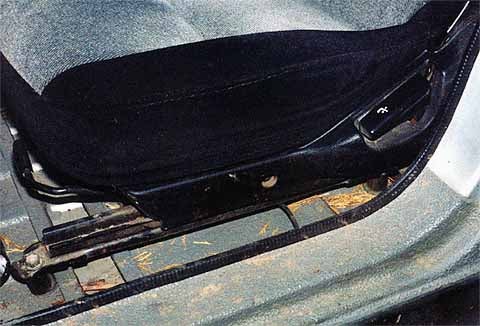
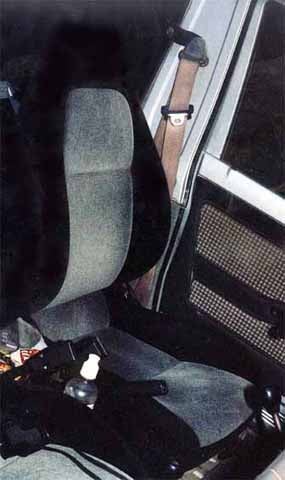
Test fit one of the two seats to find the position that will work best for you. Climb in and out a lot to see how things are working out. Remember to check for clearance to reach the outer seat belt ends, door handles, brake handle and the like. The nice thing about doing this change is that you can reposition the seats to go as far back as possible if you need the room.
Tip: The passenger side foot-actuated seat-back release on the Eclipse seat may be in the way of mounting the seat as far back as you'd like. It hits the Sammy body panel on the outboard side. You can carefully bend this little lever around to clear, and still have it work.
Mounting the seats
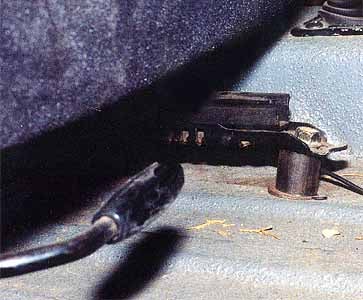
Once you've got your new seat position established, carefully mark the location of one of the new mounting holes.
 Before
you drill through the floor pan, double-check to be sure you're not going to run into interference with anything under the vehicle for any of the four new holes.
Before
you drill through the floor pan, double-check to be sure you're not going to run into interference with anything under the vehicle for any of the four new holes.
Drill the first hole through the floor pan, then replace the seat, slip some hardware through it to hold it loosely in place, and mark the other three hole positions.
 Remove the seat again, and drill the remaining three holes. Or, you can do it like I did: square the seat up in the proper position, drill the second hole, fasten the seat down loosely, then run the seat forward on the rail and drill the two rear holes. Just carefully run the drill right through the seat-rail holes on the new seat.
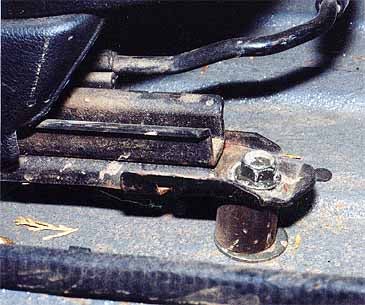 To
permanently mount the seat, place a large, flat washer on the floor over each hole, stack a piece of tubing on top of each washer, and a smaller flat washer on the top of the tubing.
To
permanently mount the seat, place a large, flat washer on the floor over each hole, stack a piece of tubing on top of each washer, and a smaller flat washer on the top of the tubing.
Lift the seat into position and drop a bolt down through each seat-rail hole, the washer-tubing-washer stack, and the hole in the floor pan.
Tip: I did each bolt individually, threading a nut on the bottom and leaving enough play in each bolt as I set it in place to allow me to slip the component parts under each of the remaining rail positions.
 Reach
under the car and remove the loosely fastened nuts.
Reach
under the car and remove the loosely fastened nuts.
Place a large flat washer and a lock washer over each bolt and then replace the nut.
Bolt everything down securely.
Depending on where your mounting holes line up, you may find that as you bolt down the seat you start to flatten some of the "channels" in the body pan with your large washers. Pulling them flat this way as you bolt the seat down will prevent the mounting bolts from loosening later.
Note: If you use the existing Samurai seat belts and mounting positions, grade 5 hardware is fine for the seat itself, as the belt is what will hold you in the car. If you're going to use the Eclipse inner seat belt mounts (on the seats themselves), be sure to use grade 7 or better hardware to match the original seat's hardware, as a combination of the seat mounting and the belt mountings is what will keep you in the car.
|
Off-Road.com Newsletter Join our Weekly Newsletter to get the latest off-road news, reviews, events, and alerts! |
Follow @Off-Road
 Your Privacy Choices