There have been hundreds of stories written on the small block Chevy, how to beef-up the tranny and four-link suspensions. Stories on steering are not common at all. This is an article that even the professionals can learn from.
Getting your vehicle to drive and steer properly, whether it's a street rod or especially an off-road car, is vital to the life of the components. The extreme strain that your steering takes from an improperly installed power steering box is a recipe for failure. We're all guilty of throwing a power steering box on and calling it good without giving thought to hose diameters, pitman arm links, or even adjusting the stops on the steering knuckles/spindles. You stress the pump, break sector shafts and crack frames. All of theses things are avoidable once you learn the basics.
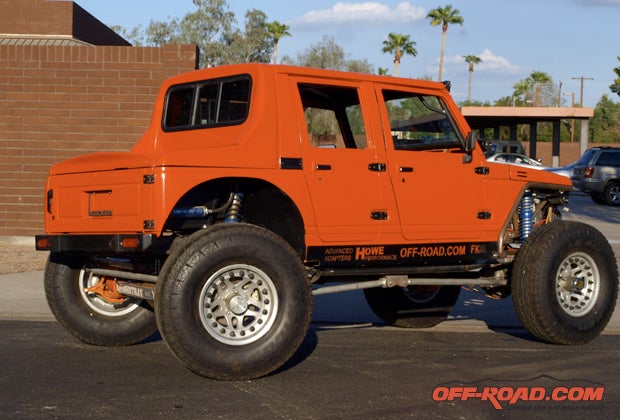
Previous Project Samurai Stories
Part 6 - Exhaust, Driveshafts and Lighting
Part 5 - Instruments, Hoses and More
Part 4 - Engine and Fabrication Work
Part 3 - Roll Cage and Suspension Work
Part 2 - Fabricating the Suzuki Off-Roader
Part 1 - Project Samurai Begins
Recently, we had the opportunity to work with an expert in the steering industry. Jeff at Howe Performance is an amazing guy with extremely high energy and with more knowledge on steering systems than anyone you'll ever run across. And most importantly, he's willing to share his knowledge. These guys take care of all of the big name racers and treat every customer as if they were Robby Gordon.
We took our Suzuki there to pick up some parts. Jeff came out and checked out the vehicle, and after spending literally two minutes looking at it he found three problems. (And I thought I was pretty decent at this stuff.) I had the pitman arm slightly out of time with the steering box and I had cut the heim joint off the end of the ram for the power steering assist. I had re-clocked it so the fittings faced straight out in the three o'clock position, giving me access to the hoses. This gives the ram no way to bleed itself and gives the steering a mushy feel (like brakes not bled well). We had to weld 90-degree fittings at the 12 o'clock position to allow it to bleed. He also found the heim joint on the shaft side was slightly in a bind. We had too much throw on our ram due to the pitman arm being out of time.
The Boss Man said, "Yank it off." So I grabbed my camera and a wrench and started pulling parts.

TIMING THE STEERING COMPONENTS
We clearly had some issues to correct. When the steering on the Samurai is turned all the way to the right the knuckles will be hitting on the limit stops, and the pitman arm will be as far right as it can go. The ram will be as far right as it can go as well, and everything is in time to the right. The same procedure is done on the left. When everything is at full stroke and happening at the same time, everything is happy. However, that's very seldom ever the case.
A real quick way to check if your steering box has more throw than your steering knuckles is to simply turn it to the left and have someone watch the knuckles. When the limiting stop bottoms out, pause for a second, and then continue to turn to the left (repeat to the right as well). If the steering box still has travel in it, youll see the frame lift, or twist. This is what creates problems and cracks in the frame.
You should also be able to feel it in the steering wheel, as well. Additionally, you need to look for just the opposite problem. When the steering box is all the way right or left, if there's a gap at the stops on the steering knuckles, this also is extremely dangerous. If you hit a berm with the steering turned hard and the steering box is maxed out and there is a gap in the knuckles, that berm will forcefully collapse the gap at your knuckle, putting strain on the sector shaft, tie-rod ends and your frame. You should never have a gap at the steering stops when at full stroke.


The way to check it properly is to undo the tie-rod end from the pitman arm, turn the steering all the way left, then all the way right, and find the center of the steering box. Now, bolt the pitman arm on, making sure that it runs parallel with the frame. You may have to file the clocking splines out from the center of the pitman arm. There are usually four of them. A chain saw file makes short work of this.
Put the tie-rod end back on and adjust the relay rod/drag link until both wheels are facing straight forward. This is assuming that your tie-rod end is correct. Now the steering box is centered, your pitman arm is centered and your wheels are straight. Turn the steering wheel all the way to the right until the stops on the knuckles hit. Scribe an indicating mark onto the steering box and down the pitman arm. Now turn to the left until the knuckle hits the stop and, using the indicating mark on the steering box, scribe a mark on the pitman arm. This is the information Howe Performance needs to correct your steering box.
You may find that the distance between our marks and the distance between your marks may be substantially different. Don't be nervous. We have a lot more steering angle due to the RCV axles.


We also added a ram to our system to help protect our steering box. The ram, contrary to popular belief, is not to make the steering easier. It's there to help protect the steering box, your vehicle and your life.
I recently had a friend who was jamming down a sand wash and the steering sector broke off, causing him to hit a boulder the size of a freight train, severely injuring him and totaling out the vehicle. He had to be air-evacuated from the wash.
The way the ram works is this: It's plumbed off of the steering box so that it's always in the right position with the pitman arm. It helps reduce any shock load to the sector shaft. Howe Performance has a very detailed drawing on their website under "frequently asked questions" showing you how to spot a twisted sector shaft. This is a very common failure in off-road usage. When prepping your vehicle, checking bolts, and so forth, always check for this and learn to recognize it.
In the gap between your steering box and your pitman arm, you can see the splines. If there is any twist in the splines, it's ready to break. By adding one of Howe's rams to your rig, the guesswork will be eliminated and it will be the proper diameter. They can also add internal stops to it, thus making this an inexpensive insurance policy against a broken sector shaft. It's also an easy install.

Many people will simply add a ram to the pitman arm without following the above procedures. The ram will have more throw than the steering box, and basically the ram will act as a tubing bender, compounding problems and making it worse. I highly advise going to Howe's website to FAQ and take advantage of all of the free knowledge.

We now need to determine where to place the stops in the ram. Turn your steering the direction that collapses the ram. Using a sharpie, make a mark on the ram next to the seal (I would put a "C" for collapsed). Now turn the steering the opposite way extending the ram.
Make a mark at the seal ("E " for extended). We didn't use those letters in our photos, but you'll be able to see what we've done. With these marks, you can ship your parts to Howe Performance to have the corrections made and then plumbed.


The rear steering components are basically the same as the front, only there's no steering box and the ram is quite a bit bigger. Turn the direction that collapses the ram, making sure your knuckles are on the stops. Mark the ram near the seal (C for collapse). Repeat the other direction and mark it (E for extended).
This will tell you how much of a stop will need to put internally or externally in the ram. These procedures and drawings, along with the proper way to plumb your rig, are all found on Howe Performance's website.
They also cover the installation of Howe's joystick that controls the rear steering. It has a very solid feel to it. When you have that "uh oh" moment and the car feels as if it's gonna roll and you have to grab a handful of rear steer, you can trust this valve will hold up.
|
Off-Road.com Newsletter Join our Weekly Newsletter to get the latest off-road news, reviews, events, and alerts! |
Follow @Off-Road
 Your Privacy Choices