Nearly every off-road vehicle has a mechanical “fuse.” In many common 4x4 trucks the fuse is a u-joint, or a locking hub – they are parts that are relatively easy to replace, and by breaking first they can often save major components up the line from serious and expensive damage. In the Hummer H1, half-shafts are the most common fuses, so anyone who wheels in an H1 should learn how to replace one. The H1 half-shaft is a driveshaft assembly that runs from the differential out to the hub, delivering power to the wheel, and with an independent suspension all the way around. The civilian Hummer H1s and its military brother the HMMWV both make use of this. The assembly is made up of a center shaft area with a constant velocity (CV) joint on each end. The inboard side has a flange that is bolted to the brake rotor, while the outboard side has a splined stub that slides into the upper gear on the portal hub assembly. There are three different lengths of half-shaft on the H1, so if you want to carry spares you need one of each size, three shafts total.
Half-shaft problems on the H1 usually occur for one of three reasons:
The first two issues can be avoided by frequently inspecting the bolts and boots on each of the half-shafts on the truck. The third can be limited by minimizing wheel-spin, sudden braking or unnecessary bursts of acceleration on the trail.
Replacing a half-shaft is straightforward. For rear half-shafts, the emergency brake cable has to be detached from the rear caliper to get the shaft out – other than that, the replacement procedure is the same for all four corners. First, chock and jack the vehicle using the factory jack positioned under the A-arm and remove the wheel/tire assembly (you can put it under the geared hub for safety!)
For rear shafts only, remove the retaining clip and cotter pin and then disconnect the emergency brake cable from the caliper. Use a 3/8” driver ratchet extension to remove the “cap” on the outside of the geared hub, and then remove the 9/16” retaining bolt hidden underneath with a socket. Remove each of the rotor bolts with a 15mm wrench (don’t lose those washers). Slide the inboard flanged side of the half-shaft down off the rotor so that it hangs freely. Pull the whole shaft towards the middle of the truck, so that the splined outboard stub slides out of the geared hub, and pull the entire assembly out. Reverse the order of these steps to install the new half-shaft. With pneumatic or cordless electric tools, this whole job can be done in about 15 minutes. Give it a shot in your driveway – practice makes perfect!
If you do not have a spare half-shaft, or if there is some other reason you cannot reinstall a new shaft in place of the old one, you should at least have something to plug the opening of the geared hub and some bolts that will hold the rotor in place. You can either buy a kit for these purposes from a third-party company, or you can make your own kits. This will allow you to remove a half-shaft, but still drive the vehicle as long as you select High-Lock or Low-Lock on the transfer case. Spare parts from a deceased half-shaft work well as fillers on either end when you need to limp home in High-Lock.
Minimum tools needed for H1 half-shaft replacement: 15mm wrench, 3/8 inch ratchet driver and extension, 9/16 socket, and red thread-locker. Another option, if you have the parts on hand, is to disassemble the shaft and repair it with a new CV joint, shaft or boot. You should be aware, however, that there a couple of different kinds of half-shafts out there - some of the parts are interchangeable, and others are not.
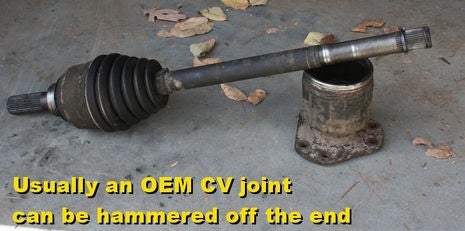
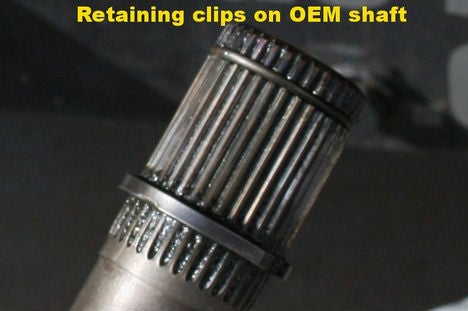
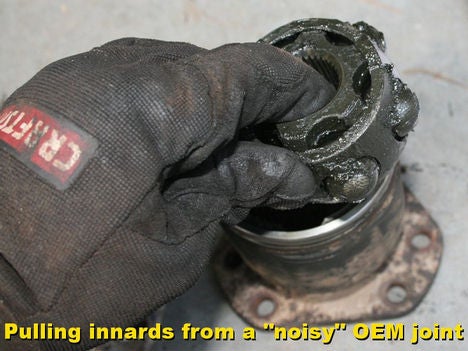
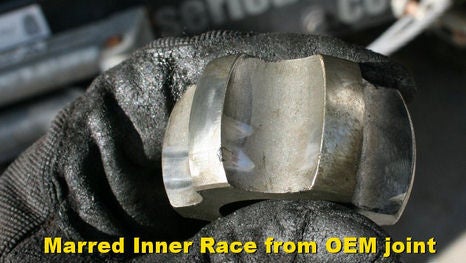
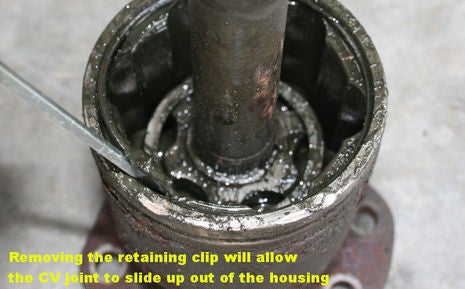
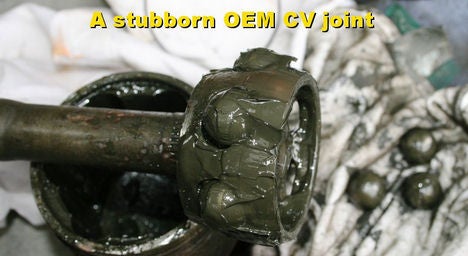
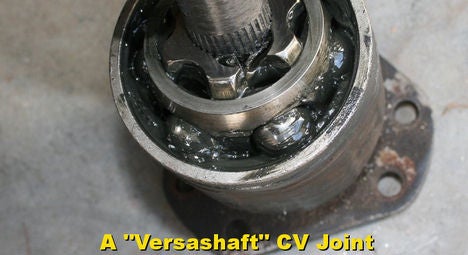
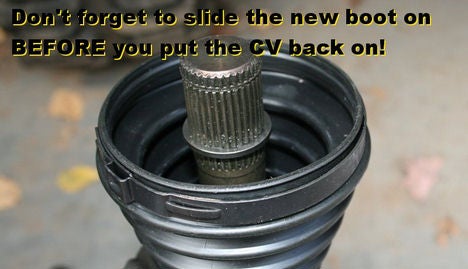
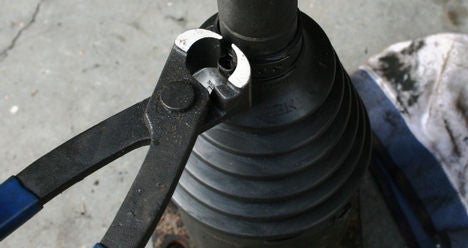
H1 owner and enthusiast Scot Smith of SAX Express (http://www.sax-express.com) developed replacement half-shafts for the H1 that are affordable, and more easily taken apart and reassembled than the OEM shafts. The appropriately named “Versashafts” are more modular in nature, allowing someone to purchase different length shafts and assemble them with CV joints as needed in the field, eliminating the need to carry 3 complete replacement assemblies. These aftermarket shafts use the same cage and balls as the OEM CV joints, but the shaft itself and the inner race are different, allowing for the use of a quick-release clip. On an OEM half-shaft, a CV joint can be removed by pulling the boot back out of the way and hammering the inner race until the whole CV joint pops off the end of a shaft. If that doesn’t work, a difficult shaft may require removing the larger retaining clip in front of the CV joint, and pulling the “guts” out to get to the smaller retaining clip on the end of the shaft for disassembly.
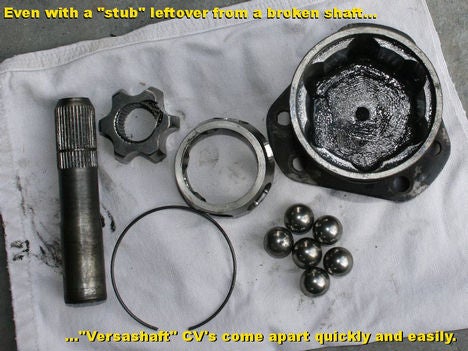
The SAX-Express CV joints can be removed by opening the retaining clip that is nested inside the inner race, and sliding the shaft out – this is a real nice difference, especially if you are removing a broken portion of the shaft itself from a perfectly good CV joint. If you need to remove a broken off stub from an OEM CV joint, you will need a very good vise, a big hammer, and a lot of luck.
The “Versashaft” replacement half-shafts are similar in strength to the OEM half-shafts, but Scot is quick to point out that the OEM (10,300 GVW) half-shafts are undersized for the application in his opinion, and that for anything more than casual off-road use or on-road use, a Hummer owner may want to consider bumping up to the heavy duty (12,000 GVW) version half-shafts that are native on H1 Alphas – especially if running oversized tires and/or lockers. This change will require changing out the upper gear in the portal hub assembly, because it uses a different spline count on the end.
That should be enough information to keep your truck rolling on the trails, provided you have the necessary parts and tools. If you put together a half-shaft trail kit that includes a complete assembly for each length (or just two joints and three shafts if you go the Versashaft route), some basic tools and a handful of other spare CV parts, you should be ready for just about anything.
|

|
Off-Road.com Newsletter Join our Weekly Newsletter to get the latest off-road news, reviews, events, and alerts! |
Follow @Off-Road
 Your Privacy Choices