|
||
|
Some of those first tips and tricks learned read like a history lesson of the early days of dirt biking. I learned how to tell a good Amal slide from a bad one (the Spanish slides were made of a stronger pot metal than the English ones), thereby preventing a piece of the slide from entering your engine and turning it into a garage door holder. CZ fans were told how to cure their brake pedal return problems by hooking a few rubber bands over the end of the brake rod to the swing arm. Guys who ran sock-type air filters were shown a simple setup that would help protect that filter from the elements by fabricating a protective cover out of thin aluminum sheet. All you needed was a stout pair of scissors, a drill and a pop rivet kit. I even learned how to make a cheap skidplate from a coal shovel. Yup, those were crude and simple days, but a lot of those riders remember them with great fondness. Naturally, the bikes of today are much more sophisticated and you normally don't have to cob-up things with rubber bands. But, you still have to work on the bikes and perhaps some of these tips, trick and tools will help you.
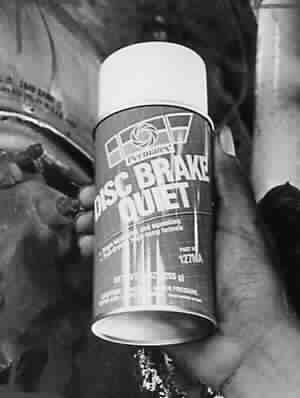
1. SQUEAKING DISC BRAKES If your disc brakes squeal or squeak, you can eliminate that without buy new rotors. Just spray on any decent disc brake quiet spray that the automotive guys use. We like this one from Permatex. Oddly enough, it's called Disc Brake Quiet and you can find it at most any auto parts store. Make sure you clean the rotor and the pads before you spray. |
||
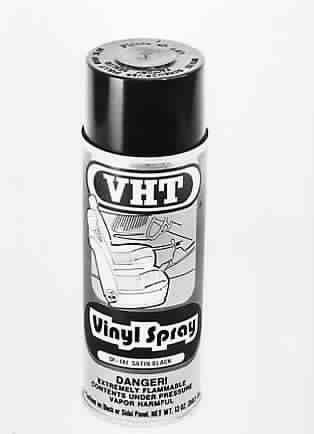
2. PAINT YOUR
PLASTIC You know that paint does not stick well to plastic parts. So
what do you do if you want to change the numberplate background color and
you don't have any backing handy? By simply scouring the surface with
acetone, spray lacquer will hold it surprisingly well. First, clean the
surface with ordinary kitchen cleanser, then scrub with acetone. After the
acetone has evaporated, let it dry completely and then rinse the part
under cold water to get rid of static that'll make the paint fuzz at the
edges. Let it air dry, then mask and paint as needed. If you're going to
paint a part that flexes a lot, like a fender, try using vinyl paint spray
instead of regular paint. It flexes well without cracking. |
||
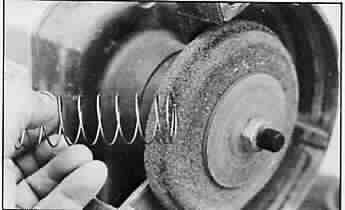
3. SPRING
FOLLIES. Many riders cut their throttle springs in an attempt to
soften the action on the twist- grip. This technique is actually one of
the dumbest things you can do. If you take a spring (let's say a
10-pound spring) with ten coils on it and cut one coil off, you'll
increase the spring rate by ten percent; cut two coils off, 20 percent,
three coils, 30 percent, and so forth. In fact, one of the most common
ways truck drivers use to increase their spring rate is to chop off or
deaden coils. So why does the throttle feel softer when you snip off a few
coils? Simple. You have reduced the preload of the spring but you've
increased the final rate. So while that throttle might feel easier as the
slide lifts off its base, it actually will be stiffer as it gets deeper
into the travel. What's the right way? Easy. Take the spring off and
grind away some of the material, thereby truly reducing the actual rate. |
||
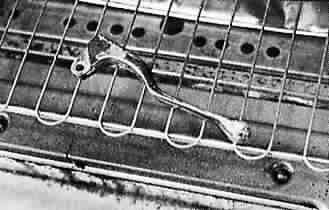
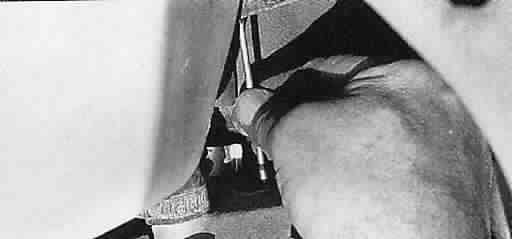
4. SAVING BENT LEVERS. Drop your bike in a slow turn and two things normally happen: you punch a hole in the end of your grip and you bend a clutch or brake lever out of shape. If you have a Magura lever, which is highly malleable, it's just a simple matter of bending it back into shape any way you can. But if you ride a bike with brittle aluminum levers (most any Japanese bike), any attempt to bend them back into shape will just about guarantee a dull cracking sound and a two-piece lever. Here's the hot setup: if you're at home, place the lever in your oven and heat it to 220 degrees for about 15 minutes. The lever can then be tapped gently back into shape on a block of wood. If you're out in the field, the lever can be laid on the exhaust manifold of your idling truck for 15 or 20 minutes, then a careful bending process ensues. Naturally, you'll have to use gloves and rags to prevent fingerburn when you use this process, but the heating process quadruples your chances of success in the deadly lever-straightening game. |
||
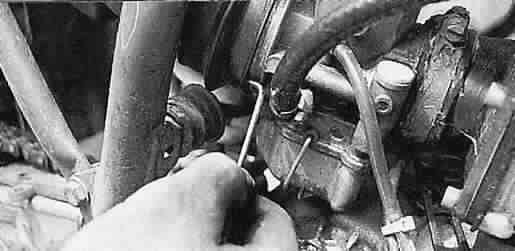
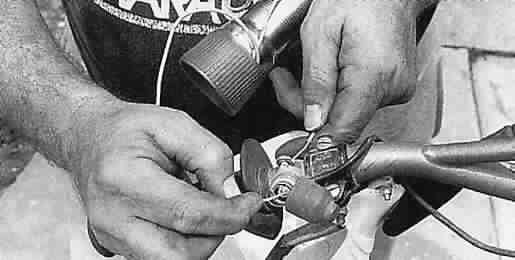
5. PROPER VENTING. You should vent your mag cover to prevent condensation from building up inside, but you don't want to have water or dirt get in there. One of the best ways to get this done is to drill a small hole in the mag cover and silicone a small diameter hose in place. Then, insert a spare pilot jet in the end of the hose and route the hose back in and out of the way. It'll breathe just fine and water or dirt will not enter. |
||
6. TIPS ON TIPS. Ever notice how the rubber on kickstarters and shift levers seem to have a tendency to slip off once you get a substantial number of hours on the bike? Here's an easy way to keep those suckers in place. Trim the rubber tip back about 1/4 inch with a razorblade and install a stout zip-tie in the cut-away space. It'll still rotate as needed, but, will stay on. |
||
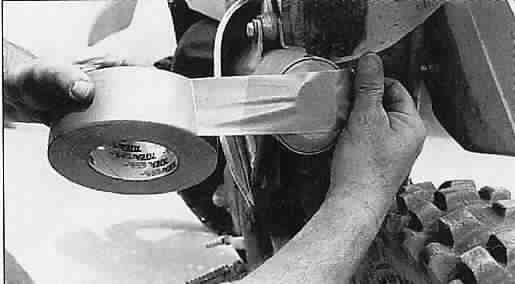
7. THE KING OF THE TOOLS! Duct tape does just about everything. You can patch up saddles, tape over the exhaust when washing the bike, keep cracked plastic from getting more cracked (at least for a while) and do a zillion or more other things. |
||
8. A CLOSER LOOK. This is a magnifying reading light for old coots with bad eyes. It doubles as a great jet looker-at-er. Even with my wheezy old eyes, I can spot jet numbers and needle identification. It's also is great for close-up inspection of parts when checking for wear, damage or cracks that are hard to see with the naked eye. |
||
9. RING HOLDER. Sometimes forcing a piston down inside a cylinder can be tough because the ring keeps hanging up. It seems you either need three hands or an expensive ring compressor; or you can just snug down a zip-tie over the ring, enabling you to slide the piston down inside the cylinder while the zip-tie holds the ring firmly in place. |
||
10. BOOT HELPER. Sometimes trying to slip a carb boot or an airbox boot over a lip can be a real bear. To help with this, I heated a cheap Phillips screwdriver and bent the tip over. The thinner the tip, the better. Now, the tip can be inserted under the rubber boot and slipped around easily. Combining this tool with a bit of moisture will get the stubbornest boot in place. |
||
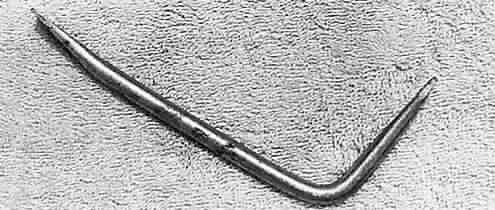
11. BENT SCREWDRIVER. I made this L-shaped two-tipped flat-blade screwdriver many years ago, and it's a real time-saver. Have you ever tried to remove a hardened or stubborn fuel line? It can be a real hassle, but not with this. The L-shape lets you wedge against the bottom of the tank and pop it off easily. It's also good for prying and wedging a multitude of things apart. |
||
12. ROPE TRICK. Maybe you need to keep your crank from moving while you loosen a primary drive gear or an ignition part. Just remove the spark plug and feed a few inches of rope inside the hole. The rope will keep the piston from topping out and can then be easily pulled out once the part has been loosened. |
||
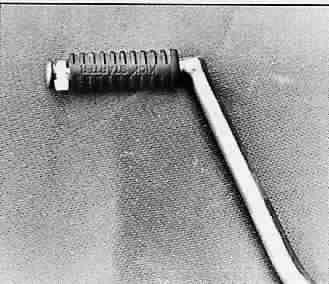
13. CASUAL TIMING DEVICE. Make a timing mark device from a piece of welding rod. How? Well, first use a timing device to locate where your proper mark is. In this case, 2.5mm before Top Dead Center is where the firing should take place. Cut a small piece of rod, insert it in the spark plug hole and scribe a mark on the rod even with the spark plug hole base. Then throw this little device in your gear bag and forget about it until that day when you have to check your timing and don't have the tools you need at hand. |
||
14. CHEAP CIRCUIT TESTER. Need to check out a circuit for flow, or a short, but don't have a circuit tester with you? Don't despair. If you have a flashlight and some wire, you can simply unscrew the end and twist two pieces of wire at both sides of a contact juncture. Now, turn the flashlight switch on with the wires apart and the light will not come on. Touch the wires together, and the light should come on. Get the idea now? |
||
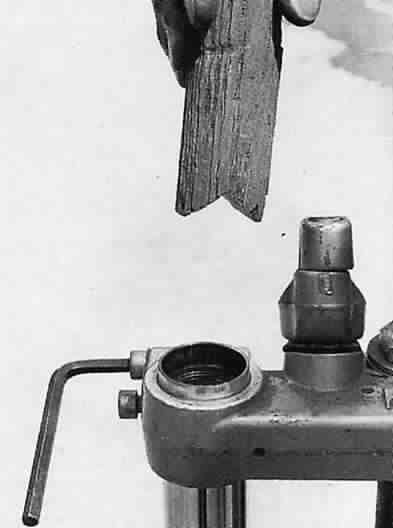
15. FORK TOOL. When trying to remove damping rods from conventional-style forks (non-upside-down), it's often hard to keep the rod from spinning. You can cut a V-notch in a wooden pole, then insert the pole inside the fork to hold the top of the damping rod without damaging any parts. |
||
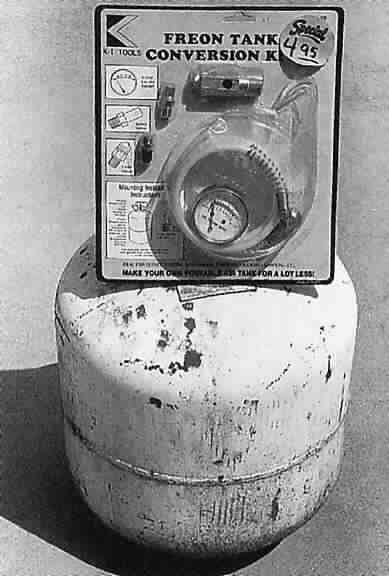
16. LOW BUCKS AIR BOTTLE. Want a nice portable air bottle, but don't want to spend big bucks on one? Then pick up this kit which will convert a regular old freon tank into an air tank. This one cost us $4.95 and you can get kits for under $15 almost anywhere. Look around for the cheaper kits. They all use the same kind of fittings. |
||
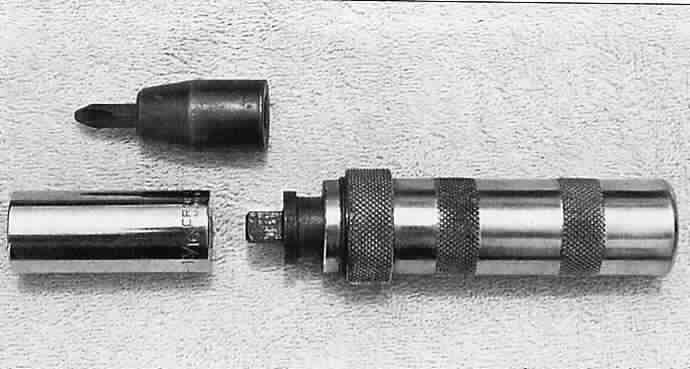
17. VERSATILE IMPACT. A regular old impact driver is really much more than a tool to remove stubborn Phillips screws. Most standard Impact drivers have a 3/8" drive head, and thus will accept regular 3/8" drive sockets. This means you can really whack a hard-to-remove fastener of almost any size, as well as the normal Phillips head screws. |
||
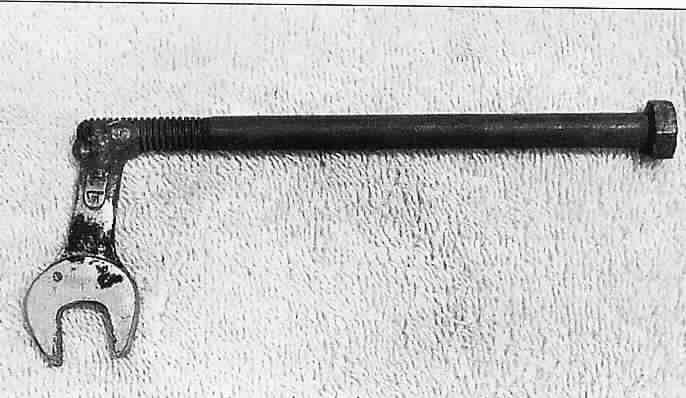
18. CUSTOM WRENCHES? Well, it isn't pretty, but it sure is handy to reach some well-hidden 13mm nuts on vintage Maicos and Greeves. I just cut the end off a cheapo wrench and welded it to a 6" bolt. Your imagination is your only limit here. |
||
19. MORE THAN A SAW. A bit more on the exotic side is this sawzall. While it's made strictly for cutting things, I find that you can put all sorts of neat things in them, like flat or round files and even hacksaw blades. This lets you elongate or enlarge holes in plastic, file metal down or use the hacksaw blades to trim saddle foam. |
||
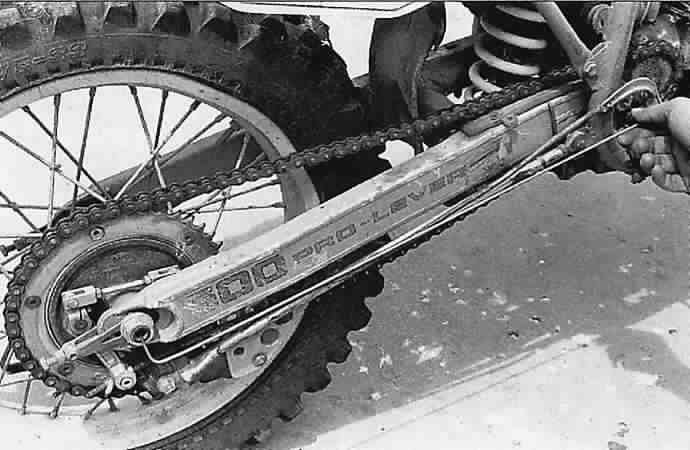
20. POSITIVE CHAIN ALIGNMENT CHECK. You should know by now that you cannot always trust the marks stamped on the end of the swingarm. What I do is to use a thick piece of welding rod and bend it with pliers, as shown. When both sides line up, you're spot-on, with no doubts. |
||
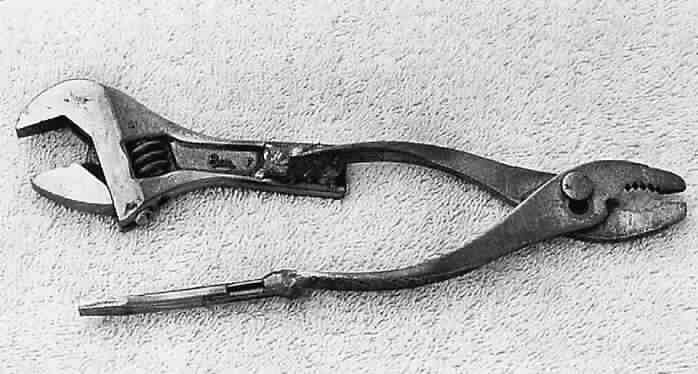
21. COMBO-TOOLS. Multi-tools are good things to carry with you. You can buy them or make your own. This one is a combination screwdriver, pliers and small adjustable wrench. |
||
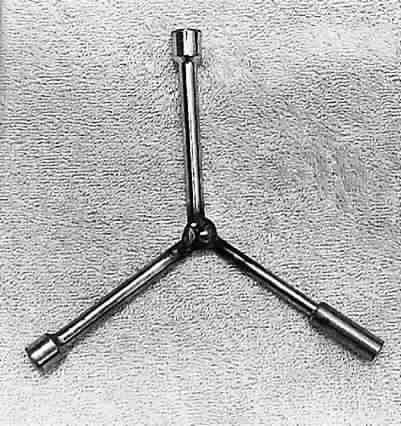
22. TRI-HANDLE SOCKET TOOL. Most bikes have the bulk of the nuts and bolts in standardized sizes. Japanese bikes abound with 10mm, 12mm and 14mm fasteners. European bikes have a bunch of 11mm, 13mm and 17mm hardware. This creates the need for a compact enduro pouch tool, the three-sided T-handle. The shape lets you put some real torque on most any fastener and the t-handles let you spin off pieces quickly. All it takes is a bit of welding |
||
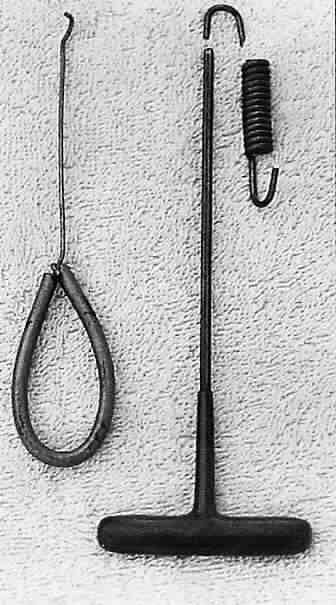
23. SPRING REMOVER. Removing exhaust pipe springs is best done with one of the old-style Husky tools, but they are hard to find. You can make your own decent spring tool remover by cutting the tip off an old auto brake spring and brazing or welding it to a T-handle. |
||
24. CLEANING RING GROOVES. If you're doing a top-end job, you should certainly clean out the ring grooves. A lot of crud accumulates in there. One of the easiest ways to do this is to break off a small piece of the old ring and lock it in some vise grips, then gently drag the ring piece through the grooves. Don't be tempted to hold a piece of the ring in your fingers, as the rings are really sharp on the edges and you will get all sorts of small cuts on your fingertips. |
||
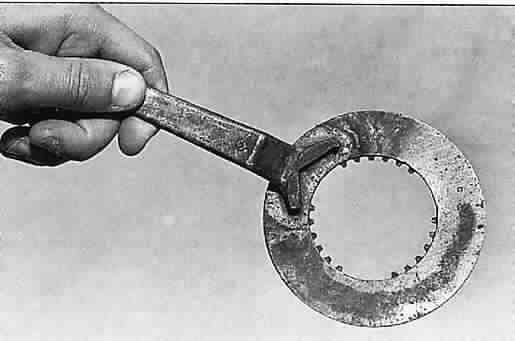
25. CLUTCH HOLDER. Often, you have to figure some way to hold a clutch basket in place while you remove the locking nut in the center. Easy job. Just take an old clutch plate and weld a handle on it like this. You can then slip the plate holder in the basket and wedge the handle against something to keep the basket from moving. |
||
|
|


|
Off-Road.com Newsletter Join our Weekly Newsletter to get the latest off-road news, reviews, events, and alerts! |
Follow @Off-Road
 Your Privacy Choices