1998 Jeep Cherokee RE Slip Yoke Eliminator Kit & CV Driveshaft
1998 Jeep Cherokee
RE Slip Yoke Eliminator Kit & CV Driveshaft
This is for a 97+ Cherokee with the Command-Trac transfer case.
After installing the 3" lift on Project X, I had noticeable vibration problems. I contacted Rubicon Express, which suggested that I do a CV conversion with a new driveshaft. Now I've heard that a lot of Cherokees with only 3" of lift fair just fine by lengthening the driveshaft, but after measuring my angles I determined that a CV was the way to go. Doing this conversion also allows a longer driveshaft to be used which helps by decreasing the driveshaft angle.
The angles were:
Driveshaft = 16 degrees down
Transfer-case = 4 degrees down
Pinion = 10 degrees up
As usual I opened the box and inspected the parts, surprisingly they were very simple machined parts. The instructions seemed clear enough, so I went ahead with the install. Sorry for the size of the pictures, but I wanted them to be as clear as possible.
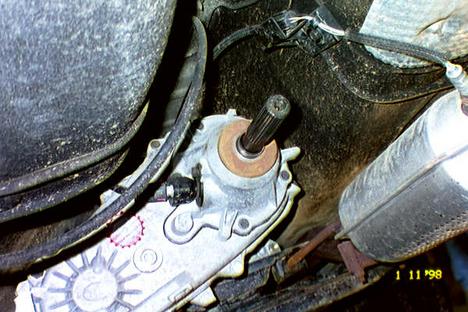
I started by taking off the stock driveshaft....
Loosen the bolts on the yoke of the rear axle, and remove the straps from the u-joint. I had to pry a bit at the u-joint to pop it out of the yoke. At this point, I'm sure you can pull the driveshaft right off the transfer case output shaft, but I loosened one of the small metal clamps holding the black rubber boot to the output shaft. Then I pulled the old driveshaft off and out.
Cutting the shaft...
Measure so that
you leave 1" of the splines exposed on the output shaft... see picture.
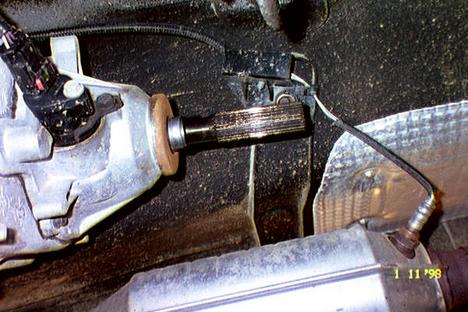
These are before I cut the shaft...
And these are after I cut the shaft. As you can see there is 1" remaining of the splined shaft.
I simply used a circular saw with a metal cutting blade I picked up at K-mart (Black and Decker brand) and it worked just fine. Really it's not that big of a deal to cut. Just make sure you cut it as straight as possible. It's not ABSOLUTLY critical, but it should be as close as humanly possible.
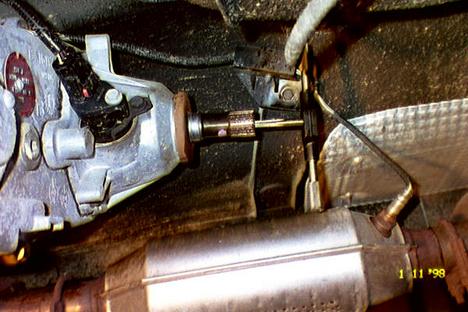
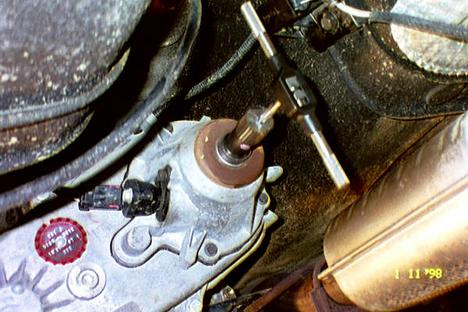
Drill and Tap.....
The next step is
to drill and tap the end of the shaft. I center punched the output shaft with a
punch, then drilled a small pilot hole. Also try to get this hole as close to
center as possible, and drill "straight" into the shaft. I used my
angle finder to help keep the drill level, and eyeballed the side to side. Here
is a picture of the tap in the shaft.
Install the new yoke.....
Simply slide on the new yoke and install the supplied bolt lockwasher and washer... don't forget to use Locktite!

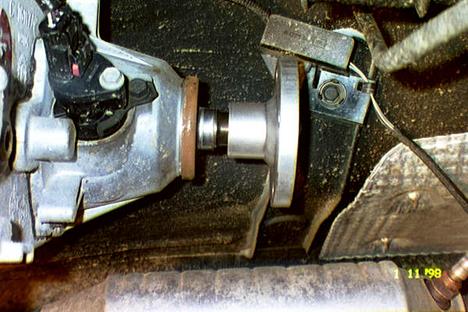
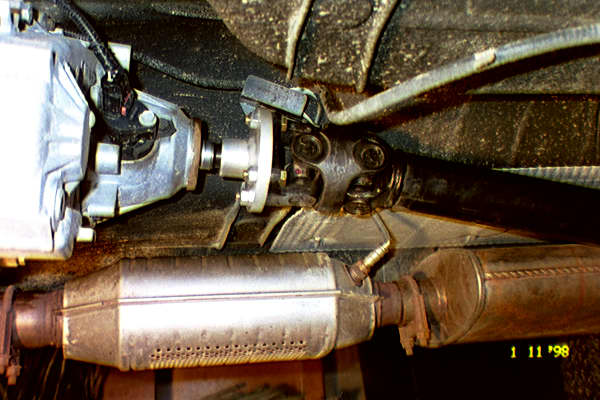
Install the Driveshaft.....
Install the new driveshaft!
Now the angles
are:
Driveshaft = 15 degrees down
Transfer-case = 4 degrees down
Pinion = 12 degrees up
Notice I only needed another 2 degrees for the CV shaft on the pinion yoke. Originally I installed a total of 8 degrees based on Rubicon Expresses recommendation. This produced vibrations above 40MPH on acceleration. Then I lowered it to 4 degrees, and it still had the same type of vibe only less. Then finally I ended up at 2 degrees of pinion rotation for the end result that has no vibrations.
Note: If you have vibrations on your rear driveshaft, pay close attention to when and what causes the vibrations. Vibrations caused by accelerating usually mean that the pinion is pointed too high. Vibrations that occur when you let off the gas usually mean too low of a pinion. If you get vibrations during both acceleration and deceleration, but not during coast, you may have a problem with axle wrap. Hopefully we'll have a tech article to explain axle wrap soon. Vibrations that happen during all 3 instances coasting, accelerating, decelerating, could be a variety of reasons. Remember these are only guidelines and not always the rule.
|
Off-Road.com Newsletter Join our Weekly Newsletter to get the latest off-road news, reviews, events, and alerts! |
Follow @Off-Road
 Your Privacy Choices