We turn our attention to the chain and gearing on Project 230. Why? Because from day one, we felt that the CRF 230 was geared all wrong. In fact, we read all kinds of stuff from CRF 230 owners where they actually dropped the size of the countershaft sprocket. Many owners went from 13 teeth to 12 and some even went lower!
Many of these owners rode in the woods and felt they had to have some real grunt down low to navigate around the tight trees and to handle the mud they would encounter. Also, many of these riders were not very good. Savvy woods riders learn quickly that the best way to get around the tight trees is to use second gear whenever possible. Learn to use the torque and roll the throttle on.
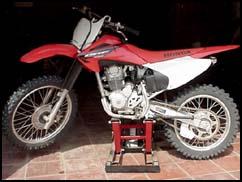
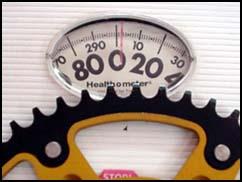
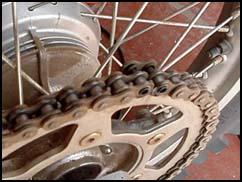
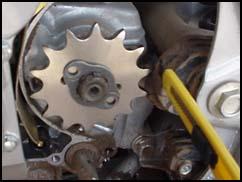
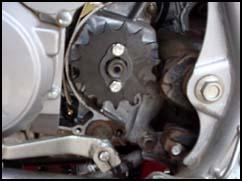
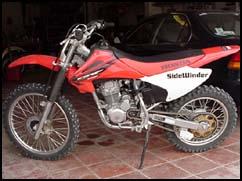
CRF 230 with stock chain and gearing |
Inexperienced riders panic out and think they need a creepy-crawly low gear when they go slow. All this does is make the bike harder to ride. The power comes on in a big burst and the rider finds himself fighting the sudden lurches. To further the problem, as the bike suffers from uncontrollable bursts of power, the rider uses the clutch and usually forward motion becomes erratic at best, and often results in stopping, or stalling.
Think about it: you have a six speed box, nicely spaced, and you cripple your bike with ludicrous gearing.
The next time you get to observe at a real enduro, listen carefully as the really fast riders go through the tight woods. Their engines are working at low or mid-range, and they're maintaining some sort of speed. They are not fighting their bikes.
If you live in the West, or in an area where you have open spaces, the stock gearing is wrong. Low is so low that it's almost useless. Second will take you up, over, or through most anything. Where I live (in Baja), you're always searching for another gear when blasting down a fire road. On a typical trail ride, your engine should be loafing at mid range in top gear while you're cruising. It should not be screaming its guts out.
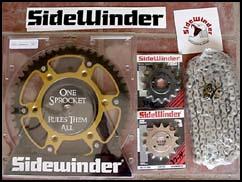
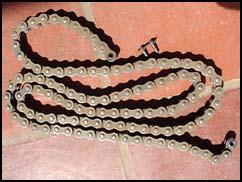
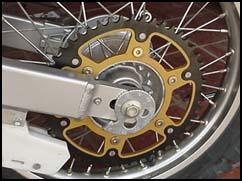
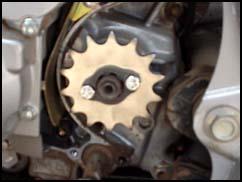
New Sidewinder Trimetal sprocket, 14 & 15 tooth countershaft sprockets, and Krause chain |
First, we tried a 14 tooth countershaft sprocket, then a 15 tooth item. Krause Racing sent us one of each, as well as a Tri-Metal rear sprocket and a Sidewinder chain. More on the chain later.
The 14 tooth c/s really helped and the spread of power was longer and more usable in each gear. Low was still low … too low. A 15 tooth was then tried and this was just about perfect. Top speed was increased by about ten miles per hour and the spread of power was a pure joy!
Recall how the re-jetting and opening up of the intake and exhaust really helped the bike and made it come alive? Well, the same feeling was realized just by replacing the 13 tooth c/s with a l5 tooth! No kidding, the change makes that much difference. If you're strangling your bike with the stock gearing, or are one of those poor souls who have put a smaller c/s sprocket on, then you owe it to yourself to try a 15. Your eyes will be yanked open and you'll realize just how much potential your 230 has.
GETTING RID OF THE STOCK CHAIN
You ought to dump the stock chain for one very good reason: there's no master link in it. That's right, if you break the chain, or toss it, on the trail, you're screwed. In their infinite wisdom (?), Honda figures that you're either too stupid to handle a master link, or you'll put it on wrong.
Another good reason to have a master link is to make it easier to change sprockets, or to properly clean the chain.
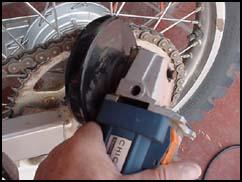
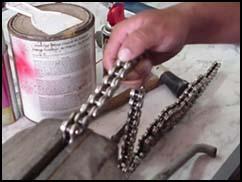
Chain breaker? We don't need no stinkin' ... |
Getting the stock chain off means using a heavy duty chain breaker, or do as we did: whip out the old hand grinder and chew through the link and side plate. Then use a sharp pointed drift (or a hardened nail) to drive the cut link out of the chain.
We installed Sidewinder chain instead of opting for Honda chain. Why? The stock Honda chain is so horribly overpriced that most dealers don't even stock the stuff on their shelves. Our chain came a bit long (good) and we cut a few links off to make it fit. With the chain cut for running the 15 tooth counter shaft sprocket, we were able to use the same section of chain to run the 14 tooth. You have about a two inch range of adjustment in the swing arm slot.
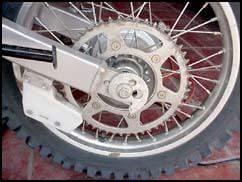
REAR SPROCKET
The Sidewinder Tri-Metal rear sprocket got the nod. Not only is it lighter than the stock steel sprocket (see the photos for actual weight), it's close to bullet-proof. The gold anodized inner core is the lightest aircraft alloy available. Micro-polishing yields an absolutely flat, blemish free, aerospace quality surface that not only looks dynamite, but provides the ideal platform for bonding with the outer ring of teeth.
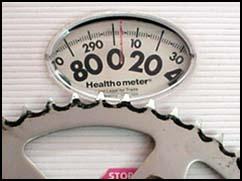
Stock steel sprocket weighs almost 4 pounds |
Sidewinder Trimetal sprocket weighs less than 3 pounds |
That coal-black outer ring of teeth is a boron-enhanced, triple nitrate heat-treated, tool steel (the same material used for space station docking latches) and is virtually impervious to wear. The bonding process is very elaborate: the inner core is frozen while the outer ring is heated. The mating surfaces are treated with special chemical bonding agents just prior to being pressed together with 70 tons of pressure. The result is inseparably mated components. "AAA" grade Titanium Rivets adds yet another layer of insurance against delamination. Sidewinder offers a 100% Guarantee against breakage. Racers no longer have to put up with the short lifespan of an all-aluminum sprocket, or the excessively heavy weight of a solid steel sprocket.
Tri-Metal is available for Yamaha, Honda, Suzuki, Kawasaki, KTM, Gas Gas, Husqvarna, and other models. Many alternate gearing sizes are available to accommodate all rider preferences. Retail price is $99.99. Matching Titanium series front sprockets and chains are also available.
Customers seeking to place orders direct may contact
SIDEWINDER INSTALLATION TIPS
- If your Sidewinder chain is coated with preservative grease, you must clean this off before putting your drive system into service. We recommend mineral spirits as a mild solvent to remove this sticky coating. Failure to remove this preservative grease will attract dirt and grit and shorten the life of your system.
- Alignment is a crucial factor regarding drive system life and performance. Double check your work to insure that the chain is running true to both sprockets. Slowly compressing your suspension through its full travel while you monitor the chain tension will also be a good cross-check against being over tight.
- Some chain guides are too narrow. You may need to widen yours to allow proper clearance for Sidewinder chain. Permitting the outside edges of the sideplates to rub against any object could cause high-frictional heat, loss of temper in the steel and eventual cracking.
- Be sure you install the master link clip with the closed end pointing in the direction of chain rotation.
- Do not use gasoline, lacquer thinner or any strong solvents to clean 0-ring chain. It will attack the rubber 0-rings. Use hot soapy water and a nylon brush. A wire brush is a no-no!
- Replace the chain 2 or 3 times for each set of sprockets. This is normal. Timely chain replacement will assure maximum possible useful life from your sprockets.
- Since Sidewinder uses oversize pins in the chain for maximum tensile strength, no other brand master link will fit. It is a very good idea to buy 2 or 3 spare Sidewinder master links.
-
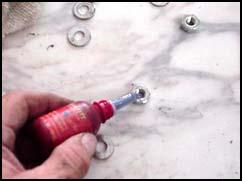
Apply Red Locktite to Steel Fasteners |
Using red grade Loctite to secure nuts and bolts is a good idea. Allow sufficient time for the Locite to cure. It is not a good idea to use Locite on aluminum surfaces, since later removal may destroy any threads in the softer aluminum material.
- Make sure all hub/shaft surfaces are clean and free of foreign materials when mounting sprockets.
- Certain front sprockets may exhibit side-to-side clearance that appears unusual. This is ok. The sprocket will self-align with the chain and will also eliminate side loads on the drive system due to slight front-to-back misalignments.
| Sidewinder Prices: |
| 14 Tooth Front (C/S) Sprocket |
$29.99 |
| 15 Tooth Front (C/S) Sprocket |
$39.99 |
| Tri-Metal Rear Sprocket |
$99.99 |
| Titanium Series Chain |
$89.99 |
| Honda Reference Prices: |
| Stock Front Sprocket |
$41.87 |
| Stock Rear Steel Sprocket |
$77.42 |
| Stock Chain |
$169.89 |
| Other Materials:
|
| Master links |
$3.99 |
| Chain lube |
$9.99 |
Step-By-Step
Remove the countershaft (c/s) sprocket cover |
The top bolt on the cover can be reached easily with an 8mm t-handle |
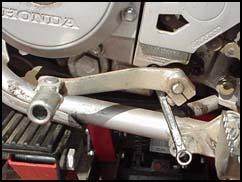
You can barely get to the bottom bolt with the shifter in place |
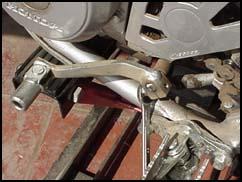
Using a 10 mm to get the shifter bolt loose |
Shifter removed |
Now the bottom bolt can be easily removed |
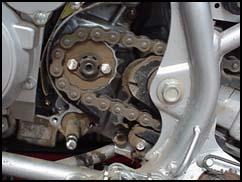
Here's the stock 13 tooth countershaft sprocket |
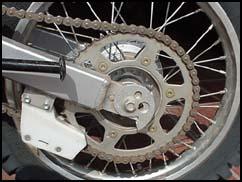
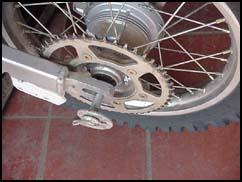
Stock 50 tooth rear sprocket |
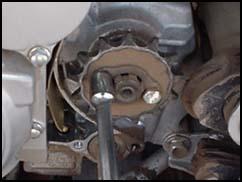
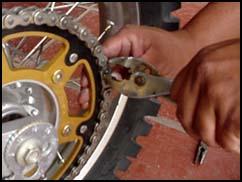
The stock chain has no master link. It's easist to grind it free |
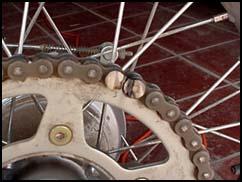
Just grind completely through the outer plate |
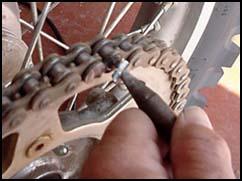
Use a sharp pointed punch to free the pins |
Link about to part company with the chain |
Stock chain removed |
Stock 50 tooth rear sprocket with chain removed |
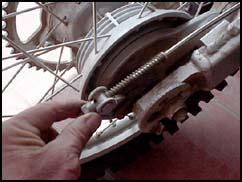
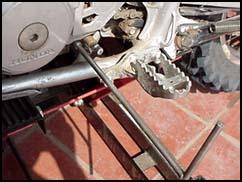
Remove the rear brake rod nut |
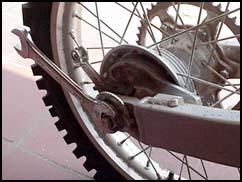
24 mm wrench is used to loosen axle nut |
Slide axle free |
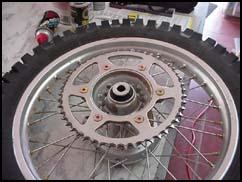
Rear wheel off the bike |
Remove the rear sprocket bolts |
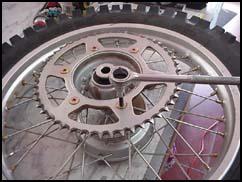
Use a quality locking solution on the sprocket holding nuts |
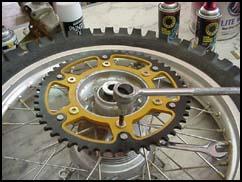
Use a criss-cross pattern when tightening. Bottom wrench is a 14 mm |
Slide axle in and re-install rear wheel |
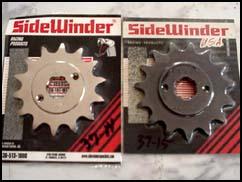
Two Sidewinder counter shaft sprockets ... 14 tooth and 15 tooth |
Remove stock 13 tooth countershaft sprocket |
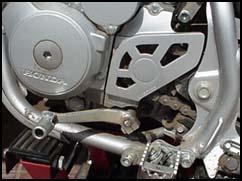
When we installed the larger 14 tooth, a clearance problem was found with the chain protector. We cut the front part off |
With chain guard cut, proper clearance was acheived |
After trying the 14, we installed a l5 tooth |
We had to shorten the Sidewinder chain by two links to fit |
The new chain was locked in place with a master link |
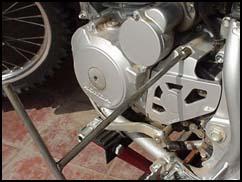
Completed job ... looks good and works better |
|


 Your Privacy Choices