|
|
|||||
|
|||||
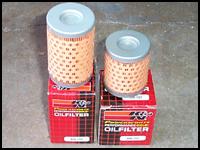
The main tools we use during an oil and filter change are an 8mm socket to remove the rear brake reservoir and oil filter covers, 10mm & 13mm sockets for the three drain bolts, a pair of snap ring pliers for removing the old filters and a vacuum pump to remove the old left over oil from the filter cavities. Besides these tools we also use a funnel, drain pan, new filters and oil to finish off the oil change. |
|||||
|
|||||
|
|
|||||
|
|||||
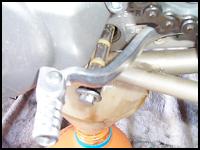
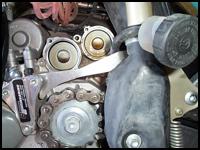
After the oil has stopped draining and the screens are clean reinstall the drain bolts and snug them up, but be sure not to over tighten them. Next we lean the bike on its side, resting the throttle side handgrip on a stand. Leaning the bike over gives direct access to the oil filters and prevents the oil from running all over the place when removing the filters. From here remove the rear brake reservoir, followed by removing each of the two oil filter covers. Getting the oil filters out can be a little tricky but the best method we have found is to use a pair of snap ring pliers inserted into the center holes on the outsides of the filters. If you don't have snap ring pliers needle nose pliers can work, but not nearly as well. With the oil filters
removed there will still be a little dirty oil left in the oil cavities.
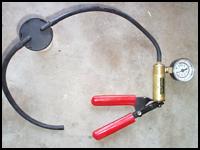
Using a vacuum brake bleeder type tool is quick, effective and doesn't
make a mess. A turkey baster could also be used if you A.) don't want to
spend the cash for a pump or B.) want to get the lady of house excited
that your taking interest in her kitchen tools. Once the old oil is
removed fill the cavities about ? to a ? way up with fresh oil (too much
will result in a mess when you put in the new filters). Install the new
oil filters with the rubber seal facing down and then fit the o-rings into
each cavity seat. Finish off by replacing the filter covers and brake
reservoir and snugging down all the 8mm bolts. |
|||||
|
|||||
Adding oil and finding the right level is the final step to our oil change process. Instead of worrying about the exact amount of oil we put in we have learned to utilize the sight glass window. The oil level seems to vary in the window depending on if the bike is cold or warm so keep this point in mind. First put in enough oil that it comes about halfway up the sight-glass window. Start the bike and let it warm up a bit before shutting it down and rechecking the oil level. Continue to add oil with the bike off until it reaches between ? and ? up the window. Restart the motor and let it run for a minute or so and then shut it off again and recheck the level to be sure it remains within that range. After you get the oil level correct double check that you tightened everything down, clean up your mess and go ride. |
|||||
|
|
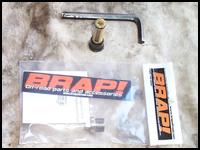 The
first thing we discovered on our first oil change is the need to take your
timegetting out the stock allen head bottom drain bolt. The factory puts
it in so tight that unless you use a high-quality allen wrench - you risk
stripping out the bolt and a costly repair bill. After successfully
removing the stock allen bolt we picked up an aftermarket BRAP 10mm hex
head drain plug to make life easier for future oil changes. There are a
number of companies that offer these replacement bolts so just shop around
until you find one.
The
first thing we discovered on our first oil change is the need to take your
timegetting out the stock allen head bottom drain bolt. The factory puts
it in so tight that unless you use a high-quality allen wrench - you risk
stripping out the bolt and a costly repair bill. After successfully
removing the stock allen bolt we picked up an aftermarket BRAP 10mm hex
head drain plug to make life easier for future oil changes. There are a
number of companies that offer these replacement bolts so just shop around
until you find one.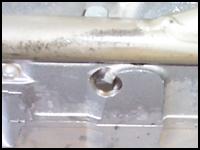

|
Off-Road.com Newsletter Join our Weekly Newsletter to get the latest off-road news, reviews, events, and alerts! |
Follow @Off-Road
 Your Privacy Choices