Project Yamaha YZ125: Overview and Powder Coating
So what did we find in storage that we have to work with?
Riding any off-road trail has always been a way for me to release and relax, and getting the most out of my ride is even more rewarding. Having a great powersports dealership in my area makes seeing and even riding the newest motocross-style dirtbikes within easy reach. The problem is I cannot really afford to buy a new bike at today’s prices, and like many of you, especially not with the unpredictability of work in these economic times. It’s hard to face that unless we make-do with what we have, our riding days could be at a stand-still for now.
 This is when I started digging through the storage building for an old friend I purchased a while back. It’s a 2002 Yamaha YZ 125, and even though it needs a lot of work, well, it’s my only hope to get back on the trail.
In this series of articles I will be showing you how to take the old and make it new again - a little at a time. This project will give the reader - and me - a chance to make the bike that once was the new kid on the block, come back to the future! [Editor's note - oh man, do those references really date you, Ricky!]
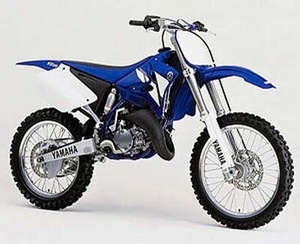
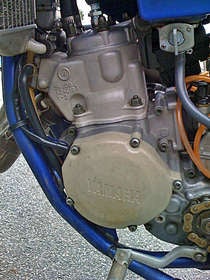
Starting out in life the YZ125 was one of the most sought-after race machines right out of the box. Having many years of exciting race wins and even championships, the Yamaha YZ 125 made its mark forever.
Current Condition of our Project Bike
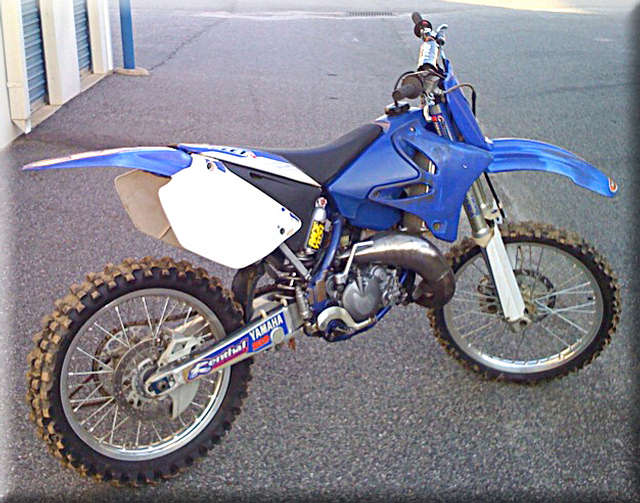
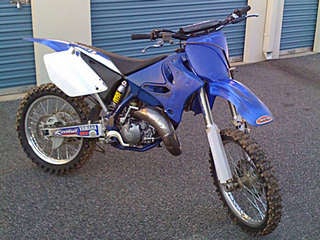
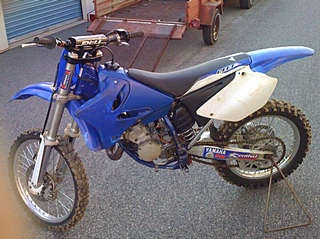
Our rebuild project bike has seen its better days. As you can see in the pictures, this Yami isn’t in REALLY bad shape, but looking close reveals some worn-out parts and very tired pieces that make our YZ hard to ride and in some cases, unsafe. The bike needs a lot of attention. We plan to totally disassemble it and start from the frame out with simple replaceable parts that will still be cheaper than toting a new bike payment book around for the next four years.
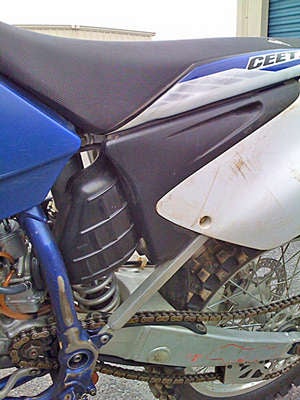 Our plastics have been heated and remolded in some areas just to get them to fit and appear some-what normal.
 - The tires look good from a distance but closer inspection reveals cracked and dry-rotted lugs that mean only one thing - they need replacing before they leave me on the trail pushing the bike miles back to the trailer.
- Having even slightly-bent or twisted rims makes the bike hard to handle. The fact that two spokes on the rear wheel and three on the front wheel are completely missing has to be a part of this equation.
- The chain and sprockets are worn beyond the limits and can create very dangerous riding conditions.
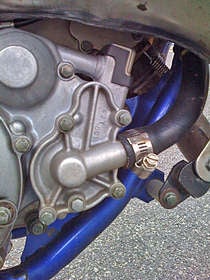
- The chain guides and rollers are stuck in position due to frozen bearings, and quite honestly the whole bike squeals and squeaks from worn or frozen bearings throughout.
- Our air filter and intake box have been the subject of many horrible get-off’s and could use replacing as well, just to keep the dirt out of the motor.
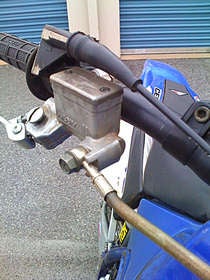
- The bars are, well, not so good either.
Needless to say there are a lot of things literally hanging off the bike. I could go on and on about what I have on my wish list for repairs but it might be too depressing, so I will just get into the story on my plans for this restoration.
Project Plan
Here are some of the products I'm planning for this rebuild. We will be adding a few I'm sure as the build progresses. We are looking to replace our bent and broken brake and clutch levers but have not decided on a specific product yet. The throttle body has also taken a few hard hits and will need to be repaired or replaced as well.
| Part | Supplier | Item(s) |
| Bearings | Pivot works | Front and rear wheels, swing arm pivot bolt and shock linkages |
| Air Filter | TwinAir | |
| Reed cage | Boyesen | |
| Bars | Bell-Easton | Triple clamp for use of Steering Dampener |
| Heavy protection | Works Connection | Radiator braces, Skid Plate, Frame guards |
| Tires | Dunlap | Geo Max MX51’s |
| Rims | Pro-wheel | OEM Size |
| Spokes | Pro-Wheel | Heavy Duty |
| Brakes | Moto-Master | Rotors and Pads |
| Pegs | IMS products | Bigfoot Peg |
| Driveline | Supersprox | Sprockets |
| Chain | RK Chains |
Like I said these are just a few of the parts I am planning on and of course this build would not be complete without OEM parts from Yamaha. I know the radiators are in rough shape and of course our plastics have been abused as well.
This project was designed to let you know that all hope is not lost, and with a little time and effort the old bike in the storage building can be made fun again. It may cost a little money to get back in shape but like I said its better than having a payment book. This will also help us to be more familiar with the bike we ride, as well as maintenance tricks and tools needed to make the job easier.
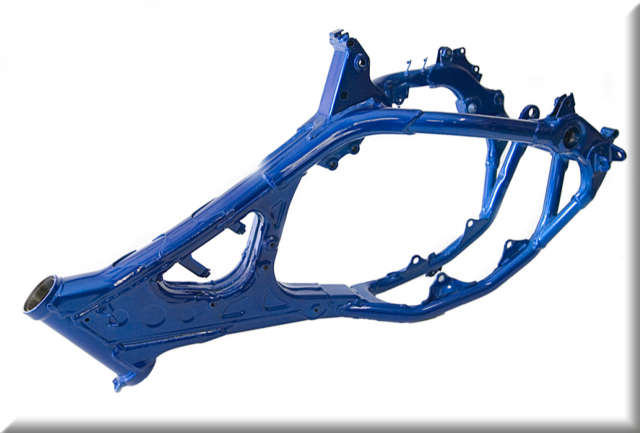
Step One: Powder-Coating The Frame
Starting with a bare frame I decided to get in touch with some old friends of mine at BK Performance Coatings in West Virginia. Ken Hill has been powder coating for many years and is known around the MX/ATV community for his awesome work. We decided that since the Yamaha frame had to be stripped we might as well just powder coat it and insure a durable finish for the days of riding just ahead. I chose to go with a candy blue that closely resembles the Yamaha blue but with a sparkle underneath.
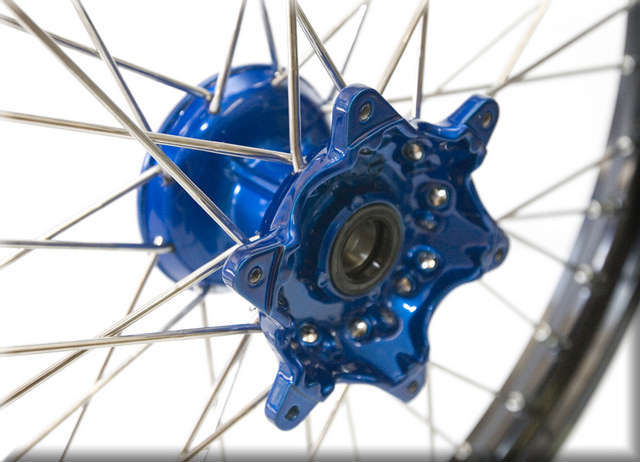
We also wanted the wheels to stand out and since I knew we would have to replace or repair the rims and spokes, we opted to powder coat the hubs the same color as the frame. This should get the looks of the YZ 125 back and let it stand out in the crowd at our ride areas. Excited as I am I had to make sure to keep the build realistic to my goals. I knew I would splurge a little but just getting the bike back in shape was our primary intention.
We removed the stock steering head bearings and thoroughly inspected them after a good cleaning. I think these will be good enough to reuse after a good dose of waterproof grease. The frame had to be prepped after arriving back from the powder coating but the prepping was minimal, as BK Performance made sure to tape off and plug up any of the threaded holes and bearing slots before applying the color.
Since we chose a candy blue and that color requires a bit more work, the cost for powder coating the frame was $225. The hubs are also the same color so they were a bit more than usual, at $30 per wheel hub. These prices include stripping and prepping the part to be powder coated but they must be dirt and grease free to get this price. More labor = more money.
You can contact BK Performance at:
Ken Hill
bkperformance@verizon.net
304-754-7609
Hedgesville WV
What's Next
So there's where we're starting with this Yamaha YZ, and a look at where we're going. Follow along in the coming months, and feel free to post your comments and questions!
-RS
|
Off-Road.com Newsletter Join our Weekly Newsletter to get the latest off-road news, reviews, events, and alerts! |
Follow @Off-Road
 Your Privacy Choices