Project Kawasaki KLX110 Pitbike: Suspension
Marzocchi upside down forks, BBR Rear End, Elka shock
 You might recall the first upgrade to our Project 110 was to the suspension. After riding the stock bike a few times it was clear we needed to make some upgrades to allow the 110 to hold up a 175 lb adult rider. These upgrades consisted of adding stiff fork springs to the stock forks and adding a new shock while still retaining the stock swingarm. These modifications were very affordable and the installation process straightforward.
With the stock engine the 110 didn’t do anything quickly, it was all about keeping momentum. This led to us picking very smooth lines on the track and avoiding obstacles that would slow us down. With this strategy the stiffer springs and new shock really made the bike fun to ride. In fact, the suspension mods we chose allowed us to utilize the stock power output to point were we really didn’t feel we needed any other suspension components.
While our initial suspension mods worked great with the stock engine’s power output things changed in a hurry when we bumped up the power with the MotoHP 150 kit and other add-ons. With the added power of the engine upgrades the bike had more than enough power on tap to attack obstacles head on. This had us experiencing harsh fork bottoming up front and the rear end searching for traction coming out of corners. We even found ourselves trying to go around the whoops because it was faster and easier than trying to get pounded and bounced around going through them. This change of attitude left us longing for more suspension performance to allow us to utilize the power.
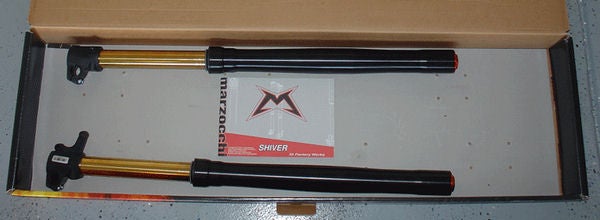
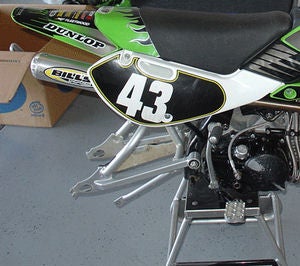
 After doing some research on available components we decided upon adding a set of new Marzocchi upside down forks and an almost new BBR rear end with Elka shock. This setup has been proven by top racers and seemed like a great fit for our Project 110.
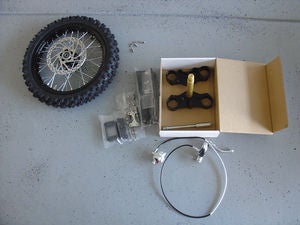
The Marzocchi front end is actually a complete bolt-on kit that comes complete with the forks, triple clamps, front wheel and disc brake. The BBR swingarm and Elka shock extend the wheelbase, allow more travel and give the 110 a big bike look.
Installation of these components is definitely more involved than our initial suspension upgrades but not out of the league of the average weekend mechanic. Both the fork kit and rear end come with instructions that are fairly straightforward and easy to follow. Fork installation involves first removing the complete stock front-end.
 To accomplish this the handlebars and front brake lever are first removed to enable access to the steering head nut holding the top triple clamp on.
Loosening the top triple clamp bolts and then removing the steering head nut will allow the forks and front tire to all be removed at once.
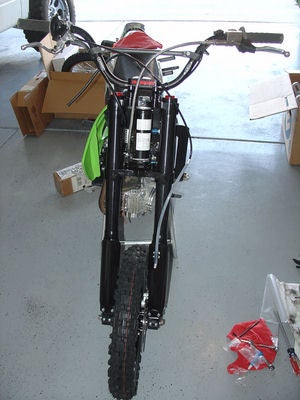
Installing the Marzocchi lower triple clamp and steering tube with bearing is the first step in assembly of the new front end.
The top bearings and clamp can then be installed and hand tightened down until the fork tubes are installed.
After the forks are in the clamps the handlebars, brake and front tire can all be installed.
To complete the front-end installation the steering head nut needs to be tightened enough to remove play but not so much to bind the bearings, more on this later.
Removing the rear tire, brake assembly, stock swingarm and in our case our Works Connection shock is the first step in upgrading our rear end.
 |
 |
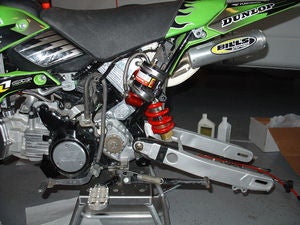
 The BBR Swingarm installation requires using a supplied template to drill a hole through the frame that will be used to mount the chain roller. After drilling the hole in the frame the new BBR shock support brackets are mounted to the frame at the original top shock location and the rear engine mount bolt hole with supplied hardware.
The swingarm is then mounted using the stock swingarm mounting hole followed by the Elka shock which attaches to the swingarm at the bottom and the support brackets at the top. The remote reservoir for the shock attaches to the side of the frame using hose clamps and rubber spacers.
We finished up by installing the chain guide, chain roller, chain, tire and brake arm.
 Before rushing off to the track however we double-checked our work to make sure all the hardware was tight and that we didn’t forget anything. We also verified both brakes worked and actually had to adjust the rear brake several times to get it to our liking.
The only thing that we found once the bike was back together was that the steering head bearings were still a little loose. This allowed too much play in the headset and would not be good for bearing life.
So we took a little extra time in removing the bars again and adjusting the tension on the bearings with the steering stem nut until we were satisfied we didn’t have it overly tight but the bars still moved from side to side freely with no play.
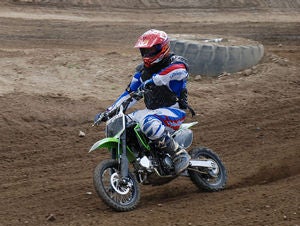
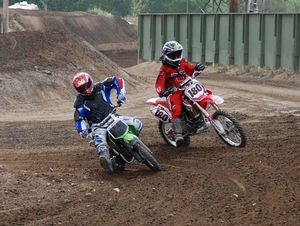
The moment of truth at the track did not disappoint. To compare our initial upgraded suspension to our Marzocchi and BBR setup isn’t even fair, there isn’t a comparison. Our Project 110 just jumped exponentially in the fun factor at the track and the bike now feels like it has full motocross suspension. No longer are we afraid of the whoops and instead of trying to go around them we now just click third and hold it open right through them.
We did manage to bottom the suspension after coming up short over a table top jump on the Vet track at Milestone MX Park. Although we bottomed hard enough to band the bars back in the clamps there was no metal to metal contact heard or felt in the suspension. The other thing the suspension does is allow the bike to hookup and use the added power of the engine, especially coming out of corners.
 Does this mean everyone needs to run out and spend all their hard earned money on this setup? No way! In fact unless your engine is well built we would still recommend just going with our initial upgrades of stiffer springs and a new shock.
The Works Connection shock was actually a great shock with really good feel but it used the stock swingarm and that didn’t cut it in our search for the added benefits of an extended wheelbase.
The younger, lighter and more skilled riders still manage to put us to shame by passing us with only a pipe and spring mods on their bikes but then again we would bet most of them don’t have to go work on Monday like we do. At this point we are very happy with our Project KLX110 and the fact that we have an even better balanced package than before.

|
Off-Road.com Newsletter Join our Weekly Newsletter to get the latest off-road news, reviews, events, and alerts! |
Follow @Off-Road
 Your Privacy Choices