In Part 3 of Project Lowbucks, we actually start to put together our Suzuki RM250, and it is beginning to look like a bike. At the beginning of this series, our goal was to build a dirt bike for dirt cheap. Even if you only made a few bucks flipping burgers at the local fast food place, there's no reason why you can't have a decent bike.
Other Project Lowbucks Stories:
In Part 1, we outlined how and where to look for a dirt cheap dirt bike. We also suggested what kind of bikes to look for and what bikes to avoid. Also there were solid tips on how to troubleshoot a non-running bike. Be sure to reference that first piece for insight into finding a bike.


As is the case with any build, we cleaned the bike properly before proceeding. Premix was poured into the bottom end to make sure all of the crud was out of the bike. A gallon of gas later, we had the last of the dust and dirt out of the bottom end. If you recall, we put a bunch of gas in the lower end when we first got it and flushed out the bugs and dead spiders. This final effort with the gasoline was an attempt to get that bottom end as clean as possible. The last thing you want to do is put fresh parts in a bike and when it starts, have some debris in that crank chamber and all your work goes to waste. After we were sure that all of the junk was out of the bottom end, we gave it one last blast with the air hose to make sure.
 at the gauge.")

We then turned our attention to the top end. All the parts were cleaned properly and we double-checked the measurements. At 67 mm, the liner was in stock tolerances. A piston, rings, gasket set and some new power valve linkage parts were obtained for $88.45. The piston was installed on the rod with a new needle bearing assembly, and then the ring was slipped over the piston. The barrel was then placed at the top for assembly and gently lowered into place. Please note that we did not use any assembly lube on the piston itself. Too many people make the mistake of slathering two-stroke oil all over the engine parts when they put the top end together. This just about guarantees that it's gonna smoke like crazy when it's fired up and possibly cause the rings to stick.


Don't forget, the lubrication that you get in a two-stroke engine is from the oil in the gas, which should usually be at a ratio of 32 to 1 or thereabouts. When you put a whole bunch of oil in that cylinder, you throw the ratio way out of whack.


Once we got the barrel into place, the linkage for the power valve must be connected. This means threading the small rod up through the hole in the base of the barrel and hooking it to the small pieces that go to the power valve. This is what caused the problem in the first place as far as we could see. One or more pieces in the power valve linkage assembly either broke or came apart, allowing the power valve to hit the piston as it was going up and down. When it hit the piston, that's what more than likely caused the destruction of the piston. Fortunately, the coated liner on the cylinder wall was not damaged at all. A measurement showed that it was 67 mm, the correct spec.
After the barrel was put in place the head was installed. Then the cylinder base nuts were all tightened down properly. The head bolts also received nuts and were torqued in place. The kickstarter was given a half dozen boots and the piston was stroked up and down in the process. We listened for any weird sounds but everything seemed okay at this point.
A spark plug was installed in the plug cap and we checked for a reasonable spark of sorts. Finding a nice fat blue spark let us proceed onward at this point.
The right side cover to the power valve linkage was also missing from our motor, so we resorted to eBay once again to see if we could find the part. One was located for a total cost of $8. With this installed, the top end was virtually complete. We completed this by bolting up the head steady and putting on the carburetor. Naturally, before the carburetor was put on, we checked the float bowl for water or crud and cleaned all the jets out. No sense starting with an old existing problem. Everything seemed okay in this department, so the carb was bolted on.
The pipe was then bolted into place. A close look at the pipe showed that we had a good Pro Circuit pipe, rather than the stocker. New, this pipe was about $250-$300. Used, you could plan on spending about $150 for one in good shape. Ours simply needed a coat of paint and it was like new. The silencer was checked and it seemed to have good packing in it and no obstructions, so it was hooked up to the Pro Circuit pipe.

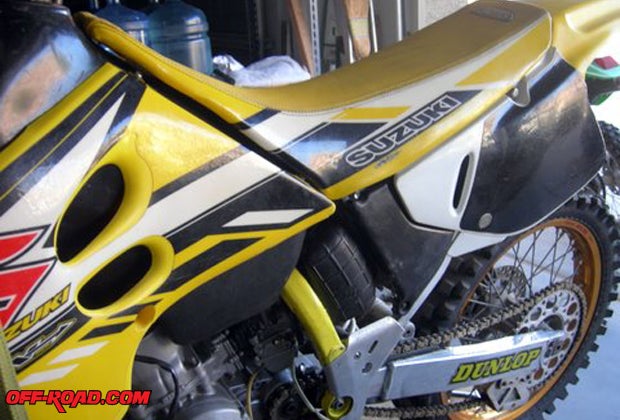
The bike was finally starting to look like real motorcycle. Next, we installed the radiator hoses and made sure that all the mounting brackets for the radiators were in place. After this was done, the gas tank was then properly attached, followed by the radiator shrouds and then the saddle. Right before the saddle was seated home, we cleaned the air filter and the airbox properly. While we were at it, the air boot from the carb to the air cleaner was also cleaned properly.


Now the bike was a finished package. Next month, well fire the beast up (hopefully) and take it for a ride. At this point, we were into the bike for less than $250. That is one sweet bargain for a solid 1994 Suzuki RM250. Stay tuned.


Check out the other Project Lowbucks stories:
|
Off-Road.com Newsletter Join our Weekly Newsletter to get the latest off-road news, reviews, events, and alerts! |
Follow @Off-Road
 Your Privacy Choices