 INTRODUCTION
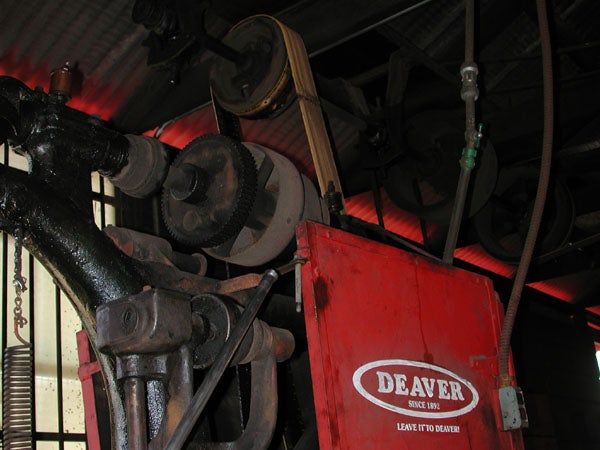
The Deaver Spring manufacturing facility is an amazing place. The company was established in 1892, and most of the equipment in their shop looks like it has been in service for at least 100 years. Drill presses and bench grinders are all driven by a series of pulleys and leather belts that should be powered by a coal-fed steam engine instead of an electric motor.
After we removed the stock bed, the rear end of our Tacoma was sitting about 2-3" too high. Jeff invited us to drive down and visit Deaver in Santa Ana, CA, so we could see the process as they re-tuned our leaf springs. When we got there, Jeff introduced us to Erik, and after looking at our vehicle and talking with us about how the truck was going to be used, Erik estimated that we would need to lower the rear suspension about 2.5". He also suggested that we bring the spring-rate down from 170lbs to something closer to 130lbs (we agreed that the 7hr ride had been pretty stiff). He told us that adding a third spring-clamp and reducing the amount of arch in the front half of the springs would help to control the axle-wrap and wheel-hop we were experiencing on hard acceleration. We didn't know that building leaf springs was such a technical process. These guys are craftsmen.
SUSPENSION TUNING

|

|
Working under lifted/off-road vehicles has some advantages, like the amount of space under them, but it also requires some additional/specific equipment. At ride height, the bottom of our frame-rails under the cab are about 19"off-the-ground and with about 8" of extension travel in the rear suspension, we couldn't even fix a flat tire without something like a Hi-Lift. Deaver uses extra tall jack-stands that can support the weight of a vehicle by the chassis, and allow a long-travel suspension to hang freely with the tires off the ground. We lifted the rear end of the Tacoma using a regular hydraulic floor-jack under the rear differential, and then placed two tall jack-stands under the frame-rails. The floor-jack was then slowly lowered until there was no longer any weight on the suspension, and the leaf springs were at free arch. Finally, we pulled the leaf springs out from under the truck after removing 8 U-bolts/nuts, 2 shackle bolts and 2 main spring hanger bolts. The shocks, driveshaft and brake lines were all left attached to the axle, because the floor-jack was supporting the weight of the rear axle axle and holding it in position.

|
Erik laid the springs out side-by-side and took some measurements so that he would have a reference point to make changes from. His work surface might look disorganized at a glance, but all of these tools were used throughout the process of tuning our leaf springs.

|
Erik is shown here removing a spring-clamp that would normally only keep the springs in alignment from side-to-side, but on the front half of our Tacoma springs they also hold the springs together in order to help fight axle-wrap.

|

|
After removing all of the hardware from the spring-clamps, the centering-pin bolts were removed from each spring-pack. Large C-clamps, like this one, are used to hold the spring-pack together while the hardware is removed. Leaf springs are held together under tension, and it would be very dangerous to disassemble them without taking these precautions. The center-pin sometimes needs to be driven out with a punch and hammer, before a long Philips-head screwdriver (or a special tool like the one shown) can be slipped into the center-pin hole to keep the springs aligned while the C-clamp is loosened.

|
Before he could tune the springs, Erik had to remove each of the spring-clamps by drilling out the rivet-heads. They will be replaced with new ones when the spring-pack is reassembled.

|
When a leaf spring is run through the spring-roller machine, it is fed in-between two fixed lower-rollers and an adjustable third roller that applies downward pressure. The amount of pressure that the top-roller applies to the material changes the amount of arch that is put into each spring. The same machine can be used to increase or decrease the amount of arch in a spring, depending on how the material is run through (up or down). The rollers are gear-driven and are operated by a reversible foot-pedal; making it possible to work on specific parts of the spring.
While he worked, Erik explained that the reasons for sagging leaf springs are inferior materials, improper tempering processes, incorrect spring rates for an application, and over-use. The life expectancy for a set of Deaver leaf springs on a race truck is about one-two seasons (those are HARD miles). Deaver leaf springs for non-competitive performance applications often last the life of the vehicle. Deaver only uses the highest-quality American made spring steel, but a lot of the performance is in tuning for specific applications.

|
Here Erik is flattening out a short section of the forward half of our leaf springs. For the best results, final tuning and smaller adjustments are still often done manually. We were amazed at the amount of labor and skill that go into making and tuning a set of race-quality leaf springs. Each spring in our 11-leaf pack was tuned and re-tuned until Erik was satisfied with the characteristics and had achieved perfect symmetry between the pair.

|
Production Deaver leaf spring-packs are sold with Teflon slider pads installed at the tip of each spring because they help to reduce friction and provide a smooth ride. We were surprised when Erik suggested that we remove these and grind/radius the edges of each spring instead. He told us that Teflon slider pads have become something that spring manufacturers and suspension companies like to promote, because they are a cost effective alternative to the labor-intensive (expensive) process of finishing the spring ends by hand. On race-springs that are subjected to hard off-road use, the soft Teflon pads often get small rocks and grit lodged in the surface of the pad, creating more friction than they eliminate. Teflon pads are also hard to keep in-place, and we had already lost two of them since we installed the springs. Erik put a radius into the end of each of our leaf springs using a bench grinder. Something like a 4 " angle grinder could also be used if you are servicing your springs at home. The spring shown in this image positioned on an anvil is about to have a spring-clamp riveted into that chamfered hole.

|

|
The new spring-clamps are installed with the rivet protruding through the chamfered hole, as shown in the image on the left. With a few swings of the hammer, the rivet-head is flattened into the spring, as shown in the image on the right. The chamfered hole allows the rivet-head to sit below the surface area of the spring so that it does not create any additional friction between leafs.

|
This image shows the bottom-side of a leaf spring-pack during a trial assembly, with a spring-clamp riveted to one of the springs. The tapered & ground ends of three springs are also visible in this image. Grinding a radius on the topside of the leaf springs IS the only place where it can reduce friction. But we tapered & ground the bottom of the springs at the same time because it was an easy pass through the bench grinder, and finished the spring ends off nicely.

|

|
One pack is shown here loosely assembled (background), and the other is being test-fit next to it (foreground) and compared leaf-by-leaf for symmetry and arch. Notice how the shorter, bottom springs (positioned on top, as the springs are sitting upside-down) have a much flatter arch than the longer springs. The spring-pack was tuned so that the shorter leafs will not put any preload on the main springs at ride-height, but will help to develop a very progressive spring-rate as the suspension cycles towards full compression.

|

|
Once Erik was satisfied with the characteristics of the spring-pack, everything was taken apart one last time and prepared for final assembly. Each leaf spring is thoroughly cleaned to remove any surface rust, rough edges, metal particles, paint/grease/oil, etc. The centering-pin tool was used to align all of the leaf springs, while the C-clamp drew them together. Then a new center-pin was installed, along with all of the spring-clamp hardware.

|
Deaver uses rust-inhibiting black paint on all of their springs to help seal out rust and contaminants. The consistency of the paint is thinner than hot tar, but it's just as messy. The rack and floor around the painting station are covered with the dried black lava-flow. The painted springs dried in less than 15 minutes though, and were ready to be reinstalled on the vehicle.

|
Erik used an air grinder to cut the center-pin bolt down to just a few threads longer than the nut, and then hauled the springs out to be reinstalled on the Tacoma. If you are unsure about the pinion angle, don't cut the center-pin bolt until the springs have been installed on the vehicle. If the pinion angle needs to be changed using tapered-degree shims, the center-pin will need to be a little longer. We don't like to use degree shims if we can avoid it, because they always seem to crack and get spit-out from between the leaf spring and the axle-pad.

|

|
Erik bolted-up the rebuilt leaf springs at each of the spring-eyes and then measured the thickness of the spring-pack to determine what length U-bolts he needed to use. Since the thickness of our spring-pack didn't change, we already knew exactly how long the U-bolts needed to be. Old U-bolts should NOT be re-used (even if they look OK) because the threads stretch every time they are installed (and reinstalled). Deaver showed us how they use this hydraulic press (shown in the image on the right) and an assortment of dies to manufacture all of their U-bolts. They can make custom U-bolts for almost any application, on short notice and at really reasonable prices.

|
We cycled the rear suspension to full extension (shown here), to verify that the springs were using all of the suspension travel that our shocks allowed. When we first installed the production Deaver F67 springs, they pulled about 17" of travel, and were a perfect match for our 16" stroke Swayaway shocks (the shocks are angled forward 10 degrees at full extension & 25 degrees at full compression). But the rebuilt springs can easily cycle over 19" now, and the shocks have become the limiting factor. We are going to run this setup for a while and see how it works. We might end up reconfiguring our shock mounts and using 2.5x18" stroke Swayaway shocks though. Adjustable limiting straps will be installed to help provide a progressive stop as the rear suspension approaches full extension.

|

|
When we first set up our long-travel rear suspension at Rock Star Trux, we disassembled the spring-packs and reinstalled the main leafs so that we could easily cycle the suspension through full compression to determine shock & bump-stop placement (cycling an assembled spring-pack on a vehicle under controlled conditions can only be accomplished by pushing/pulling down on the chassis with incredible force to load/compress the suspension). We knew that none of the changes Deaver made to the leaf springs could have affected full compression, because the stock frame, the shock mounts, and the bump-stop location all limit the compression travel equally. Deaver showed us how they use an anchor-point sunken into a cement pad in their back-lot to cycle a vehicle's suspension through full compression with a complete leaf-pack. Erik attached a come-along to the rear bumper and then ratcheted the rear suspension down so that we could check the pinion angle and driveshaft plunge. These images are taken from within 4" of full compression.
The rebuilt Deaver leaf springs lowered the rear end of the Tacoma EXACTLY 2.5" and Erik brought the spring-rate down from 170lbs to about 130lbs. This should be the perfect setup for the weight of our vehicle (anticipating a 22 gallon fuel cell installed behind the cab). It took 2-3 hours to tune and rebuild our leaf springs, including the time he took to remove/reinstall the springs, and talk with us through the process. Charging between $150-$200 to rebuild or race-prep a pair of leaf springs, Deaver isn't making a profit on these jobs- it's customer service. If you buy a pair of Deaver leaf springs, they want to make sure that their product performs to it's potential. Since we purchased our leaf springs (part F67), Deaver has introduced a new Tacoma spring (part F55) that sits closer to the ride height we have achieved with this custom-tuned pack. The F55 would be a great spring for anyone looking for less than 3" of lift from stock ride height.
Contact Information: |
 Deaver Spring
714.542.3703
902 East 2nd Street
Santa Ana, CA 92701
Talk about our Tacoma Project in the
Tacoma BBS
Send us
Email about Project Tacoma