 |
 | |
 | |
 |  |
Last summer the rumors began to grow louder that a product was about to emerge, and late this winter word got out that there was finally a suspension lift available for the H1 from Rubberduck4x4 – simple in design, no chrome plating, tested and proven in the trenches. Since I already have a Rubberduck4x4 body lift on my rig, I knew these guys know how to make parts that work hard and last under tough use… so I couldn’t wait to get my hands on the new kit.
The kit includes new upper ball joints all the way around, custom shims and mounting hardware for the new ball joints, and very nicely machines spring spacers that are custom fit to each perch location. The mounting instructions suggested replacing any worn suspension and steering parts, including sagging springs, before installing the lift kit. I took the hint, and ordered new lower ball joints, tie rod ends, and new idler and pitman arms.
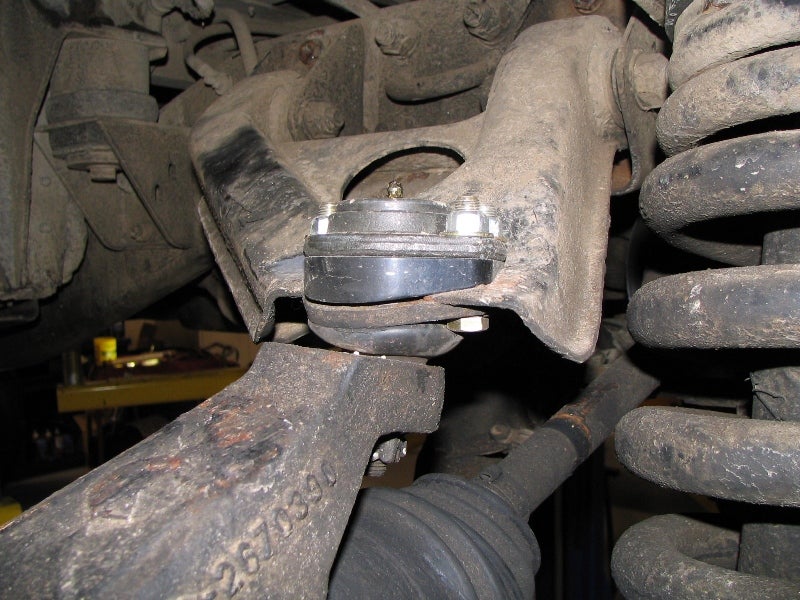 |
Installation was straightforward, and went as smoothly as the instructions suggested, with one exception… the instructions did not indicate that the lower shock mount bolts were going to be so ground down from encounters with rocks that the head would be almost gone. Needless to say, my truck also required some new hardware while I was in there, and getting those old bolts out took longer than the rest of the installation combined.
 |
Rubberduck4x4 also recommends an alignment after the installation. Naturally after replacing all the tie rod ends, I was due for an alignment anyways, so I did the tape measure trick to get the toe-in close, and after checking my truck in and out of every local truck alignment shop within a 20 mile radius, I headed down to the Hummer dealership to get the pros to check my castor and camber. Basically, my fat off-road tires would not allow regular truck alignment equipment to mount on the rims as needed at any of these shops, so I needed to go somewhere that a set of OEM sized tires and rims fitted on my truck to get the alignment done. One thick shim later, my truck was all aligned and ready to go.
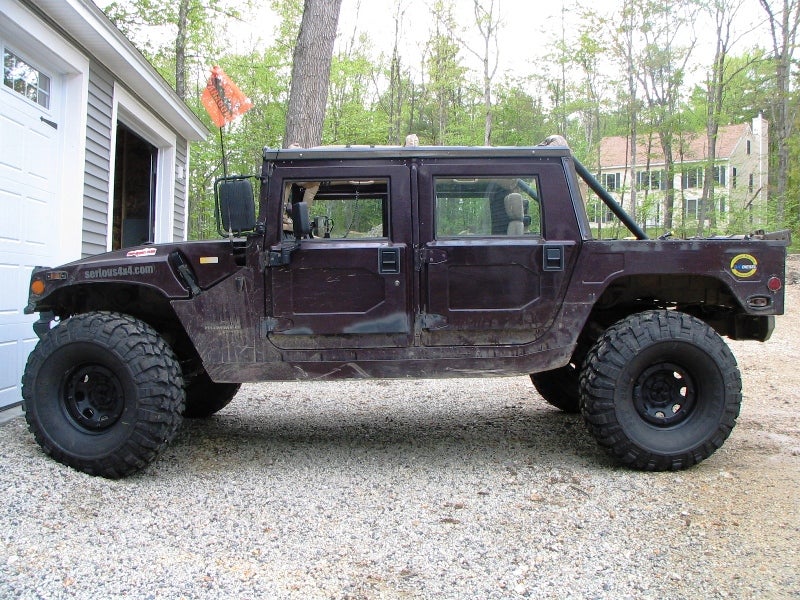 |
End result – two solid inches of suspension lift, and the operating angles of the truck are all pretty dang close to stock. Combine this new lift with a 2” body lift, and some taller tires, and you can get the belly of your truck a full 4” higher off the ground. In my case, I have a 2” body lift, 2” suspension lift, and I am running 39.5” tires. There is definitely room to go bigger than that.
The kit isn’t cheap, so if you are hoping to get something that costs little more than the cost of materials to make it… you are out of luck. But look at it this way - you would be hard pressed to find something else that costs under $2500 that will add this kind of capability to your truck. And the other good news is that these guys already broke their trucks a few times ironing out the wrinkles so that you won’t have to… isn’t that worth something? The improvement in break-over angle alone is worth the cost by itself to any serious wheeler that pilots an H1.
Don’t you just love straddling a rock that used to bottom your truck out on the trail? Or silently scaling the waterfall that everyone else is grinding their undercarriage protection on? I give it two enthusiastic thumbs up and an ear to ear smile.